
1. அறிமுகம்
This manual provides essential instructions for the proper setup, operation, and maintenance of your CipherLab 1500P HP 1D Corded Barcode Scanner. Please read this manual thoroughly before using the device to ensure optimal performance and to prevent damage.
2. பாதுகாப்பு தகவல்
- ஸ்கேனரை தீவிர வெப்பநிலை, ஈரப்பதம் அல்லது நேரடி சூரிய ஒளிக்கு வெளிப்படுத்த வேண்டாம்.
- ஸ்கேனரை கீழே போடுவதையோ அல்லது கடுமையான தாக்கங்களுக்கு ஆளாக்குவதையோ தவிர்க்கவும்.
- ஸ்கேனரை பிரிக்கவோ அல்லது மாற்றவோ முயற்சிக்காதீர்கள். இது உத்தரவாதத்தை ரத்து செய்யும்.
- இணைப்பிற்கு வழங்கப்பட்ட USB கேபிளை மட்டும் பயன்படுத்தவும்.
- துல்லியமான பார்கோடு வாசிப்பை உறுதிசெய்ய ஸ்கேனிங் சாளரத்தை சுத்தமாக வைத்திருங்கள்.
3. தொகுப்பு உள்ளடக்கங்கள்
அனைத்து பொருட்களும் இருப்பதை உறுதிசெய்ய, தொகுப்பு உள்ளடக்கங்களைச் சரிபார்க்கவும்:
- CipherLab 1500P HP 1D Corded Barcode Scanner
- USB கேபிள்
- விரைவு தொடக்க வழிகாட்டி (சேர்க்கப்பட்டிருந்தால்)
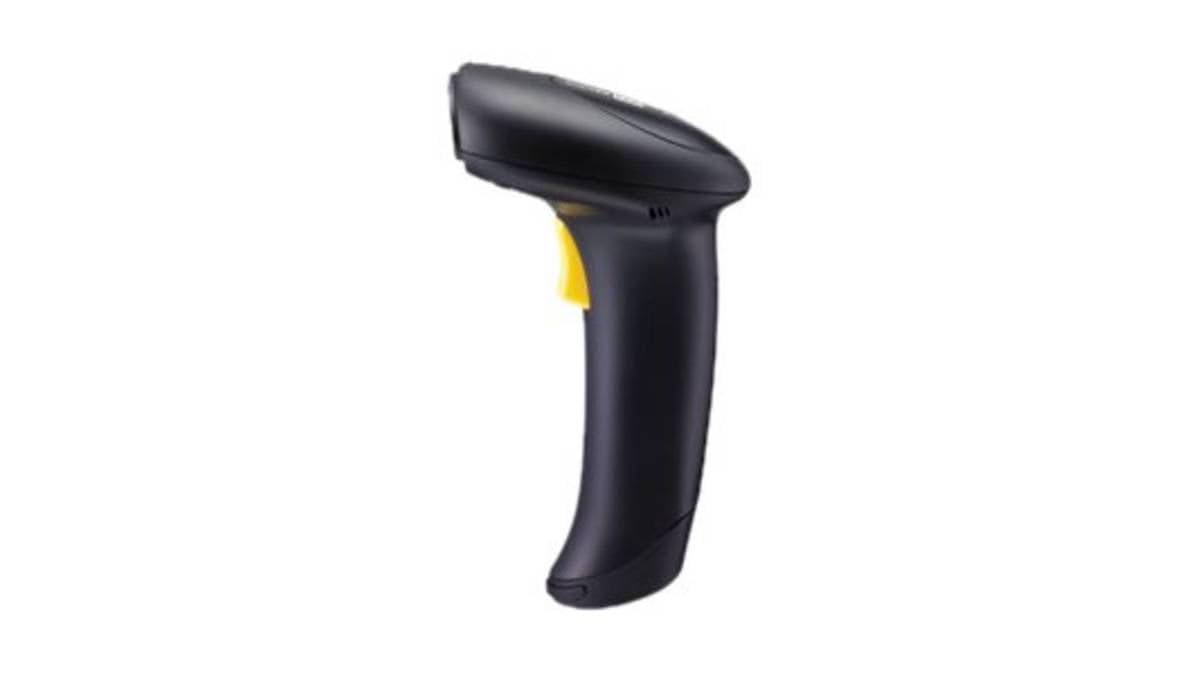
Figure 1: CipherLab 1500P HP 1D Corded Barcode Scanner with USB cable. This image displays the ergonomic design of the scanner and its wired connection.
4 அமைவு
4.1 ஸ்கேனரை இணைத்தல்
- Locate an available USB port on your computer or host device.
- Connect the smaller end of the USB cable to the port at the base of the CipherLab 1500P HP scanner.
- Connect the larger end of the USB cable to the USB port on your computer.
- The scanner will power on automatically. Most operating systems will detect and install the necessary drivers automatically (Plug-and-Play).
4.2 ஆரம்ப சோதனை
After connecting, open a text editor (e.g., Notepad, Word) or any application that accepts keyboard input. Scan a known barcode. The data should appear in the application. If not, refer to the Troubleshooting section.
5. ஸ்கேனரை இயக்குதல்
5.1 அடிப்படை ஸ்கேனிங்
- ஸ்கேனரை உங்கள் கையில் வசதியாகப் பிடித்துக் கொள்ளுங்கள்.
- நீங்கள் படிக்க விரும்பும் பார்கோடை நோக்கி ஸ்கேனிங் சாளரத்தைக் குறிக்கவும்.
- Press and hold the trigger button. A red aiming line will appear.
- Center the aiming line over the entire barcode.
- Once the barcode is successfully read, the scanner will emit a beep and the LED indicator will flash. Release the trigger button.
5.2 Scanning Feedback
- Successful Read: A short beep and a green LED flash.
- Unsuccessful Read: No beep or flash, or a different error tone (refer to troubleshooting).
6. பராமரிப்பு
6.1 ஸ்கேனரை சுத்தம் செய்தல்
To maintain optimal scanning performance, keep the scanning window clean:
- மென்மையான, பஞ்சு இல்லாத துணியைப் பயன்படுத்தவும்ampதண்ணீர் அல்லது லேசான, சிராய்ப்பு இல்லாத துப்புரவு கரைசலால் பூசப்பட்டது.
- ஸ்கேனிங் சாளரத்தையும் வெளிப்புற c ஐயும் மெதுவாகத் துடைக்கவும்.asing.
- Do not use harsh chemicals, solvents, or abrasive materials, as these can damage the scanner.
6.2 சேமிப்பு
பயன்பாட்டில் இல்லாதபோது, ஸ்கேனரை நேரடி சூரிய ஒளி மற்றும் தீவிர வெப்பநிலையிலிருந்து விலகி, சுத்தமான, வறண்ட சூழலில் சேமிக்கவும்.
7. சரிசெய்தல்
| பிரச்சனை | சாத்தியமான காரணம் | தீர்வு |
|---|---|---|
| ஸ்கேனர் இயக்கப்படவில்லை. | யூ.எஸ்.பி கேபிள் சரியாக இணைக்கப்படவில்லை அல்லது யூ.எஸ்.பி போர்ட் பழுதடைந்துள்ளது. | USB கேபிள் ஸ்கேனர் மற்றும் கணினி இரண்டுடனும் பாதுகாப்பாக இணைக்கப்பட்டுள்ளதா என்பதை உறுதிப்படுத்திக் கொள்ளுங்கள். வேறு USB போர்ட்டை முயற்சிக்கவும். |
| ஸ்கேனர் பார்கோடுகளைப் படிக்காது. | Barcode damaged, scanning window dirty, incorrect scanning angle, or scanner not configured for barcode type. | Ensure the barcode is clear and undamaged. Clean the scanning window. Adjust the scanning angle. Refer to the full programming manual for advanced configuration. |
| ஸ்கேன் செய்யப்பட்ட தரவு தவறாகத் தோன்றும். | Keyboard layout mismatch or incorrect data formatting. | Ensure your computer's keyboard layout matches the scanner's default or programmed layout. Consult the full programming manual for data formatting options. |
8. விவரக்குறிப்புகள்
- மாதிரி எண்: A1500PCBSU001
- இணைப்பு தொழில்நுட்பம்: USB கேபிள்
- சக்தி ஆதாரம்: USB கேபிள்
- இணக்கமான சாதனங்கள்: டெஸ்க்டாப், லேப்டாப்
- பொருளின் எடை: 10.93 பவுண்டுகள்
- தொகுப்பு அளவுகள்: 8 x 8 x 8 அங்குலம்
- உற்பத்தியாளர்: சைபர் லேப்
9. உத்தரவாதத் தகவல்
CipherLab products are manufactured to high quality standards. This product is covered by a limited warranty against defects in materials and workmanship. For specific warranty terms and conditions, please refer to the warranty card included with your product or visit the official CipherLab webதளம்.
10. வாடிக்கையாளர் ஆதரவு
If you encounter issues not covered in this manual or require further assistance, please contact your vendor or visit the official CipherLab support website for up-to-date resources, FAQs, and contact information.