
1. அறிமுகம்
This manual provides detailed instructions for the installation, operation, and maintenance of your Mi-Heat AH-150W-5.0-E51 electric underfloor heating system. This system includes a 5m² aluminum heating mat and an E51 digital thermostat with an external floor sensor. Please read this manual carefully before installation and use to ensure safe and efficient operation.
The Mi-Heat electric underfloor heating system is designed for dry installation under various floor coverings such as laminate, parquet, and vinyl on HDF backing. It offers an environmentally friendly heating solution for living rooms, children's rooms, caravans, motorhomes, boats, and yachts.
2. பாதுகாப்பு வழிமுறைகள்
- Installation must be carried out by a qualified electrician in accordance with local electrical regulations and standards.
- Always disconnect the power supply before performing any installation, maintenance, or repair work.
- The heating mat must not be cut or shortened. Only the support fabric network can be cut to adjust the mat's layout.
- Ensure the heating mat is not overlapped or installed in areas where it could be punctured or damaged.
- A Residual Current Device (RCD) with a tripping current of 30 mA is required for protection.
- Do not install the heating mat under fixed furniture without legs or heavy objects that could trap heat.
- Keep the thermostat away from direct sunlight, drafts, or other heat sources that could affect its temperature readings.
3. தொகுப்பு உள்ளடக்கங்கள்
நிறுவலைத் தொடங்குவதற்கு முன் அனைத்து கூறுகளும் உள்ளனவா மற்றும் சேதமடையவில்லையா என்பதைச் சரிபார்க்கவும்:
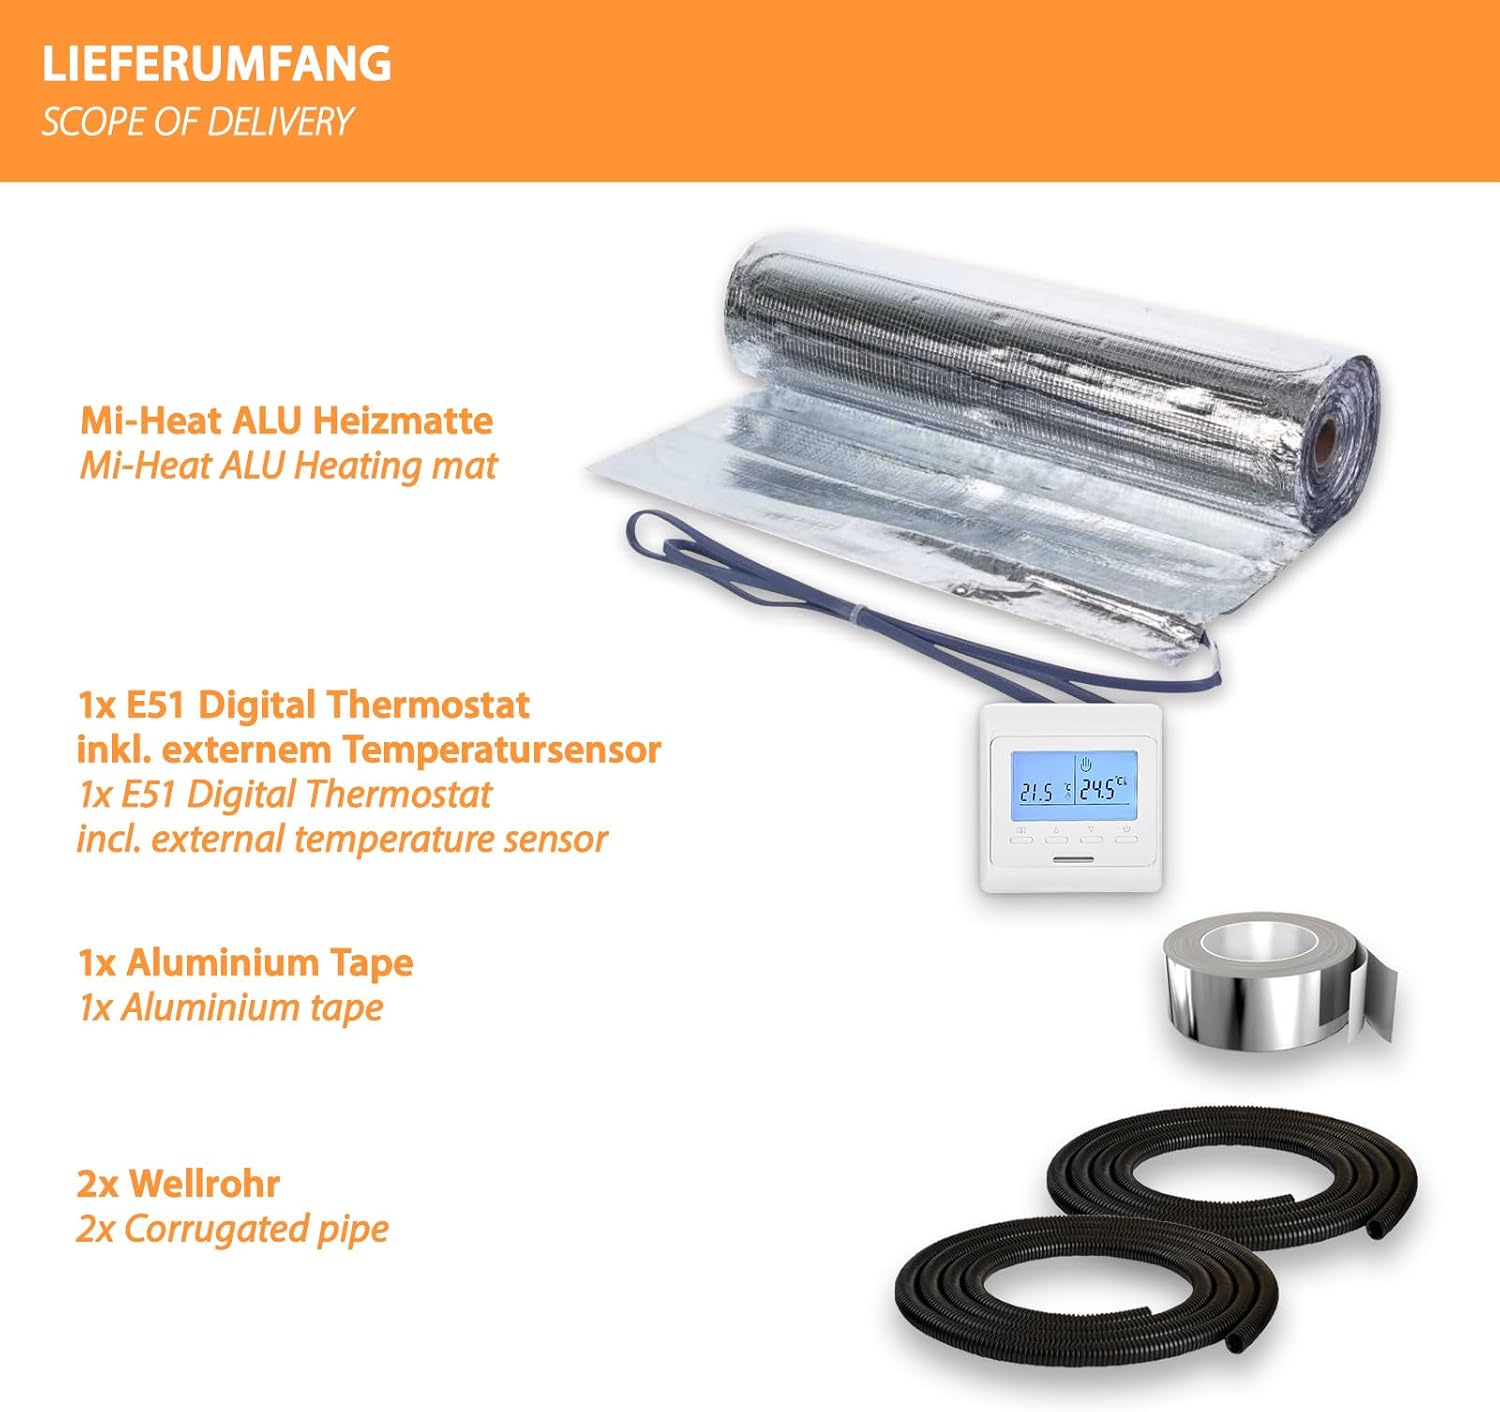
- 1x Mi-Heat Aluminum Heating Mat (5m²)
- 1x E51 Digital Thermostat
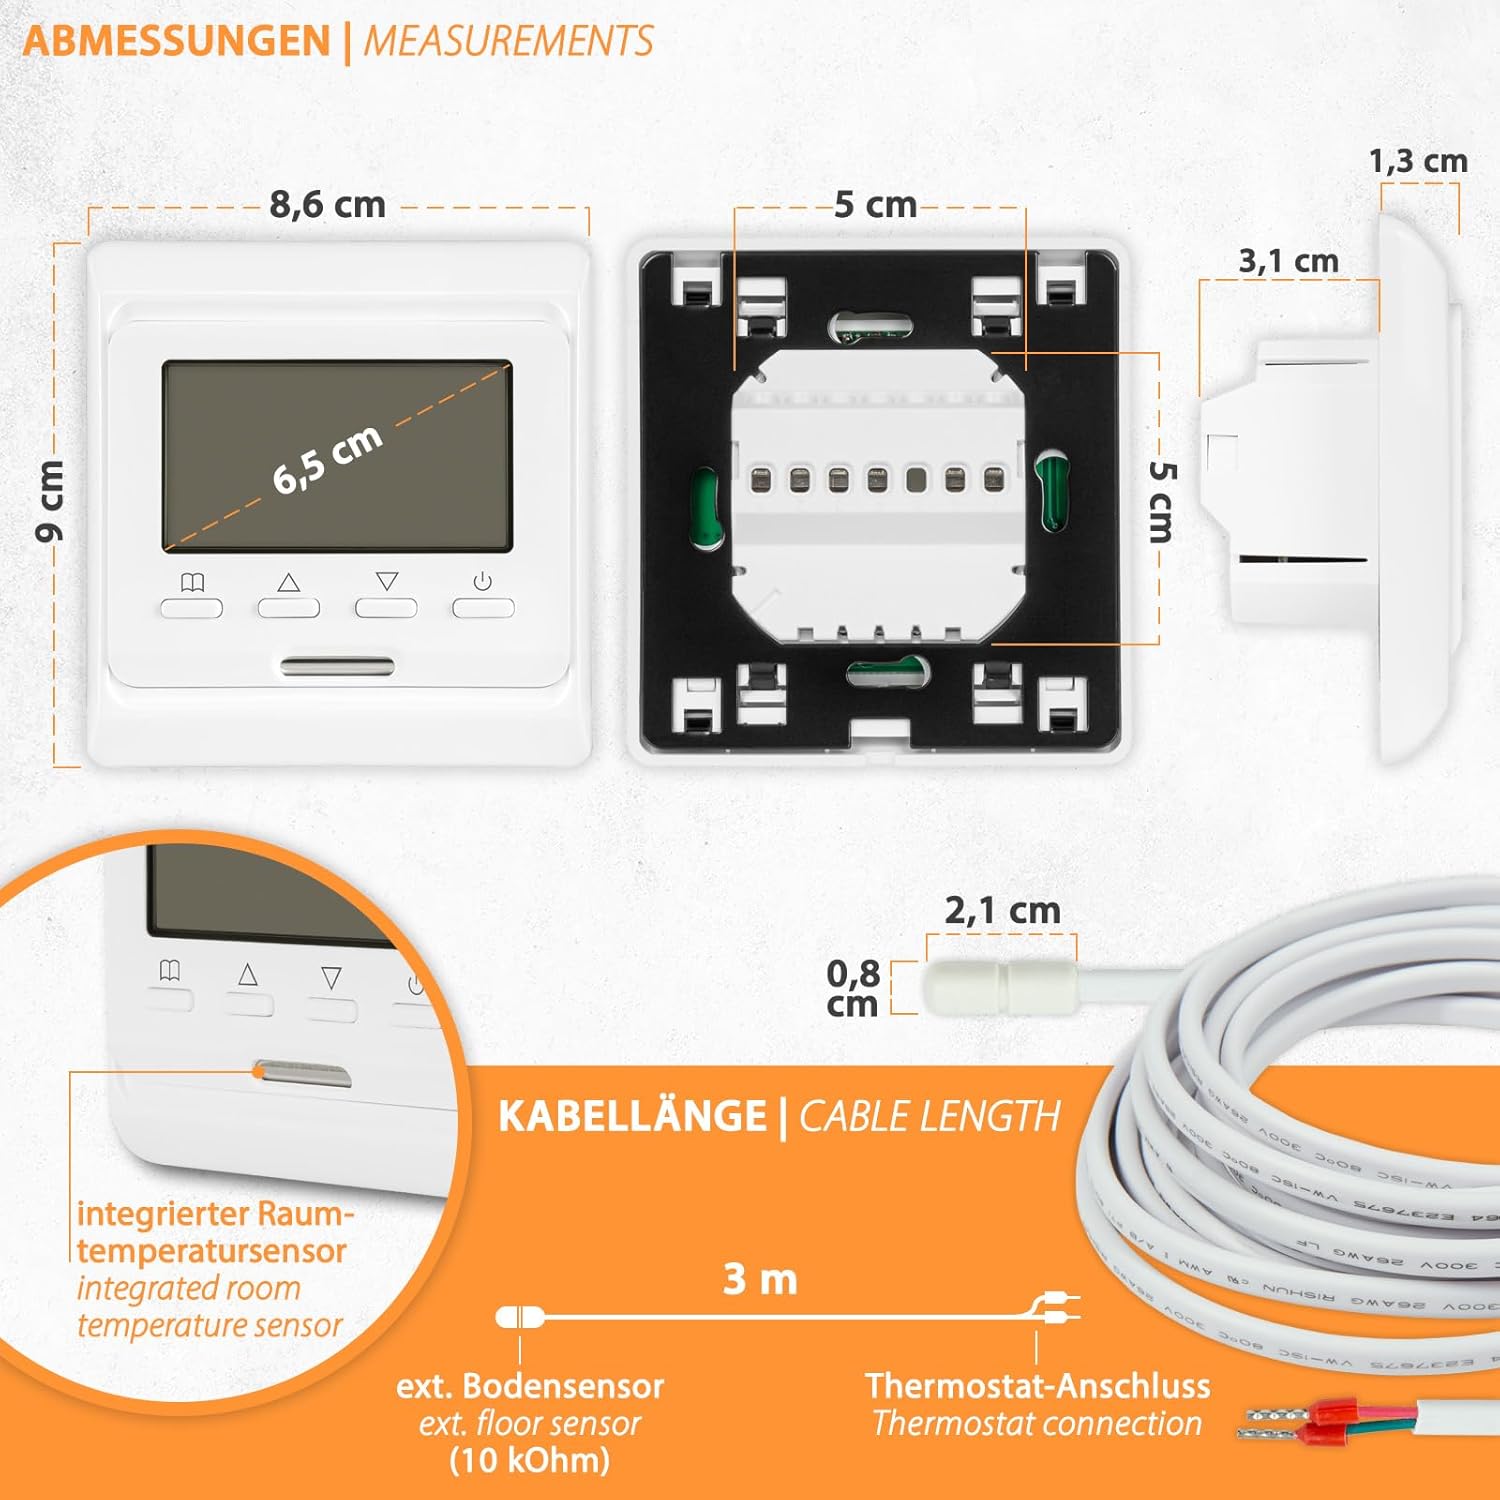
- 1x External Floor Temperature Sensor
- 1x அலுமினியம் டேப்
- 2x Corrugated Pipes (for sensor and power cables)
- 1x பயனர் கையேடு
4. தயாரிப்பு விவரக்குறிப்புகள்
4.1. Mi-Heat Aluminum Heating Mat
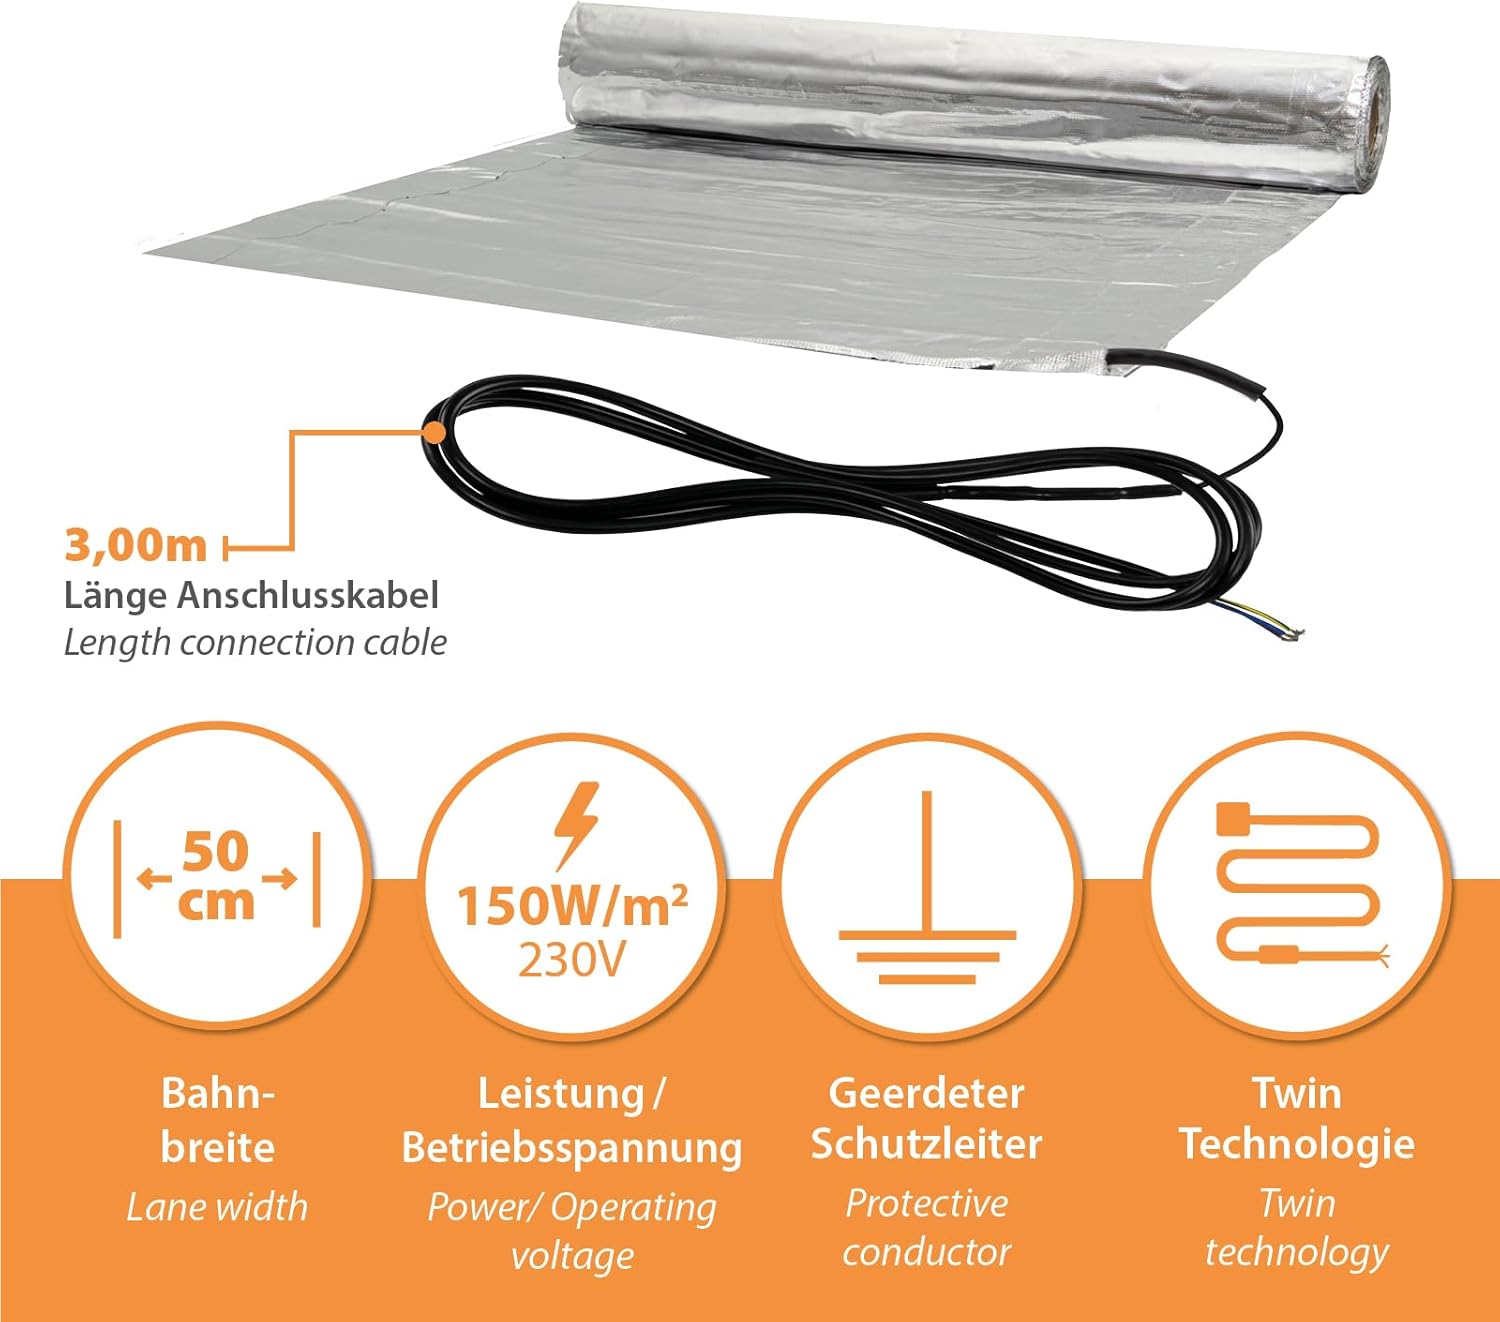
- மின் நுகர்வு: 150 W/m²
- இயக்க தொகுதிtage: 230 வி
- அதிகபட்சம். இயக்க வெப்பநிலை: 80 °C
- குறைந்தபட்சம் இயக்க வெப்பநிலை: -10 °C
- Heating Mat Width: 50 செ.மீ
- கேபிள் விட்டம்: 1.4 மி.மீ
- இணைப்பு கேபிள் நீளம்: 3.8 மீ
- IP பாதுகாப்பு மதிப்பீடு: IPX7
- Protection Measure: Requires 30 mA RCD (Residual Current Device)
- தொழில்நுட்பம்: Twin conductor technology
4.2. E51 Digital Thermostat
- அதிகபட்சம். மாறுதல் சக்தி: 16 ஏ / 3680 டபிள்யூ
- கட்டுப்பாட்டு வகை: Two-point ON/OFF control
- இயக்க வெப்பநிலை: 5-50 °C
- சென்சார்கள்: Internal (room) and External (floor)
- Temperature Setting Range (Internal/Room Sensor): 5-55 °C
- Temperature Setting Range (External/Floor Sensor): 5-55 °C
- உறைபனி பாதுகாப்பு: ஆம்
- Floor Limit Range: 5-50 °C
- Display/Backlight: ஆம்/ஆம்
- IP பாதுகாப்பு மதிப்பீடு: IP21
- பரிமாணங்கள் (W x H x D): 80 x 90 x 13/43 மி.மீ.
5. நிறுவல் வழிகாட்டி
The Mi-Heat aluminum heating mat is designed for dry installation, making it suitable for floating floor coverings. This section outlines the general steps for installation. Always consult a qualified electrician for electrical connections.
5.1. Preparation of the Subfloor
- Ensure the subfloor is clean, dry, level, and free from sharp objects.
- Install appropriate impact sound insulation (3-5mm recommended) over the subfloor.

5.2. Laying the Heating Mat
- Unroll the aluminum heating mat over the impact sound insulation.
- To change direction or fit the mat around obstacles, only cut the support fabric network. Do not cut the heating cable itself.
- Use the aluminum tape to secure the mat sections and ensure good thermal contact.
- Ensure the heating cables are evenly spaced and do not overlap.

5.3. Thermostat and Sensor Installation
- Install the E51 digital thermostat in a standard electrical box at a suitable height on the wall.
- Route the external floor sensor cable through one of the corrugated pipes and place the sensor centrally between two heating cables, ensuring it is not directly over a heating element. The corrugated pipe allows for future replacement of the sensor.
- Route the heating mat's connection cable through the second corrugated pipe to the thermostat.
- Connect the heating mat, floor sensor, and power supply to the thermostat according to the wiring diagram provided with the thermostat. This must be done by a qualified electrician.
5.4. Final Flooring Installation
Once the heating mat and thermostat are installed and tested, you can proceed with laying your chosen floating floor covering (laminate, parquet, vinyl on HDF backing) directly over the aluminum heating mat. Ensure the flooring manufacturer's guidelines for underfloor heating compatibility are followed.
6. E51 Digital Thermostat Operation
The E51 digital thermostat provides precise control over your underfloor heating system with various features for comfort and energy efficiency.
6.1 முக்கிய அம்சங்கள்
- வாராந்திர நிரலாக்கம்: Set custom heating schedules for 5/2, 6/1, or 7-day cycles.
- உறைபனி பாதுகாப்பு செயல்பாடு: வெப்பநிலை ஒரு குறிப்பிட்ட குறைந்தபட்சத்திற்குக் கீழே குறைந்தால், உறைபனியைத் தடுக்க தானாகவே வெப்பமாக்கலைச் செயல்படுத்துகிறது.
- Key Lock/Child Lock: அமைப்புகளில் அங்கீகரிக்கப்படாத மாற்றங்களைத் தடுக்கிறது.
- Actual/Set Temperature Display: Shows both the current room/floor temperature and your desired set temperature.
- தானியங்கு செயல்படுத்தல்: Heats automatically when the actual temperature falls below the set temperature.
6.2. Controls and Display Elements
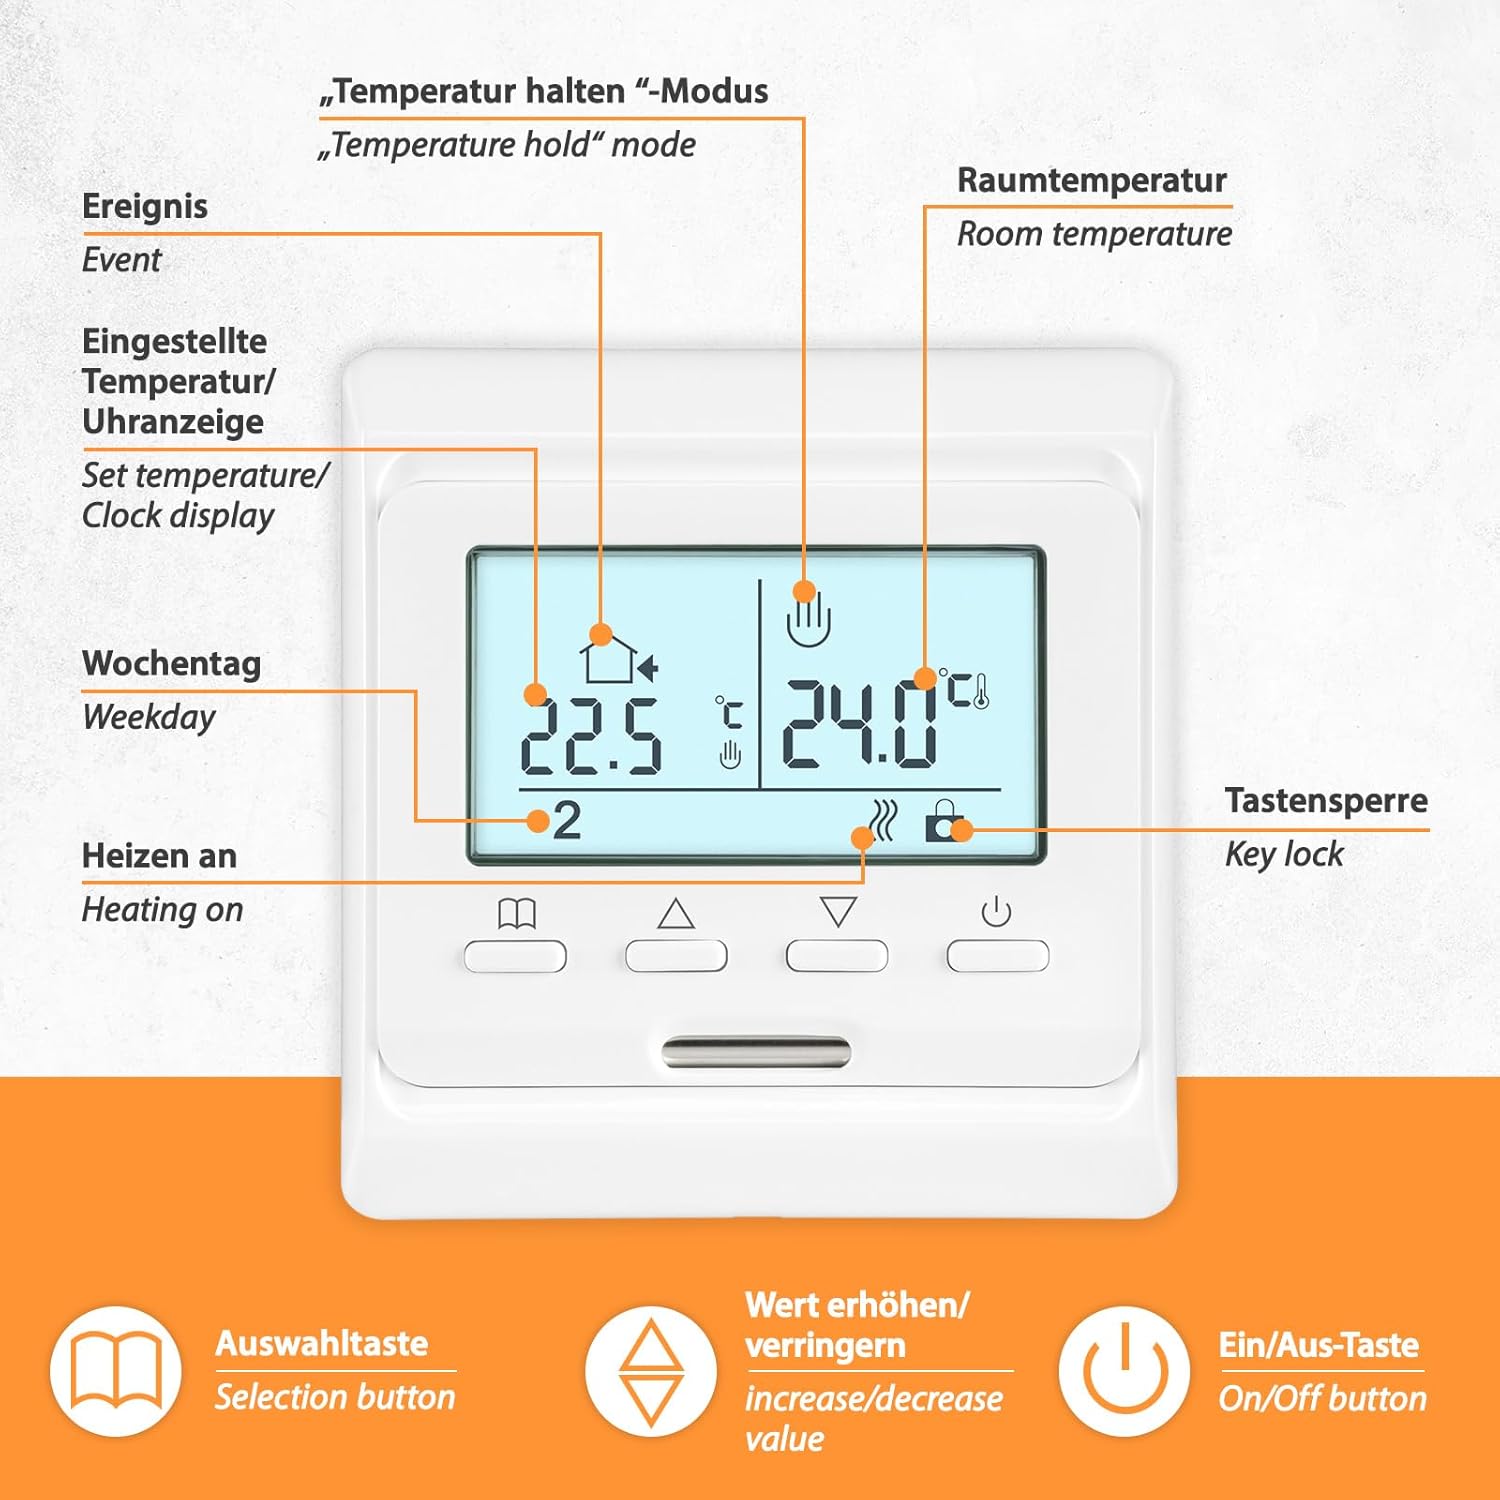
- காட்சி: Shows room temperature, set temperature, time, day of the week, heating status, and key lock status.
- தேர்வு பொத்தான்: மெனுக்கள் வழியாகச் சென்று தேர்வுகளை உறுதிப்படுத்தப் பயன்படுகிறது.
- Increase/Decrease Value Buttons: Adjust temperature settings, time, and program parameters.
- ஆன்/ஆஃப் பட்டன்: தெர்மோஸ்டாட்டை ஆன் அல்லது ஆஃப் செய்கிறது.
- "Temperature Hold" Mode: Allows temporary override of programmed settings.

6.3. அடிப்படை செயல்பாடு
- பவர் ஆன்/ஆஃப்: Press the On/Off button to switch the thermostat on or off.
- அமைக்கும் வெப்பநிலை: Use the increase/decrease buttons to adjust the desired temperature. The thermostat will automatically maintain this temperature.
- நிரலாக்கம்: Refer to the detailed instructions in the thermostat's specific manual for setting weekly programs, time, and other advanced features.
- விசை பூட்டு: Activate the key lock function to prevent accidental changes. Consult the thermostat manual for activation/deactivation steps.
7. பராமரிப்பு
- The heating mat itself requires no maintenance once installed.
- Clean the thermostat regularly with a soft, dry cloth. Do not use abrasive cleaners or solvents.
- Ensure the thermostat's ventilation slots are not blocked to allow for proper temperature sensing.
- Periodically check the electrical connections for any signs of wear or damage. This should be done by a qualified electrician.
8. சரிசெய்தல்
| பிரச்சனை | சாத்தியமான காரணம் | தீர்வு |
|---|---|---|
| Heating system not turning on. | No power supply; Thermostat off; RCD tripped; Wiring issue. | Check circuit breaker/RCD; Ensure thermostat is on; Verify power connections (consult electrician). |
| Floor not heating sufficiently. | Temperature setting too low; Floor sensor faulty or incorrectly placed; Heat loss. | Increase set temperature; Check floor sensor placement; Ensure proper insulation. |
| தெர்மோஸ்டாட் காட்சி காலியாக உள்ளது. | No power to thermostat; Thermostat faulty. | Check power supply; Contact customer support if power is present. |
| Thermostat shows error code. | Sensor fault; Internal error. | Refer to the E51 thermostat's specific manual for error code meanings and solutions. Contact customer support if the issue persists. |
9. உத்தரவாதம் மற்றும் ஆதரவு
For warranty information, technical support, or spare parts availability, please contact your retailer or the manufacturer directly. Keep your proof of purchase for warranty claims.