அறிமுகம்
Welcome to the world of sewing with your new Janome IT 1028 Glamour mechanical sewing machine. This manual provides essential information for the safe and efficient operation, setup, maintenance, and troubleshooting of your machine. Please read it thoroughly before using the machine to ensure optimal performance and longevity.
The Janome IT 1028 Glamour is designed for ease of use, featuring 12 stitch types, a free arm for circular sewing, an oscillating hook, automatic buttonholes, and adjustable stitch length and width. It also includes a double presser foot lift, feed dog lowering, a thread cutter, a needle threader, and a soft cover for protection.
பாதுகாப்பு வழிமுறைகள்
மின்சார அதிர்ச்சி, தீக்காயங்கள், தீ அல்லது நபர்களுக்கு காயம் ஏற்படும் அபாயத்தைக் குறைக்க:
- இயந்திரத்தைப் பயன்படுத்திய உடனேயே, சுத்தம் செய்த பிறகு, கவர்களை அகற்றுவதற்கு முன்பு அல்லது ஏதேனும் பயனர் சேவை மாற்றங்களைச் செய்வதற்கு முன்பு எப்போதும் மின் நிலையத்திலிருந்து இயந்திரத்தைத் துண்டிக்கவும்.
- Do not allow the machine to be used as a toy. Close attention is necessary when the machine is used by or near children.
- இந்த கையேட்டில் விவரிக்கப்பட்டுள்ளபடி இந்த இயந்திரத்தை அதன் நோக்கத்திற்காக மட்டுமே பயன்படுத்தவும். உற்பத்தியாளரால் பரிந்துரைக்கப்பட்ட இணைப்புகளை மட்டுமே பயன்படுத்தவும்.
- இந்த இயந்திரத்தில் சேதமடைந்த கம்பி அல்லது பிளக் இருந்தால், அது சரியாக வேலை செய்யவில்லை என்றால், அது கைவிடப்பட்டாலோ அல்லது சேதமடைந்தாலோ அல்லது தண்ணீரில் விழுந்தாலோ அதை ஒருபோதும் இயக்க வேண்டாம்.
- எந்தவொரு திறப்பிலும் எந்தவொரு பொருளையும் கைவிடவோ அல்லது செருகவோ கூடாது.
- வெளியில் பயன்படுத்த வேண்டாம்.
- ஏரோசல் (ஸ்ப்ரே) தயாரிப்புகள் பயன்படுத்தப்படும் இடத்தில் அல்லது ஆக்ஸிஜன் நிர்வகிக்கப்படும் இடத்தில் செயல்பட வேண்டாம்.
- நகரும் அனைத்து பகுதிகளிலிருந்தும் விரல்களை விலக்கி வைக்கவும். தையல் இயந்திர ஊசியைச் சுற்றி சிறப்பு கவனம் தேவை.
- எப்போதும் சரியான ஊசி தட்டு பயன்படுத்தவும். தவறான தட்டு ஊசி உடைந்து போகலாம்.
- வளைந்த ஊசிகளைப் பயன்படுத்த வேண்டாம்.
- தைக்கும்போது துணியை இழுக்கவோ அல்லது தள்ளவோ வேண்டாம். இது ஊசியை திசை திருப்பி உடைந்து போகக்கூடும்.
- ஊசியில் நூல் போடுதல், ஊசியை மாற்றுதல், பாபினில் நூல் போடுதல் அல்லது பிரஷர் பாதத்தை மாற்றுதல் போன்ற ஊசிப் பகுதியில் ஏதேனும் மாற்றங்களைச் செய்யும்போது தையல் இயந்திரத்தை அணைக்கவும்.
- Always unplug the machine when removing the light bulb.
- வடத்தை இழுத்து துண்டிக்க வேண்டாம். துண்டிக்க, கம்பியை அல்ல, பிளக்கைப் பிடிக்கவும்.
தயாரிப்பு முடிந்துவிட்டதுview
முக்கிய அம்சங்கள்
- 12 Stitch Types: Versatile options for various sewing projects.
- இலவச கை: Facilitates sewing cuffs, sleeves, and other small, circular items.
- Oscillating Hook: Ensures smooth and consistent stitch formation.
- Adjustable Stitch Length and Width: Provides control over stitch appearance.
- Automatic Four-Step Buttonhole: Simplifies the creation of professional-looking buttonholes.
- இரட்டை அழுத்த கால் லிஃப்ட்: Allows for sewing thicker fabrics.
- Feed Dog Lowering: Useful for darning and free-motion quilting.
- நூல் கட்டர்: Conveniently trims threads.
- ஊசி நூல் தைப்பான்: Assists in quickly threading the needle.
- மென்மையான அட்டைப்படம்: Protects the machine from dust and damage.
இயந்திர கூறுகள்
Familiarize yourself with the main parts of your Janome IT 1028 Glamour sewing machine.

படம் 1: முன் view of the Janome IT 1028 Glamour sewing machine with the soft cover in place. This image shows the overall design and the stitch selection and length dials.

படம் 2: நெருக்கமான காட்சி view of the stitch selector dial (left) and stitch length dial (right) on the Janome IT 1028 Glamour. The decorative illustration on the machine body is also visible.
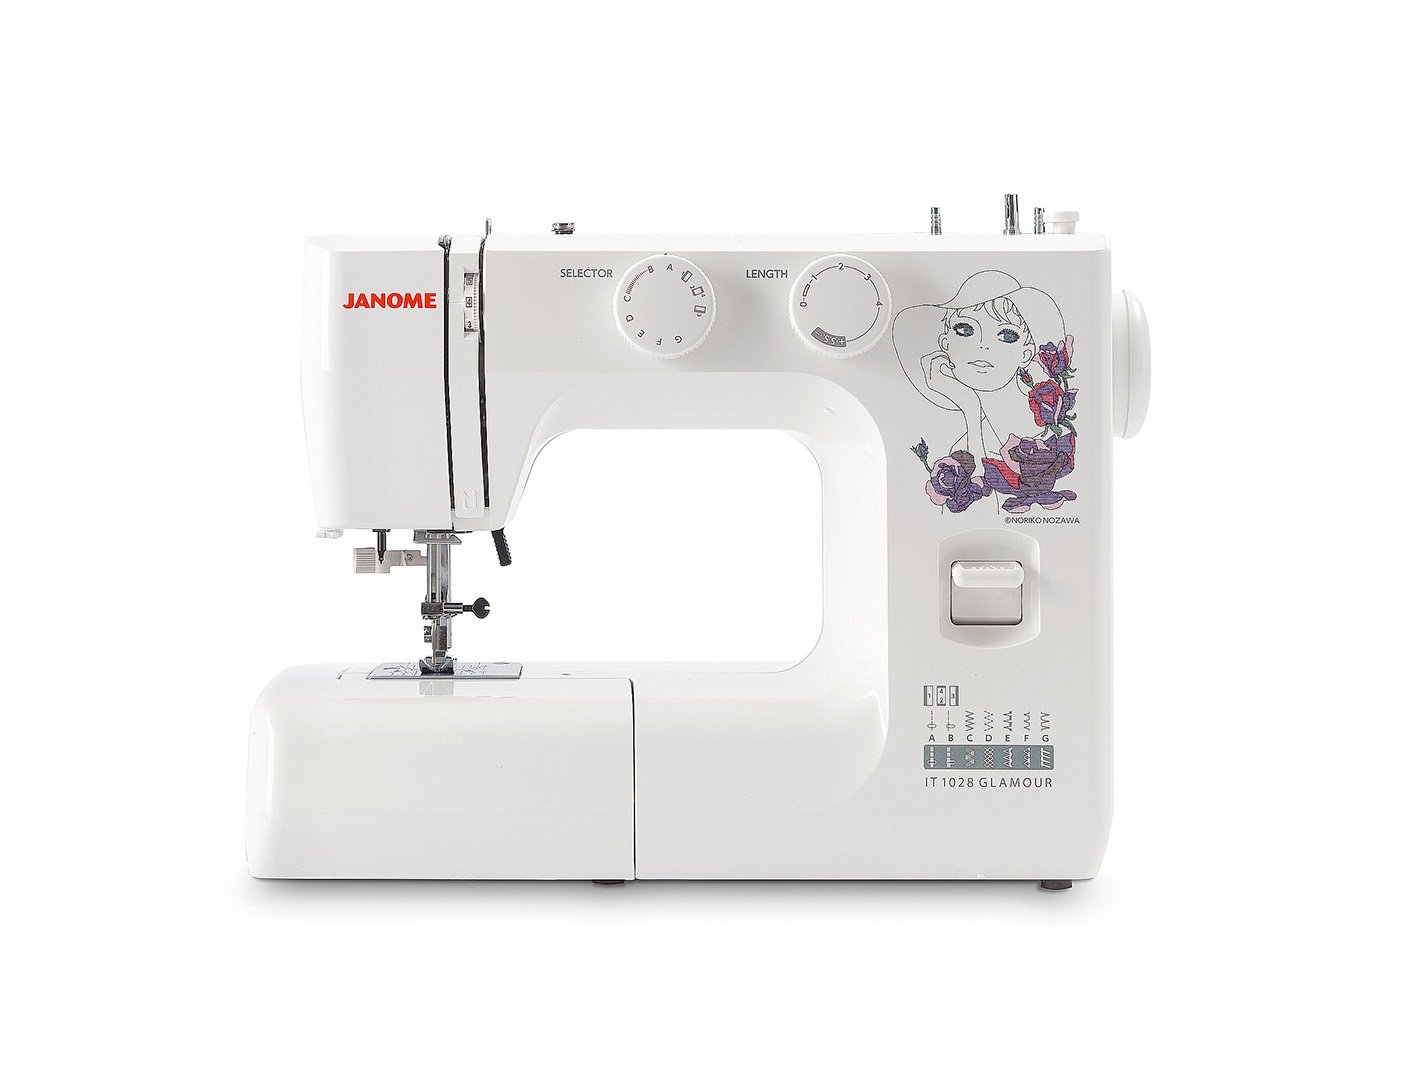
Figure 3: The Janome IT 1028 Glamour sewing machine with the accessory tray removed, revealing the free arm and the bobbin case area. This view is essential for bobbin insertion and cleaning.
அமைவு
1. பிரித்தல் மற்றும் இடம் அமைத்தல்
- இயந்திரத்தை அதன் பேக்கேஜிங்கிலிருந்து கவனமாக அகற்றவும்.
- இயந்திரத்தை ஒரு நிலையான, தட்டையான மேற்பரப்பில் வைக்கவும்.
- Remove any protective films or packing materials.
2. மின் இணைப்பு
- Ensure the machine's power switch is in the "OFF" position.
- Connect the power cord to the machine's power input jack.
- பவர் கார்டை பொருத்தமான மின் நிலையத்தில் செருகவும்.
3. பாபினை முறுக்குதல்
- ஸ்பூல் பின்னில் ஒரு ஸ்பூல் நூலை வைக்கவும்.
- மேல் நூல் வழிகாட்டி வழியாகவும், பாபின் முறுக்கு இழுவிசை வட்டைச் சுற்றியும் நூலை வழிநடத்தவும்.
- பாபினில் உள்ள துளை வழியாக நூலை உள்ளே இருந்து வெளியே செருகவும்.
- Place the bobbin onto the bobbin winder spindle and push the spindle to the right.
- Start the machine. The bobbin will wind automatically. Stop when the bobbin is full.
- Cut the thread and push the bobbin winder spindle to the left. Remove the bobbin.
4. பாபின் செருகுதல்
- இயந்திரத்தை அணைக்கவும்.
- Open the bobbin cover plate located on the free arm.
- Insert the bobbin into the bobbin case with the thread running in the direction indicated by the arrows.
- Pull the thread through the tension spring and into the guide slot.
- பாபின் கவர் பிளேட்டை மூடு.
5. மேல் நூலை இழைத்தல்
- பிரஷர் கால் லிப்டரை உயர்த்தவும்.
- ஸ்பூல் பின்னில் ஒரு ஸ்பூல் நூலை வைக்கவும்.
- மேல் நூல் வழிகாட்டி வழியாக நூலை வழிநடத்தவும்.
- Bring the thread down the right channel, up the left channel, and through the take-up lever from right to left.
- Continue guiding the thread down to the needle bar thread guide.
- Use the built-in needle threader or manually thread the needle from front to back.
- ஊசியின் காது வழியாக சுமார் 6 அங்குல நூலை இழுக்கவும்.
6. பாபின் நூலை எழுப்புதல்
- உங்கள் இடது கையால் மேல் நூலை லேசாகப் பிடித்துக் கொள்ளுங்கள்.
- Turn the handwheel towards you to lower the needle into the needle plate and then raise it.
- மேல் நூல் பாபின் நூலைப் பிடித்து, ஒரு வளையத்தை உருவாக்கும்.
- Pull the loop to bring the bobbin thread up through the needle plate hole.
- இரண்டு நூல்களையும் (மேல் மற்றும் பாபின்) பிரஷர் பாதத்தின் கீழ் மற்றும் இயந்திரத்தின் பின்புறம் இழுக்கவும்.
இயக்க வழிமுறைகள்
1. தையல் தேர்வு
திருப்பு தையல் தேர்வுக்குழு டயல் (refer to Figure 2) to choose your desired stitch pattern. The available stitches are indicated by letters or symbols on the dial.
2. Adjusting Stitch Length and Width
- தையல் நீளம்: பயன்படுத்தவும் தையல் நீள டயல் (refer to Figure 2) to adjust the length of your stitches. Higher numbers indicate longer stitches.
- தையல் அகலம்: For stitches that allow width adjustment, use the corresponding dial or setting. (Note: The Janome IT 1028 Glamour has adjustable stitch width, typically integrated with the stitch selector or a separate dial. Consult the machine's markings for specific controls.)
3. Basic Sewing
- உங்கள் துணியை அழுத்தும் பாதத்தின் கீழ் வைக்கவும்.
- பிரஷர் ஃபுட் லிஃப்டரைக் குறைக்கவும்.
- இயந்திரத்தை இயக்கவும்.
- Gently press the foot controller to start sewing. The harder you press, the faster the machine will sew.
- Guide the fabric gently with your hands, but do not pull or push forcefully.
- To secure the beginning and end of a seam, use the reverse lever to sew a few stitches backward.
- When finished, raise the needle to its highest position, lift the presser foot, and pull the fabric away from the machine.
- Use the built-in thread cutter or scissors to trim the threads.
4. ஃப்ரீ ஆர்மைப் பயன்படுத்துதல்
To use the free arm, simply slide off the accessory tray (refer to Figure 3). This exposes the narrow free arm, ideal for sewing small, tubular items like sleeves, pant hems, and cuffs.
5. Automatic Four-Step Buttonholes
The Janome IT 1028 Glamour features an automatic four-step buttonhole function. Refer to the stitch selector dial for the buttonhole settings (usually marked with a buttonhole symbol and steps 1-4).
- பொத்தான்ஹோல் பாதத்தை இணைக்கவும்.
- Mark the buttonhole position on your fabric.
- Set the stitch selector to the first buttonhole step.
- Sew the first side of the buttonhole.
- Change the stitch selector to the next step and sew the bar tack.
- Continue through all four steps, following the machine's markings for each segment of the buttonhole.
- Carefully cut open the buttonhole using a seam ripper, ensuring not to cut the stitches.
பராமரிப்பு
1 இயந்திரத்தை சுத்தம் செய்தல்
Regular cleaning helps maintain your machine's performance. Always unplug the machine before cleaning.
- பாபின் பகுதி: Remove the needle plate and bobbin case. Use a small brush to remove lint and dust from the bobbin area and feed dogs.
- வெளிப்புறம்: மென்மையான, உலர்ந்த துணியால் வெளிப்புற மேற்பரப்புகளைத் துடைக்கவும். கடுமையான இரசாயனங்கள் அல்லது சிராய்ப்பு கிளீனர்களைப் பயன்படுத்த வேண்டாம்.
2. ஊசி மாற்று
ஊசியை (தையல் செய்த 8-10 மணி நேரத்திற்குப் பிறகு) அல்லது அது வளைந்து, மந்தமாக அல்லது சேதமடைந்தால், அதை தவறாமல் மாற்றவும். சேதமடைந்த ஊசி தையல்களைத் தவிர்க்கலாம் அல்லது துணி சேதத்தை ஏற்படுத்தலாம்.
- இயந்திரத்தை அணைத்து, அதை துண்டிக்கவும்.
- ஊசி cl ஐ தளர்த்தவும்amp திருகு.
- பழைய ஊசியை அகற்று.
- இயந்திரத்தின் பின்புறம் தட்டையான பக்கமாக இருக்கும்படி ஒரு புதிய ஊசியைச் செருகவும், அது முடிந்தவரை மேலே தள்ளவும்.
- ஊசி cl இறுக்கamp பாதுகாப்பாக திருகு.
சரிசெய்தல்
இந்தப் பிரிவு நீங்கள் சந்திக்கக்கூடிய பொதுவான சிக்கல்களைப் பற்றி விவாதிக்கிறது. இங்கே பட்டியலிடப்படாத சிக்கல்களுக்கு, வாடிக்கையாளர் ஆதரவைத் தொடர்பு கொள்ளவும்.
| பிரச்சனை | சாத்தியமான காரணம் | தீர்வு |
|---|---|---|
| தவிர்க்கப்பட்ட தையல்கள் | தவறான ஊசி, வளைந்த ஊசி, தவறான நூல் திரித்தல், துணிக்கு தவறான ஊசி அளவு. | Replace needle, re-thread machine, ensure correct needle type/size. |
| நூல் உடைப்பு (மேல்) | Improper threading, tension too tight, poor quality thread, bent needle, burr on needle plate. | Re-thread machine, adjust upper tension, use quality thread, replace needle, check needle plate for damage. |
| நூல் உடைப்பு (பாபின்) | Improperly wound bobbin, bobbin inserted incorrectly, lint in bobbin case, tension too tight. | Re-wind bobbin, re-insert bobbin correctly, clean bobbin case, adjust bobbin tension (if adjustable). |
| சீரற்ற தையல்கள் | Incorrect tension settings, pulling/pushing fabric, wrong presser foot. | Adjust tension, guide fabric gently, use appropriate presser foot. |
| இயந்திரம் தொடங்கவில்லை | Not plugged in, power switch off, foot controller not connected. | Check power connections, ensure switch is ON, connect foot controller. |
விவரக்குறிப்புகள்
- மாதிரி எண்: 8100000017663 (IT 1028 Glamour)
- பிராண்ட்: ஜானோம்
- பொருள்: பிளாஸ்டிக்
- எடை: 8 கிலோகிராம்
- பரிமாணங்கள் (P x L x H): 10 செ.மீ x 35 செ.மீ x 25 செ.மீ (ஆழம் x அகலம் x உயரம்)
- சக்தி ஆதாரம்: மின்சார கேபிள்
- Stitch Types: 12
- கொக்கி வகை: ஊசலாடுகிறது
- Buttonhole Type: Automatic Four-Step
உத்தரவாதம் மற்றும் ஆதரவு
For warranty information, service, or technical support, please refer to the warranty card included with your product or contact your authorized Janome dealer or customer service center. Keep your purchase receipt as proof of purchase.