1. அறிமுகம்
This manual provides essential information for the safe and effective installation, operation, and maintenance of your Recoil S2P-38 Dual 3/8" (M10) Studs Power Distribution Block. Please read these instructions thoroughly before use and retain them for future reference.
2. தயாரிப்பு முடிந்துவிட்டதுview
The Recoil S2P-38 Busbar is designed to provide a centralized point for power distribution in various electrical systems, including marine, automotive, and RV applications. It features dual 3/8" (M10) stainless steel studs for secure connections and a reinforced polycarbonate cover for protection against accidental short circuits. The nickel-plated brass plate ensures low resistance and maximum conductivity.
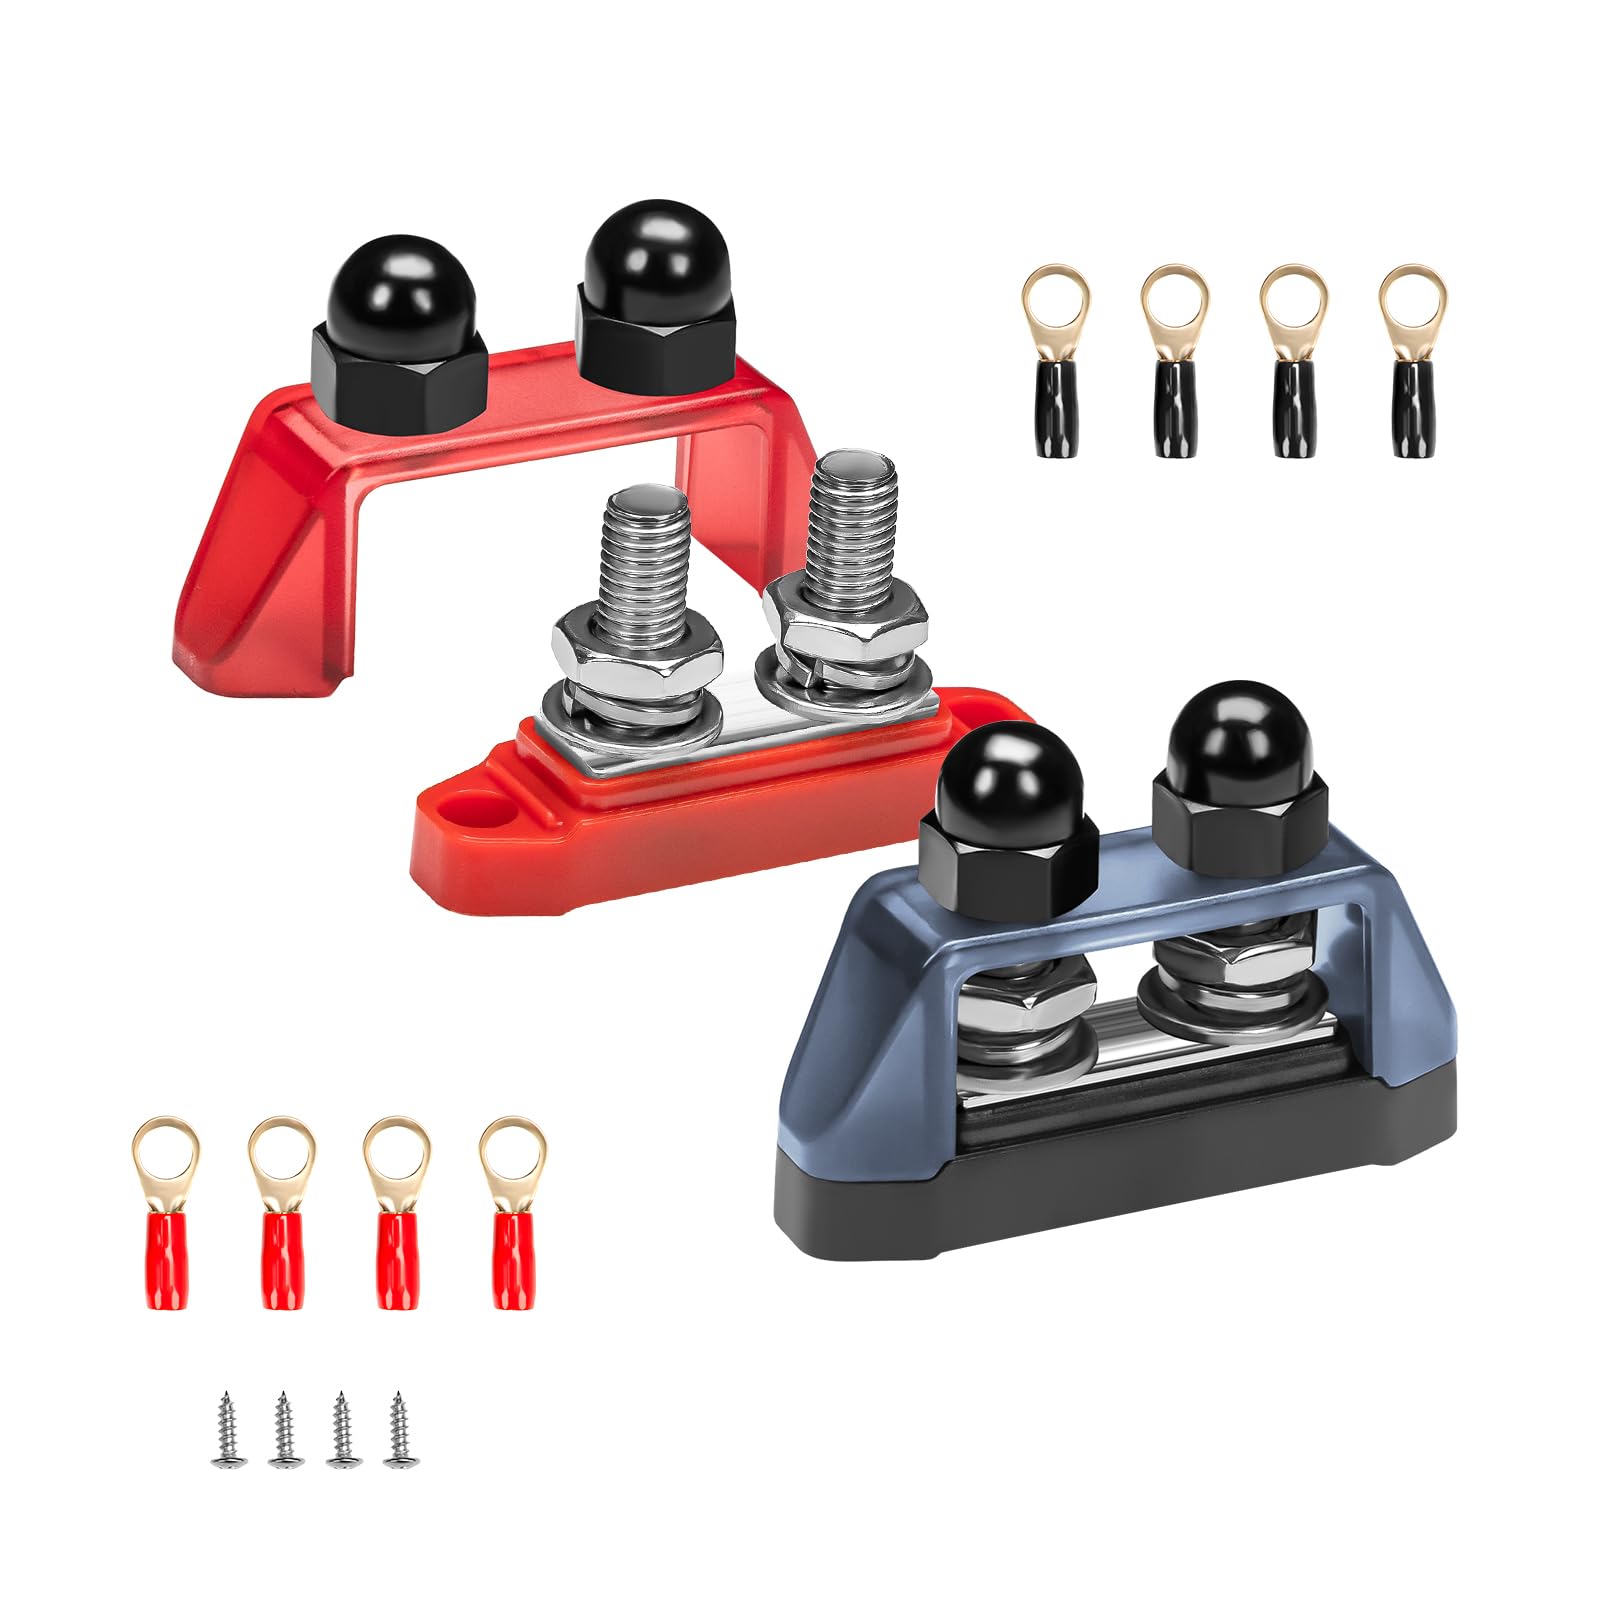
Image: Recoil S2P-38 Busbar with connected wires, illustrating its function as a power distribution point.
3. விவரக்குறிப்புகள்
| அம்சம் | விவரம் |
|---|---|
| மாதிரி எண் | S2P-38 |
| ஆய்வு அளவு | Dual 3/8" (M10) Stainless Steel Studs |
| அதிகபட்ச தொகுதிtage | 48V DC |
| அதிகபட்சம் தொடர்ச்சி Ampஎரிச்சல் | 250A DC |
| அடிப்படை பொருள் | பாலிகார்பனேட் (பிசி) |
| Conductor Plate Material | நிக்கல் பூசப்பட்ட பித்தளை |
| மவுண்டிங் வகை | பேனல் மவுண்ட் |
| பொருளின் எடை | 242 கிராம் |
| பார்சல் பரிமாணங்கள் | 14.2 x 11.6 x 5.4 செ.மீ |

Image: Detailed dimensions of the Recoil S2P-38 Busbar, showing measurements for installation planning.
4. தொகுப்பு உள்ளடக்கங்கள்
The Recoil S2P-38 Busbar package includes the following items:
- 2 x Busbars (Red & Black)
- 8 x 8AWG Ring Terminals
- 4 x Stainless-Steel Screws

Image: Contents of the Recoil S2P-38 package, including two busbars (red and black), ring terminals, and mounting screws.
5. பாதுகாப்பு தகவல்
WARNING: Electrical systems can be dangerous. Improper installation or use can result in serious injury or damage. Always consult with a qualified professional if you are unsure about any part of the installation process.
- Always disconnect the power source (e.g., battery) before installing or servicing the busbar.
- பாதுகாப்பு கண்ணாடிகள் மற்றும் காப்பிடப்பட்ட கையுறைகள் உட்பட பொருத்தமான தனிப்பட்ட பாதுகாப்பு உபகரணங்களை (PPE) அணியுங்கள்.
- வளைவு மற்றும் அதிக வெப்பமடைவதைத் தடுக்க அனைத்து இணைப்புகளும் இறுக்கமாகவும் பாதுகாப்பாகவும் இருப்பதை உறுதிசெய்யவும்.
- அதிகபட்ச தொகுதியை தாண்ட வேண்டாம்tage (48V DC) or continuous amperage (250A DC) ratings.
- Install the busbar in a dry, protected location away from flammable materials.
- The polycarbonate cover must be securely attached after installation to prevent accidental short circuits.
6. அமைவு மற்றும் நிறுவல்
Follow these steps for proper installation of your Recoil S2P-38 Busbar:
- மவுண்டிங் இடத்தை தேர்வு செய்யவும்: Select a flat, stable surface for mounting the busbar. Ensure it is easily accessible for wiring but protected from physical damage and moisture.
- பெருகிவரும் புள்ளிகளைக் குறிக்கவும்: Use the busbar as a template to mark the locations for the four stainless-steel mounting screws.
- துளை பைலட் துளைகள்: Drill appropriate pilot holes for the mounting screws.
- Secure the Busbar: Attach the busbar to the chosen surface using the provided stainless-steel screws. Ensure it is firmly secured.
- கம்பிகளைத் தயாரிக்கவும்: Strip the insulation from your power cables and crimp the provided 8AWG ring terminals onto the ends. Ensure a strong, secure crimp.
- கம்பிகளை இணைக்கவும்:
- Loosen the nuts on the 3/8" (M10) studs.
- Place the ring terminals onto the studs. For multiple connections, stack terminals neatly.
- Tighten the nuts securely. Do not overtighten, but ensure there is no play in the connection.
- பாதுகாப்பு உறையை நிறுவவும்: Place the reinforced polycarbonate cover over the studs and secure it with the nylon nuts. This cover protects against accidental contact and short circuits.
- இணைப்புகளைச் சரிபார்க்கவும்: Double-check all connections for tightness and proper polarity before restoring power.

படம்: நெருக்கமான படம் view of the nickel-plated brass plate and stainless steel studs, highlighting the robust construction for secure electrical connections.
நிறுவல் வீடியோ குறிப்பு:
Video: This video demonstrates the installation of a similar dual 3/8" stud busbar, providing visual guidance for connecting wires and securing the unit. (Source: Joinfworld)
Video: This video illustrates the installation process for a dual stud power distribution block, showing how to connect cables and secure the protective cover. (Source: RED WOLF)
7. இயக்க வழிமுறைகள்
The Recoil S2P-38 Busbar is a passive power distribution component. Its operation involves maintaining secure electrical connections for multiple circuits from a single power source.
- Ensure all connected devices draw current within the busbar's maximum continuous amperage rating (250A DC).
- Regularly inspect connections for any signs of loosening or corrosion.
- The protective cover should always remain in place during operation to prevent accidental contact with live terminals.
8. பராமரிப்பு
Regular maintenance ensures the longevity and safe operation of your busbar:
- அவ்வப்போது ஆய்வு: Annually, or more frequently in harsh environments, inspect the busbar for any signs of corrosion, discoloration, or physical damage.
- இணைப்புகளைச் சரிபார்க்கவும்: Verify that all nuts on the studs are tight. Loose connections can lead to resistance, heat buildup, and potential failure.
- சுத்தம்: If necessary, disconnect power and gently clean the busbar and terminals with a dry, non-abrasive cloth. Do not use harsh chemicals or solvents.
- கவர் நேர்மை: Ensure the polycarbonate cover is intact and securely fastened. Replace if damaged.
9. சரிசெய்தல்
If you encounter issues with your power distribution system, consider the following:
- சாதனத்திற்கு மின்சாரம் இல்லை:
- Check the main power source (battery) for charge.
- Inspect all connections at the busbar and device for tightness.
- Verify that the wire gauge is appropriate for the current draw.
- Check any inline fuses or circuit breakers in the circuit.
- Overheating Connections:
- உடனடியாக மின்சார இணைப்பை துண்டிக்கவும்.
- This usually indicates a loose connection or an overloaded circuit. Tighten all connections.
- Ensure the total current draw does not exceed the busbar's 250A DC rating.
- Verify that the wire gauge is sufficient for the current being carried.
- அரிப்பு:
- சக்தியைத் துண்டிக்கவும்.
- Clean any corrosion with a wire brush and a baking soda solution (for battery terminals) or a specialized electrical contact cleaner.
- Ensure the busbar is installed in a dry environment.
10. உத்தரவாதம் மற்றும் ஆதரவு
For warranty information or technical support, please refer to the RECOIL official webதளத்தில் அல்லது உங்கள் சில்லறை விற்பனையாளரைத் தொடர்பு கொள்ளவும். வாங்கியதற்கான சான்றாக உங்கள் கொள்முதல் ரசீதை வைத்திருங்கள்.
உற்பத்தியாளர்: மறுசீரமைப்பு
Webதளம்: RECOIL Store on Amazon