
1. அறிமுகம்
This manual provides detailed instructions for the setup, operation, and maintenance of your DOACT Projection Alarm Clock. Please read this manual thoroughly before using the device to ensure proper function and to avoid damage.
2. பாதுகாப்பு தகவல்
- சாதனத்தை தீவிர வெப்பநிலை, நேரடி சூரிய ஒளி அல்லது அதிக ஈரப்பதத்திற்கு வெளிப்படுத்த வேண்டாம்.
- சாதனத்தை தண்ணீர் மற்றும் பிற திரவங்களிலிருந்து விலக்கி வைக்கவும்.
- Use only the specified power supply (AAA*2 batteries or 5V USB).
- சாதனத்தை நீங்களே பிரிக்கவோ அல்லது சரிசெய்யவோ முயற்சிக்காதீர்கள். சேவைக்கு தகுதியான பணியாளர்களைத் தொடர்பு கொள்ளவும்.
- பேட்டரிகளை குழந்தைகளுக்கு எட்டாதவாறு வைத்திருங்கள்.
3. தொகுப்பு உள்ளடக்கங்கள்
தொகுப்பில் அனைத்து பொருட்களும் உள்ளதா என சரிபார்க்கவும்:
- 1 x DOACT Projection Alarm Clock
- 1 x USB கேபிள்
- 1 x பயனர் கையேடு (இந்த ஆவணம்)
4. தயாரிப்பு முடிந்துவிட்டதுview
Familiarize yourself with the components of your projection alarm clock.

படம் 4.1: பின்புறம் View மற்றும் கட்டுப்பாடுகள்
This image displays the back of the projection clock, highlighting key controls and ports. These include the Mode button, UP/DOWN buttons for time adjustment, MAX/MIN button for temperature/humidity display, SNZ (snooze) button, probe hole, AAA battery compartment, external power interface, and supporting base.
- காட்சி திரை: Shows time, temperature, humidity, and weather forecast icons.
- ப்ரொஜெக்ஷன் லென்ஸ்: நேரத்தை ஒரு மேற்பரப்பில் திட்டமிடுகிறது.
- பயன்முறை பொத்தான்: Used to enter setup modes for time, alarm, etc.
- மேல்/கீழ் பொத்தான்கள்: Adjust values during setup or switch display modes.
- MAX/MIN பொத்தான்: Toggles between current, maximum, and minimum temperature/humidity readings.
- SNZ (Snooze) Button: Activates snooze function for the alarm.
- பேட்டரி பெட்டி: Holds 2 x AAA batteries (not included).
- USB பவர் போர்ட்: For continuous power supply via USB cable.
5 அமைவு
5.1 சாதனத்தை இயக்குதல்
- பேட்டரி நிறுவல்: Open the battery compartment on the back of the clock. Insert 2 x AAA batteries (not included), ensuring correct polarity (+/-). Note: When using only batteries, the display will not be continuously on to conserve power. The display will be black when off and difficult to see.
- USB பவர்: For continuous display and optimal functionality, connect the provided USB cable to the USB power port on the back of the clock and plug the other end into a 5V USB power adapter (not included) or a USB port. The display will remain continuously on when powered via USB.
5.2 ஆரம்ப நேரம் மற்றும் தேதி அமைப்பு
- அழுத்திப் பிடிக்கவும் பயன்முறை நேர அமைப்பு பயன்முறையில் நுழைய தோராயமாக 3 வினாடிகள் பொத்தானை அழுத்தவும். மணிநேர இலக்கங்கள் ஒளிரும்.
- பயன்படுத்தவும் UP or கீழே மணிநேரத்தை சரிசெய்ய பொத்தான்கள்.
- அழுத்தவும் பயன்முறை மணிநேரத்தை உறுதிசெய்து நிமிட அமைப்பிற்கு நகர்த்த மீண்டும். நிமிட இலக்கங்கள் ஒளிரும்.
- பயன்படுத்தவும் UP or கீழே நிமிடங்களை சரிசெய்ய பொத்தான்கள்.
- தொடர்ந்து அழுத்தவும் பயன்முறை to cycle through and set other parameters such as year, month, and day, adjusting each with the UP or கீழே பொத்தான்கள்.
- அழுத்தவும் பயன்முறை one last time or wait for 10 seconds without input to exit the setting mode.
6. இயக்க வழிமுறைகள்
6.1 Time Projection Function
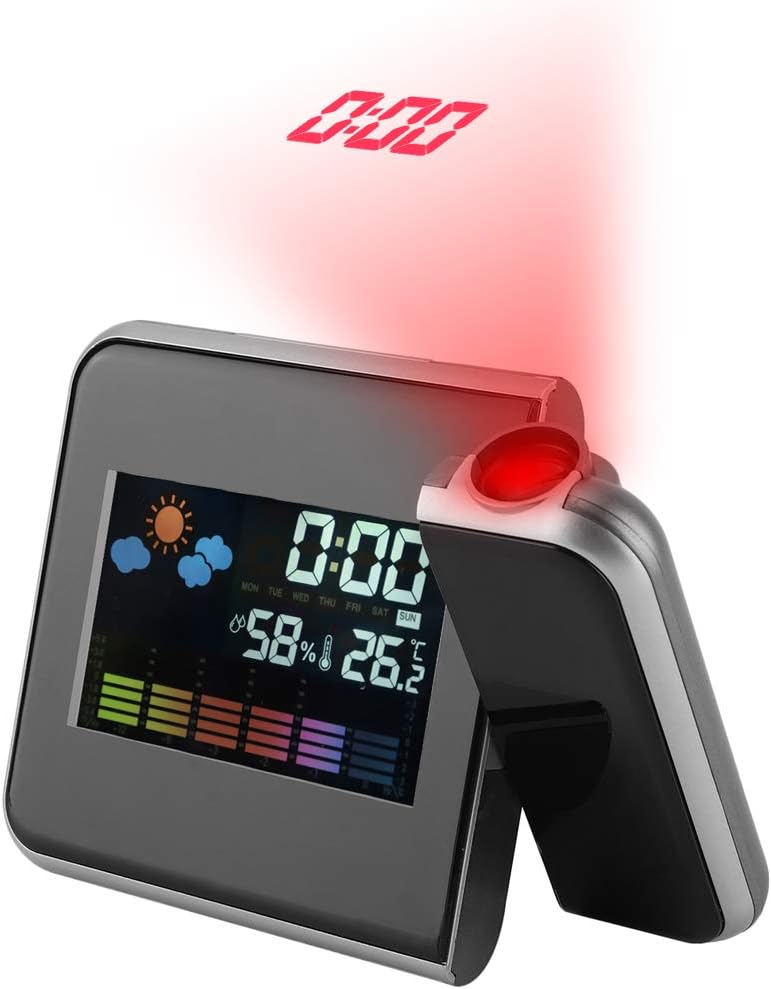
Figure 6.1: Time Projection
This image shows the projection clock actively displaying the time onto a surface, illustrating its projection capability. The projection distance is approximately 1 to 5 meters.
- The clock can project the time onto a ceiling or wall. The optimal projection distance is 1-5 meters.
- To activate the projection, ensure the clock is powered via USB or press a button if using batteries (projection is not continuous on battery power).
- ப்ரொஜெக்ஷன் கோணத்தை சரிசெய்தல்: The projection lens can be rotated 180 degrees to direct the time display to your desired surface. Gently rotate the projection arm to adjust.
6.2 வெப்பநிலை மற்றும் ஈரப்பதம் காட்சி
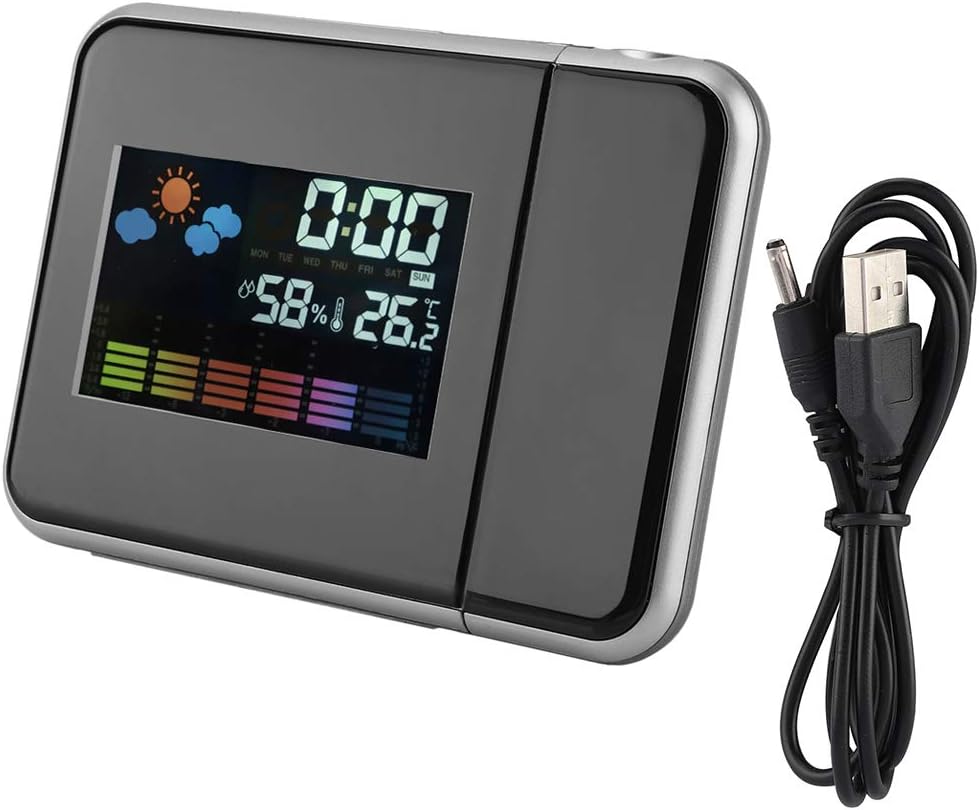
படம் 6.2: முதன்மை காட்சி
ஒரு தெளிவான view of the clock's front display, showing the digital time, current temperature, humidity percentage, and weather forecast icons. This illustrates the multi-functional display capabilities.
- The main display shows the current indoor temperature and humidity.
- வெப்பநிலை அலகு: செல்சியஸ் (°C) மற்றும் பாரன்ஹீட் (°F) இடையே மாற, கீழே சுருக்கமாக பொத்தான்.
- அதிகபட்ச/குறைந்தபட்ச அளவீடுகள்: அழுத்தவும் அதிகபட்சம்/நிமிடம் பொத்தான் view அதிகபட்சமாகப் பதிவுசெய்யப்பட்ட வெப்பநிலை மற்றும் ஈரப்பதம். மீண்டும் அழுத்தவும் view the minimum recorded temperature and humidity. Press a third time to return to current readings. The readings reset daily or when the device is reset.
6.3 அலாரம் கடிகாரம் மற்றும் உறக்கநிலை செயல்பாடு
- அலாரத்தை அமைத்தல்:
- அழுத்தவும் பயன்முறை button once to enter alarm setting mode. The alarm time will flash.
- பயன்படுத்தவும் UP or கீழே அலாரம் நேரத்தை சரிசெய்ய பொத்தான்கள்.
- அழுத்தவும் பயன்முறை again to confirm the hour and set the alarm minutes.
- பயன்படுத்தவும் UP or கீழே அலாரம் நிமிடங்களை சரிசெய்ய பொத்தான்கள்.
- அழுத்தவும் பயன்முறை again or wait for 10 seconds to exit alarm setting.
- செயல்படுத்துதல்/முடக்குதல் அலாரம்: சாதாரண நேர காட்சி முறையில், அழுத்தவும் UP button briefly to toggle the alarm on or off. An alarm icon will appear on the display when activated.
- உறக்கநிலை செயல்பாடு: அலாரம் ஒலிக்கும்போது, அழுத்தவும் SNZ button to activate the snooze function. The alarm will temporarily stop and sound again after a few minutes (default snooze time is typically 5-10 minutes, refer to specific model details if available). To turn off the alarm completely, press any other button.
7. பராமரிப்பு
- மென்மையான, உலர்ந்த துணியால் சாதனத்தை சுத்தம் செய்யவும். சிராய்ப்பு கிளீனர்கள் அல்லது கரைப்பான்களைப் பயன்படுத்த வேண்டாம்.
- Ensure the projection lens is clean for clear time projection.
- நீண்ட காலத்திற்கு சாதனத்தைப் பயன்படுத்தவில்லை என்றால், கசிவைத் தடுக்க பேட்டரிகளை அகற்றவும்.
8. சரிசெய்தல்
| பிரச்சனை | சாத்தியமான காரணம் | தீர்வு |
|---|---|---|
| Display is off or dim (on battery power) | Batteries are low or display is designed to turn off to save power. | Replace AAA batteries or connect the device to a USB power source for continuous display. |
| No time projection | Projection function not activated or device not powered via USB. | Ensure USB power is connected. If on battery, press a button to temporarily activate projection. Check if the projection lens is obstructed. |
| தவறான நேரம்/தேதி | Time/date not set correctly or power interruption. | நேரம் மற்றும் தேதியை மீட்டமைக்க பிரிவு 5.2 ஐப் பார்க்கவும். |
| அலாரம் ஒலிக்கவில்லை | அலாரம் இயக்கப்படவில்லை அல்லது தவறாக அமைக்கப்படவில்லை. | Refer to Section 6.3 to ensure the alarm is set and activated (alarm icon visible). |
9. விவரக்குறிப்புகள்
| அம்சம் | விவரம் |
|---|---|
| மாதிரி எண் | DOACTcuf6pq3yvr-01 |
| காட்சி வகை | Digital, LED Color Screen |
| சக்தி ஆதாரம் | 2 x AAA Batteries (not included), USB 5V (cable included) |
| வெப்பநிலை காட்சி வரம்பு | -9.9°C முதல் +60°C வரை (14.2°F முதல் 140°F வரை) |
| ஈரப்பதம் காட்சி வரம்பு | 20% RH முதல் 90% RH வரை |
| திட்ட தூரம் | 1-5 மீட்டர் |
| ப்ராஜெக்ஷன் ஆங்கிள் | 180° சுழற்றக்கூடியது |
| தயாரிப்பு பரிமாணங்கள் | 15 cm (5.9 in) W x 11 cm (4.3 in) H x 2 cm (0.8 in) D |
| பொருள் | பிளாஸ்டிக் |
| எடை | தோராயமாக 246 கிராம் (8.7 அவுன்ஸ்) |
| சிறப்பு அம்சங்கள் | Alarm, Snooze, Temperature Display, Humidity Display, Weather Forecast, Digital Time Display, Max/Min Temperature/Humidity |

படம் 9.1: தயாரிப்பு பரிமாணங்கள்
This image provides a visual representation of the clock's dimensions, indicating its width (15cm / 5.9in), height (11cm / 4.3in), and depth (2cm / 0.8in).
10. உத்தரவாதம் மற்றும் ஆதரவு
For warranty information or technical support, please refer to the retailer's policy or contact the manufacturer directly. Keep your purchase receipt as proof of purchase.