அறிமுகம்
Thank you for choosing the Yunseity Portable Voice Amplifier. This device is designed to provide clear and stable sound amplification for various applications such as teaching, presentations, meetings, and outdoor activities. Please read this manual carefully before using the product to ensure proper operation and to maximize its lifespan.
தயாரிப்பு முடிந்துவிட்டதுview
The Yunseity Portable Voice Amplifier is a compact and versatile device. Familiarize yourself with its components and controls.

Image: The voice amplifier unit shown with its accompanying headset microphone, waistband strap, and USB charging cable.
முக்கிய கூறுகள்:
- குரல் Ampலிஃபையர் அலகு: The main speaker and control unit.
- ஹெட்செட் மைக்ரோஃபோன்: For hands-free voice input.
- Waistband Strap: வசதியான பெயர்வுத்திறனுக்காக.
- USB சார்ஜிங் கேபிள்: உள் பேட்டரியை ரீசார்ஜ் செய்வதற்கு.
Control Panel and Ports:

Image: A labeled diagram indicating the location and function of each button, knob, and port on the ampஆயுள்.
- 3.5மிமீ மைக்ரோஃபோன் ஜாக்: Connect the headset microphone here.
- தொகுதி நாப்: சரிசெய்ய சுழற்று ampலிஃபிகேஷன் தொகுதி.
- சார்ஜிங் போர்ட்: Connect the USB charging cable here.
- முந்தைய பாடல் பொத்தான்: Press to go to the previous track (when playing media).
- ப்ளே/இடைநிறுத்த பட்டன்: Tap to play or pause media. Long press to turn the device on or off.
- அடுத்த பாடல் பொத்தான்: Press to go to the next track. Long press to switch between single song loop and list loop.
- U Disk Interface: Insert a USB flash drive for media playback.
- மெமரி கார்டு ஸ்லாட்: Insert a Memory Card (TF card) for media playback.
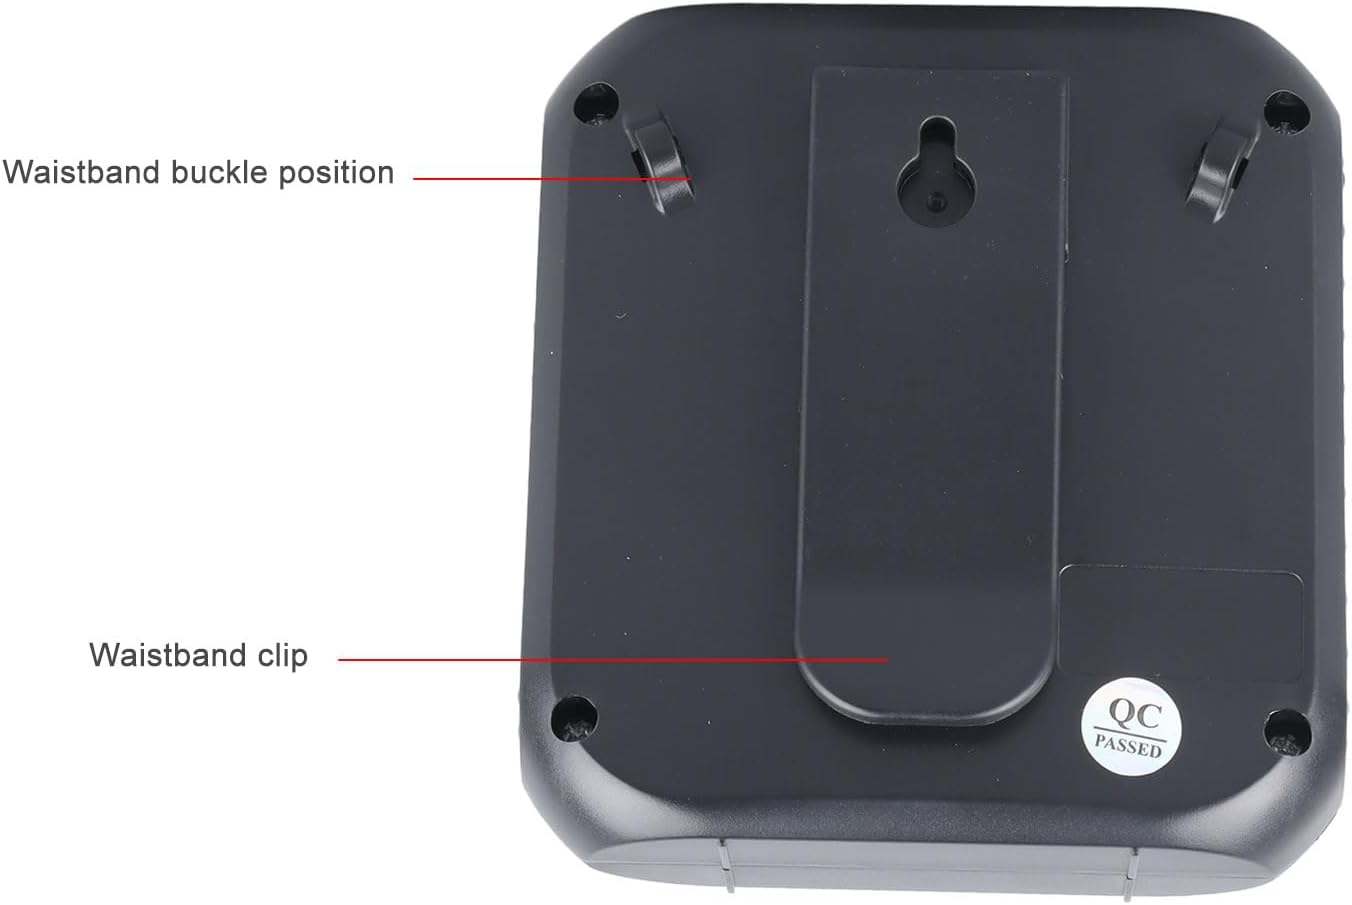
Image: The back of the amplifier, highlighting the attachment points for the waistband strap.
- Waistband Buckle Positions: Slots for attaching the waistband strap.
- Waistband Clip: For direct attachment to clothing or a belt.
அமைவு
- ஆரம்ப கட்டணம்: முதல் பயன்பாட்டிற்கு முன், முழுமையாக சார்ஜ் செய்யவும் amplifier. Connect the USB charging cable to the charging port on the amplifier and to a standard USB power adapter (not included) or computer USB port. The charging indicator will illuminate.
- மைக்ரோஃபோனை இணைக்கவும்: Insert the 3.5mm plug of the headset microphone into the microphone jack on the amplifier. Ensure it is securely connected.
- Wear Microphone: Position the headset microphone comfortably on your head, ensuring the microphone element is close to your mouth for optimal voice pickup.
- இணைக்கவும் Ampஆயுள்: Use the waistband strap by threading it through the buckle positions on the back of the amplifier, or use the integrated clip to attach the amplifier to your belt or clothing.
இயக்க வழிமுறைகள்
- பவர் ஆன்/ஆஃப்: நீண்ட நேரம் அழுத்தவும் விளையாடு/இடைநிறுத்தம் திரும்ப பொத்தானை amplifier on or off. A voice prompt will indicate the power status.
- ஒலியளவைச் சரிசெய்யவும்: சுழற்று தொகுதி குமிழ் clockwise to increase volume and counter-clockwise to decrease volume. Start with a low volume and gradually increase to avoid feedback.
- குரல் Ampஉயர்வு: Once powered on and the microphone is connected, speak into the headset microphone. Your voice will be ampஸ்பீக்கர் மூலம் உயர்த்தப்பட்டது.
- Media Playback (U Disk/Memory Card):
- Insert a U disk into the U disk interface or a Memory Card (TF card) into the Memory Card slot.
- தி amplifier will automatically detect and begin playing audio files.
- பயன்படுத்தவும் முந்தைய பாடல் மற்றும் அடுத்த பாடல் தடங்களுக்கு செல்ல பொத்தான்கள்.
- தட்டவும் விளையாடு/இடைநிறுத்தம் பிளேபேக்கை இடைநிறுத்த அல்லது மீண்டும் தொடங்க பொத்தான்.
- நீண்ட நேரம் அழுத்தவும் அடுத்த பாடல் button to cycle through playback modes (single song loop, list loop).
- AUX உள்ளீடு: Connect an external audio source (e.g., smartphone, MP3 player) to the amplifier's AUX input port (if available, typically shared with microphone jack or a separate port) using an AUX cable (not included). The amplifier will play audio from the connected device.
சார்ஜ் செய்கிறது
தி amplifier features a built-in 2200mAh rechargeable battery, providing extended usage time.
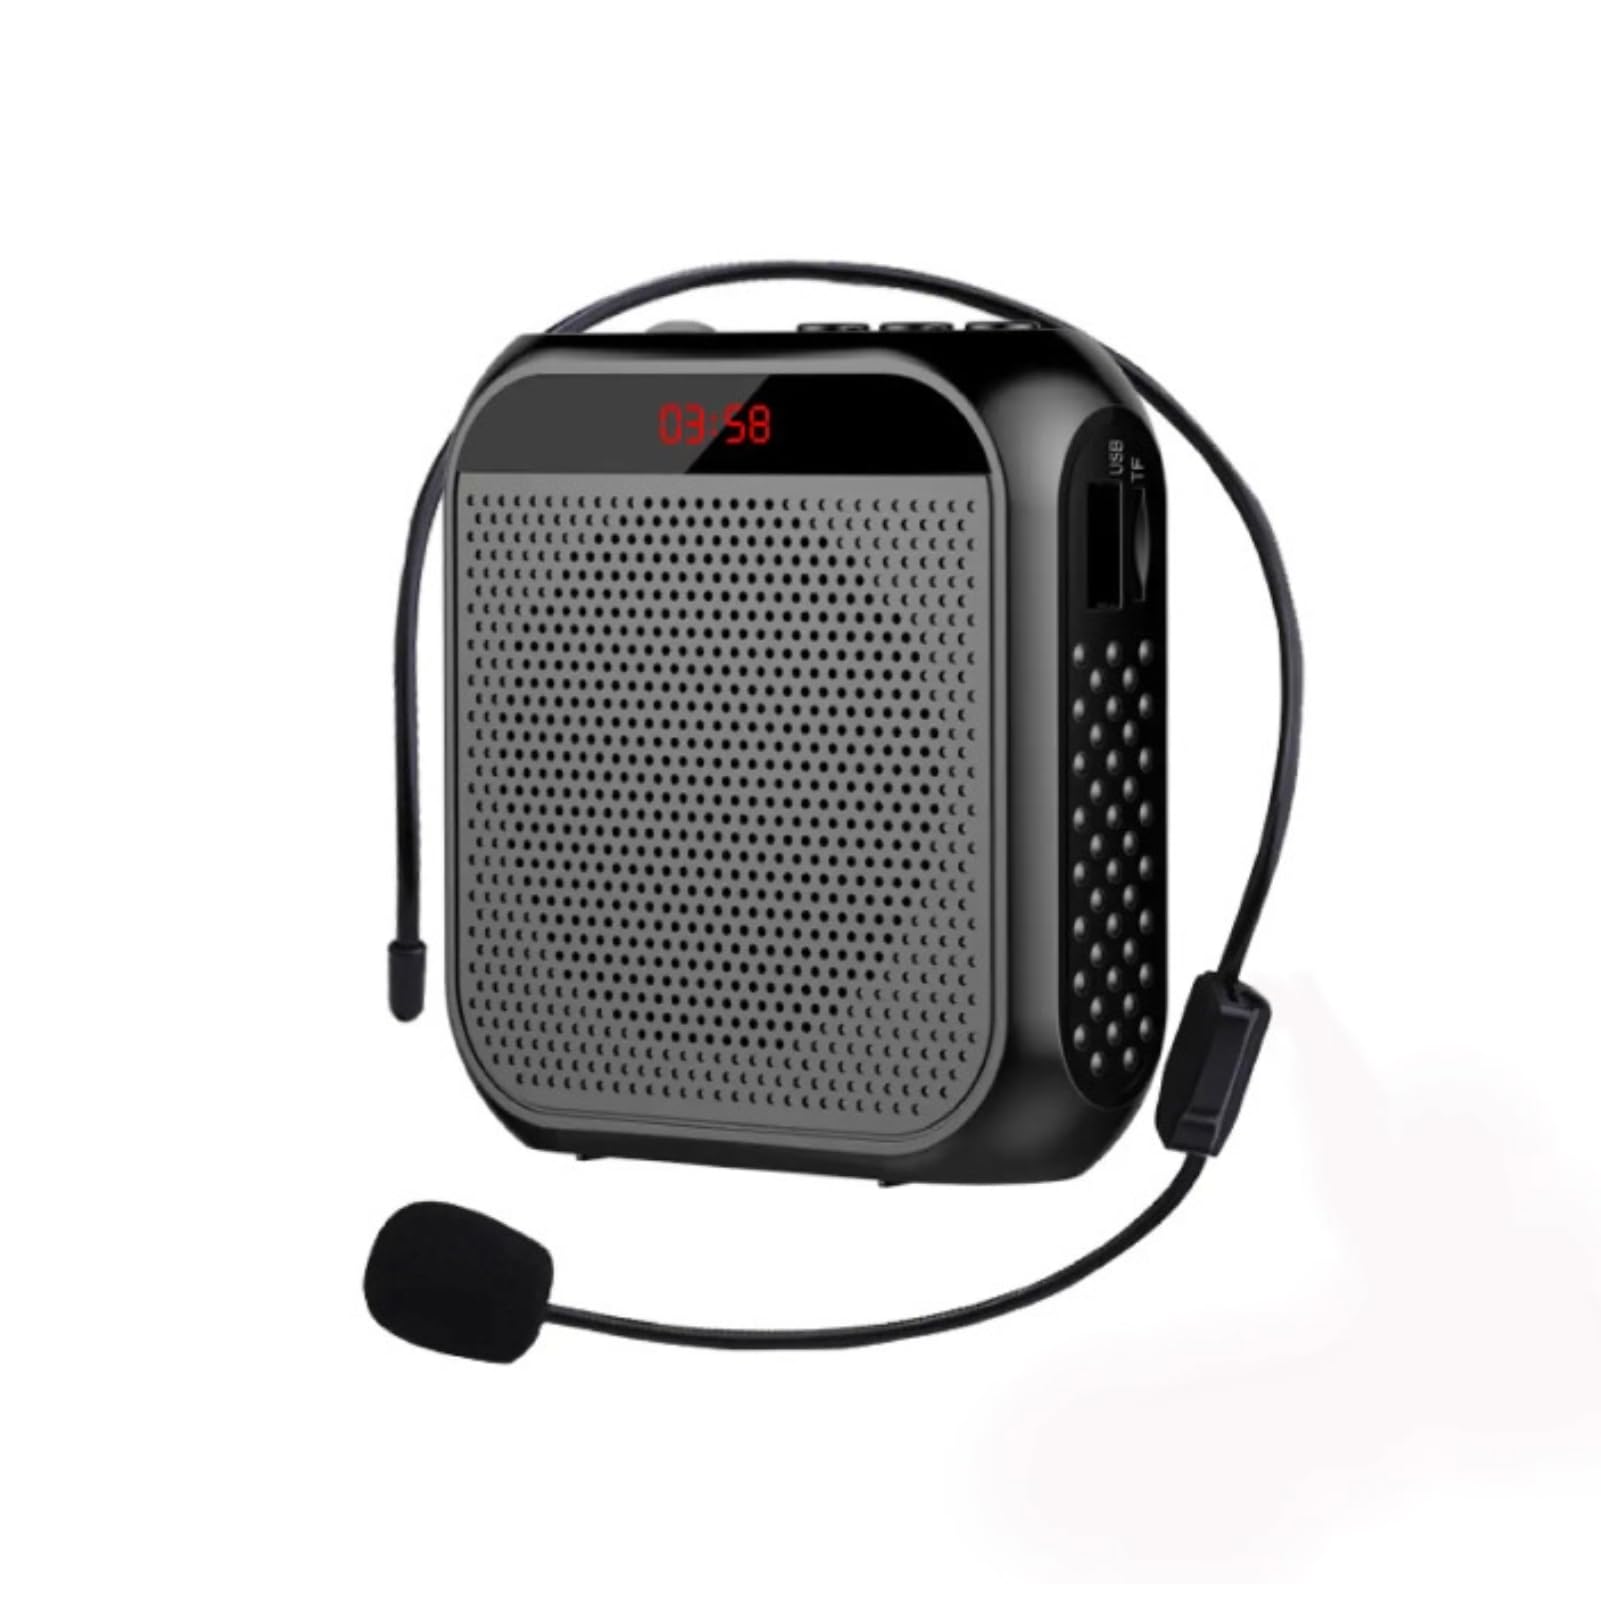
Image: Visual representation of the amplifier's long battery life and capacity.
- Connect the provided USB charging cable to the amplifier's charging port and a USB power source.
- சார்ஜிங் காட்டி விளக்கு சார்ஜிங் நிலையைக் காண்பிக்கும்.
- A full charge can provide up to 10 days of playtime, depending on usage.
- When the battery is low, the device may emit an audible alert or the indicator light may change. Recharge promptly.
பல பயன்பாடுகள்
This portable voice amplifier is suitable for a wide range of scenarios where clear and amplified voice is needed.
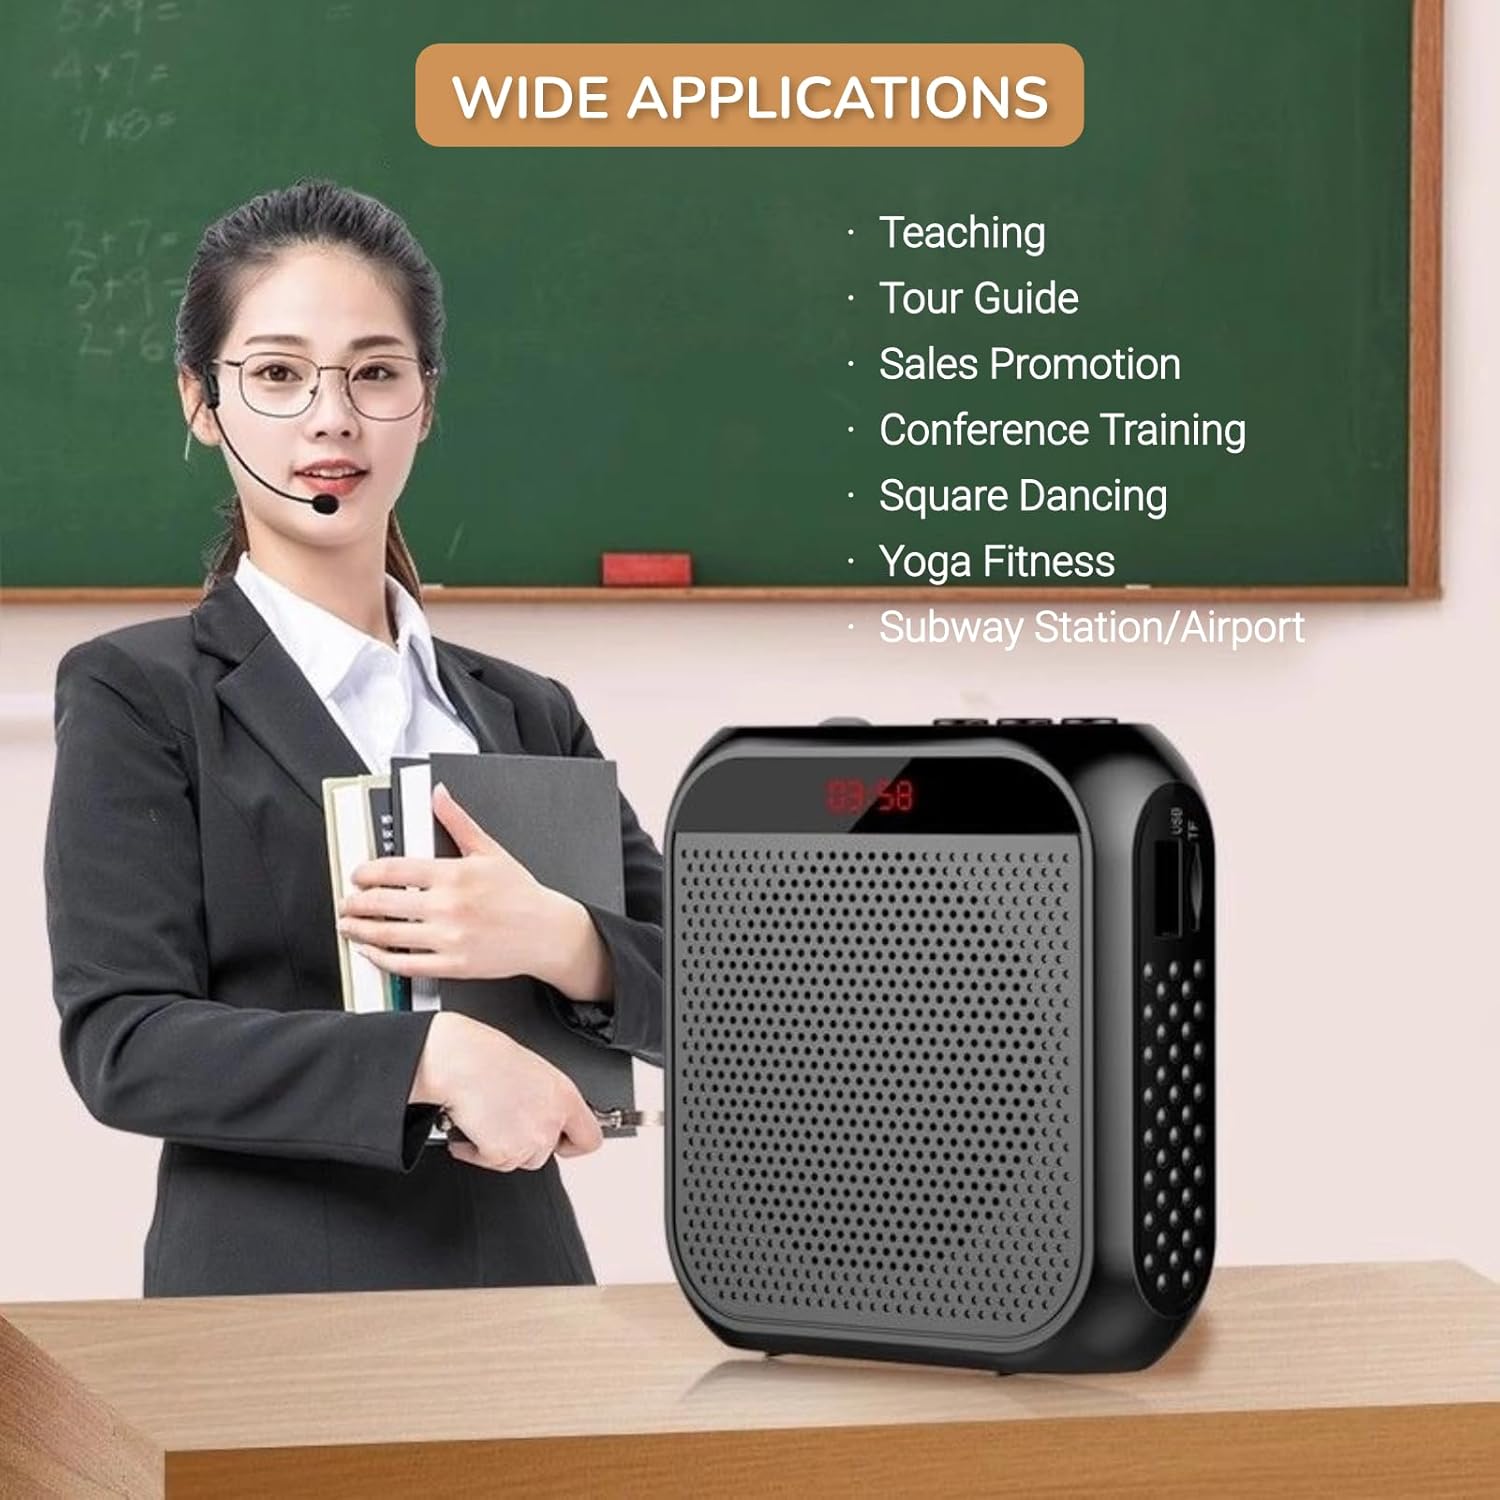
Image: A visual demonstrating various professional and recreational uses for the voice ampஆயுள்.
- கற்பித்தல்
- Tour Guiding
- Conference Training
- விளக்கக்காட்சிகள்
- பொதுப் பேச்சு
- வெளிப்புற நடவடிக்கைகள்
அணியும் முறைகள்
தி amplifier offers flexible wearing options for user comfort and convenience.

படம்: Examples எப்படி amplifier can be worn using the waistband strap or clip.
- Waistband: Attach the provided strap to the buckle positions on the amplifier and wear it around your waist or over your shoulder.
- பெல்ட் கிளிப்: Use the integrated clip on the back of the amplifier to secure it directly to your belt, pocket, or clothing.
விவரக்குறிப்புகள்
Key technical specifications of the Yunseity Portable Voice Ampஆயுள்.

Image: Diagram showing the physical dimensions of the ampஆயுள்.
| அம்சம் | விவரக்குறிப்பு |
|---|---|
| பிராண்ட் | யுன்சிட்டி |
| மாதிரி எண் | Yunseity07h6poqxat |
| இணைப்பு தொழில்நுட்பம் | AUX |
| நிறம் | கருப்பு |
| இணக்கமான சாதனங்கள் | ஹெட்செட் |
| மவுண்டிங் வகை | போர்ட்டபிள், டேப்லெட் |
| சக்தி ஆதாரம் | பேட்டரி மூலம் இயங்கும் |
| இணைப்பான் வகை | ஆக்ஸ் |
| சேனல்களின் எண்ணிக்கை | 1 |
| ஆடியோ உள்ளீடு | USB, Memory Card, Auxiliary |
| அடைப்பு பொருள் | பிளாஸ்டிக் |
| பேட்டரி திறன் | 2200mAh |
| பரிமாணங்கள் (தோராயமாக) | 8.4cm x 2.8cm x 9.2cm (3.30in x 1.10in x 3.62in) |
பராமரிப்பு
- சுத்தம்: துடைக்கவும் amplifier with a soft, dry cloth. Do not use harsh chemicals or abrasive cleaners.
- சேமிப்பு: நேரடி சூரிய ஒளி மற்றும் தீவிர வெப்பநிலையிலிருந்து விலகி, குளிர்ந்த, உலர்ந்த இடத்தில் சாதனத்தை சேமிக்கவும்.
- பேட்டரி பராமரிப்பு: For optimal battery life, avoid fully discharging the battery frequently. Recharge the device regularly, even if not in use for extended periods.
- கவனத்துடன் கையாளவும்: சாதனத்தை கைவிடுவதையோ அல்லது வலுவான தாக்கங்களுக்கு உட்படுத்துவதையோ தவிர்க்கவும்.
சரிசெய்தல்
If you encounter issues with your voice ampலிஃபையரை சரிசெய்ய, பின்வரும் பொதுவான சிக்கல்கள் மற்றும் தீர்வுகளைப் பார்க்கவும்:
| பிரச்சனை | சாத்தியமான காரணம் | தீர்வு |
|---|---|---|
| ஒலி அல்லது குறைந்த ஒலி இல்லை | Device is off; Volume is too low; Microphone not connected; Microphone faulty. | Long press Play/Pause to turn on; Rotate volume knob clockwise; Ensure microphone is fully plugged in; Test with another microphone if available. |
| Feedback/Whistling sound | Microphone too close to speaker; Volume too high; Microphone pointed at speaker. | மைக்ரோஃபோனுக்கும் இடையேயான தூரத்தை அதிகரிக்கவும் amplifier; Reduce volume; Adjust microphone position away from the speaker. |
| சாதனம் சார்ஜ் ஆகவில்லை | Charging cable faulty; Power source faulty; Charging port damaged. | Try a different USB cable; Use a different USB power adapter/port; Contact customer support if port is damaged. |
| Media playback not working | U disk/Memory Card not inserted correctly; Incompatible file வடிவம்; சிதைந்துள்ளது files. | Reinsert U disk/Memory Card; Ensure files are in a supported format (e.g., MP3); Try different media files. |
உத்தரவாதம் மற்றும் ஆதரவு
This Yunseity product comes with a standard manufacturer's warranty. Please refer to the packaging or the seller's terms for specific warranty details and duration.
For technical support, warranty claims, or any questions regarding your product, please contact the seller or Yunseity customer service through the platform where you purchased the item. Provide your model number (Yunseity07h6poqxat) and purchase details for faster assistance.