ERA 550101A
ERA Crankshaft Position Sensor 550101A User Manual
மாதிரி: 550101A
1. அறிமுகம்
This manual provides essential information for the proper installation, operation, and maintenance of your ERA Crankshaft Position Sensor, model 550101A. This sensor is designed for specific vehicle applications, including Volkswagen Polo (9N_, 6N2) and Lupo (6X1, 6E1) models. Please read this manual thoroughly before proceeding with installation or any related procedures.
2. பாதுகாப்பு தகவல்
Always prioritize safety when working with automotive components. Failure to follow these safety guidelines may result in personal injury or damage to the vehicle.
- எந்தவொரு வேலையையும் தொடங்குவதற்கு முன் வாகனத்தின் இயந்திரம் அணைக்கப்பட்டு குளிர்ச்சியாக இருப்பதை உறுதிசெய்து கொள்ளுங்கள்.
- தற்செயலான மின் தடைகளைத் தடுக்க வாகனத்தின் பேட்டரியைத் துண்டிக்கவும்.
- பாதுகாப்பு கண்ணாடிகள் மற்றும் கையுறைகள் போன்ற பொருத்தமான தனிப்பட்ட பாதுகாப்பு உபகரணங்களை (PPE) அணியுங்கள்.
- விரிவான வழிமுறைகள் மற்றும் முறுக்கு விவரக்குறிப்புகளுக்கு உங்கள் வாகனத்தின் குறிப்பிட்ட சேவை கையேட்டைப் பார்க்கவும்.
- ஏதேனும் ஒரு படி குறித்து உங்களுக்கு சந்தேகம் இருந்தால், தகுதிவாய்ந்த வாகன தொழில்நுட்ப வல்லுநரை அணுகவும்.
3. தொகுப்பு உள்ளடக்கங்கள்
தொகுப்பைத் திறந்தவுடன், அனைத்து கூறுகளும் உள்ளனவா மற்றும் சேதமடையாமல் உள்ளதா என்பதைச் சரிபார்க்கவும்:
- 1 x ERA Crankshaft Position Sensor (Model 550101A)
- (No other accessories are typically included with this type of sensor)
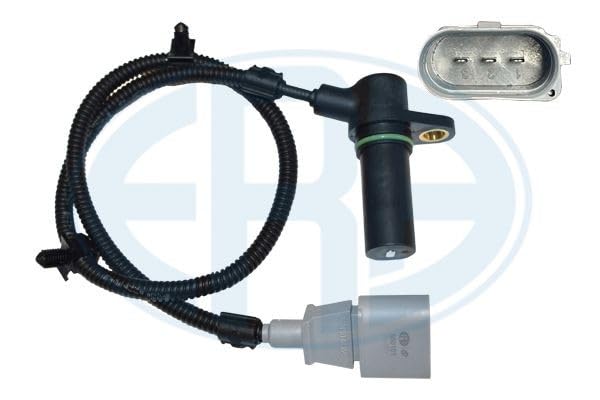
Image: The ERA Crankshaft Position Sensor 550101A, showing the main sensor body, attached electrical cable, and the corresponding electrical connector. The sensor body is black with a green O-ring, and the connector is grey with three pins.
4. நிறுவல் வழிகாட்டி
The installation of a crankshaft position sensor requires mechanical aptitude. If you are not comfortable performing this procedure, seek professional assistance.
4.1 கருவிகள் தேவை
- சாக்கெட் குறடு தொகுப்பு
- Torque wrench (if specific torque values are available in vehicle manual)
- Flathead screwdriver (for prying clips, if necessary)
- சுத்தமான துணிகள்
4.2 நிறுவல் படிகள்
- வாகனத்தை தயார் செய்யுங்கள்: Park the vehicle on a level surface, engage the parking brake, and ensure the engine is off and cool. Disconnect the negative terminal of the battery.
- பழைய சென்சாரைக் கண்டறியவும்: The crankshaft position sensor is typically located near the crankshaft pulley or flywheel, depending on the vehicle model. Consult your vehicle's service manual for the exact location.
- மின் இணைப்பியைத் துண்டிக்கவும்: Carefully disconnect the electrical connector from the old sensor. Press any release tabs or clips as needed.
- பழைய சென்சாரை அகற்று: Use the appropriate socket wrench to remove the bolt(s) securing the old sensor. Gently pull the sensor out of its mounting bore.
- சுத்தமான மவுண்டிங் பகுதி: Clean any debris, oil, or residue from the sensor's mounting bore and surrounding area.
- புதிய சென்சார் நிறுவவும்: Insert the new ERA 550101A sensor into the mounting bore. Ensure the O-ring (if present) is properly seated. Secure the sensor with the retaining bolt(s). Tighten to the vehicle manufacturer's specified torque.
- மின் இணைப்பியை மீண்டும் இணைக்கவும்: Firmly connect the electrical connector to the new sensor until it clicks into place.
- பேட்டரியை மீண்டும் இணைக்கவும்: வாகனத்தின் பேட்டரியின் எதிர்மறை முனையத்தை மீண்டும் இணைக்கவும்.
- சோதனை செயல்பாடு: Start the engine and check for any warning lights or abnormal operation. It may be necessary to clear any stored diagnostic trouble codes (DTCs) using an OBD-II scanner.
5. இயக்கக் கோட்பாடுகள்
The crankshaft position sensor (CKP sensor) is a vital component of your vehicle's engine management system. It monitors the rotational speed and position of the crankshaft, sending this information to the Engine Control Unit (ECU).
The ECU uses this data to:
- Determine engine RPM.
- Control ignition timing.
- Control fuel injection timing.
- Detect misfires.
A properly functioning CKP sensor ensures optimal engine performance, fuel efficiency, and emissions control.
6. பராமரிப்பு
Crankshaft position sensors are generally maintenance-free components. However, regular vehicle maintenance can help ensure its longevity:
- வழக்கமான ஆய்வுகள்: During routine vehicle servicing, visually inspect the sensor and its wiring for any signs of damage, fraying, or corrosion.
- சுத்தமாக வைத்துகொள்: Ensure the area around the sensor is free from excessive oil, dirt, or debris, which could interfere with its operation.
- உடல் பாதிப்புகளை தவிர்க்கவும்: Be careful not to strike or damage the sensor during other engine bay work.
7. சரிசெய்தல்
If you experience issues after installing the sensor or suspect a sensor malfunction, consider the following common problems and solutions:
| அறிகுறி | சாத்தியமான காரணம் | தீர்வு |
|---|---|---|
| என்ஜின் கிராங்க்ஸ் ஆனால் ஸ்டார்ட் ஆகவில்லை | Faulty CKP sensor, wiring issue, or incorrect installation. | Check sensor connection. Inspect wiring for damage. Verify correct sensor installation. Scan for DTCs. |
| Intermittent Stalling or Misfires | Intermittent signal from CKP sensor due to damage or loose connection. | Inspect sensor and connector for looseness or corrosion. Check for engine vibration affecting sensor. |
| Check Engine Light (CEL) with CKP-related codes (e.g., P0335) | Sensor malfunction, circuit open/short, or timing issue. | Retrieve specific DTCs with an OBD-II scanner. Follow diagnostic procedures for the specific code. Replace sensor if confirmed faulty. |
| Rough Idling or Poor Performance | Inaccurate signal from CKP sensor affecting ignition/fuel timing. | Verify sensor installation. Check for other engine issues. Consider professional diagnosis. |
குறிப்பு: Always consult a qualified mechanic or refer to your vehicle's specific diagnostic procedures for accurate troubleshooting.
8. விவரக்குறிப்புகள்
Key specifications for the ERA Crankshaft Position Sensor 550101A:
| பண்பு | மதிப்பு |
|---|---|
| பிராண்ட் | சகாப்தம் |
| மாதிரி எண் | 550101A |
| பகுதி வகை | Crankshaft Position Sensor (PMH) |
| இணக்கத்தன்மை | VW Polo (9N_), VW Polo (6N2), VW Lupo (6X1, 6E1) |
| பரிமாணங்கள் (தோராயமாக) | 46mm (length/diameter, based on keyword) |
| எடை (தோராயமாக) | 0.082 கிலோ |
| ASIN | B0CLVGQ1S4 |
9. உத்தரவாதம் மற்றும் ஆதரவு
For information regarding warranty coverage or technical support for your ERA product, please refer to the manufacturer's official website or contact your point of purchase. Specific warranty details may vary by region and retailer.
ERA Official Webதளம்: www.era.it
Ask a question about this manual
Ask about setup, troubleshooting, compatibility, parts, safety, or missing instructions. Manuals+ will review the question and use this page’s manual context to help answer it.