
1. அறிமுகம்
The Yasola RC Drone Car Model 828 is a versatile 2-in-1 remote control vehicle designed for both ground driving and aerial flight. This manual provides essential instructions for safe operation, setup, and maintenance to ensure an enjoyable experience.
2. பாதுகாப்பு முன்னெச்சரிக்கைகள்
- வயது வந்தோர் கண்காணிப்பு: Always ensure adult supervision when children are operating the drone car.
- விமான சூழல்: Operate the drone in open, clear areas, away from people, animals, buildings, and other obstacles. Avoid flying in strong winds or rain.
- பேட்டரி பாதுகாப்பு:
- வழங்கப்பட்ட சார்ஜிங் கேபிள் மற்றும் பேட்டரிகளை மட்டும் பயன்படுத்தவும்.
- பேட்டரிகளை அதிகமாக சார்ஜ் செய்யவோ அல்லது ஷார்ட் சர்க்யூட் செய்யவோ வேண்டாம்.
- Do not expose batteries to extreme temperatures or fire.
- பேட்டரிகள் வீங்கினாலோ அல்லது கசிந்தாலோ, உடனடியாகப் பயன்படுத்துவதை நிறுத்துங்கள்.
- புரொப்பல்லர் பாதுகாப்பு: விரல்கள், முடி மற்றும் தளர்வான ஆடைகளை சுழலும் ப்ரொப்பல்லர்களிலிருந்து விலக்கி வைக்கவும்.
- பாதிப்பைத் தவிர்ப்பது: Avoid collisions with objects or people to prevent damage to the drone car and potential injury.
- நீர் வெளிப்பாடு: Do not expose the drone car to water or moisture.
3. தொகுப்பு உள்ளடக்கங்கள்
தொகுப்பில் அனைத்து பொருட்களும் உள்ளதா என்பதை சரிபார்க்கவும்:
- 1 x Yasola RC Drone Car (Model 828)
- 1 x ரிமோட் கண்ட்ரோல்
- 2 x Lithium Batteries (for drone car)
- 1 x USB சார்ஜிங் கேபிள்
- 4 x உதிரி உந்துசக்திகள்
- 1 x பயனர் கையேடு (இந்த ஆவணம்)
4. அமைவு வழிகாட்டி
4.1 பேட்டரி நிறுவல்
For the Drone Car:
- Locate the battery compartment on the underside of the drone car.
- பேட்டரி பெட்டியின் அட்டையை கவனமாக திறக்கவும்.
- Connect the drone battery to the drone's power connector.
- Place the battery inside the compartment and close the cover securely.
- Use a small screwdriver to turn the battery cover screw to secure it.


ரிமோட் கண்ட்ரோலுக்கு:
- ரிமோட் கண்ட்ரோலின் பின்புறத்தில் உள்ள பேட்டரி பெட்டியைத் திறக்கவும்.
- Insert 2 LR44 batteries (included) according to the polarity markings.
- பேட்டரி பெட்டியை மூடு.
4.2 ட்ரோன் பேட்டரியை சார்ஜ் செய்தல்
- USB சார்ஜிங் கேபிளை ட்ரோன் பேட்டரியுடன் இணைக்கவும்.
- Plug the USB end into a compatible USB power source (e.g., computer, USB wall adapter).
- The indicator light on the USB cable will show charging status (refer to charger for specific light indications).
- Charging typically takes approximately 60-90 minutes. Do not leave unattended while charging.
4.3 Pairing the Remote Control with the Drone Car
- Ensure the drone car battery is installed and fully charged.
- Long press the power button on the drone car to turn it on. The LED lights will begin to flash.
- ரிமோட் கண்ட்ரோலை இயக்கவும். ரிமோட்டில் உள்ள இண்டிகேட்டர் லைட் ஒளிரும்.
- Move the left joystick (throttle) on the remote control up and then down. The remote control will beep, and the drone car's lights will become solid, indicating successful pairing.
- The default mode after pairing is typically Flight Mode.
5. இயக்க வழிமுறைகள்
5.1 ரிமோட் கண்ட்ரோல் ஓவர்view
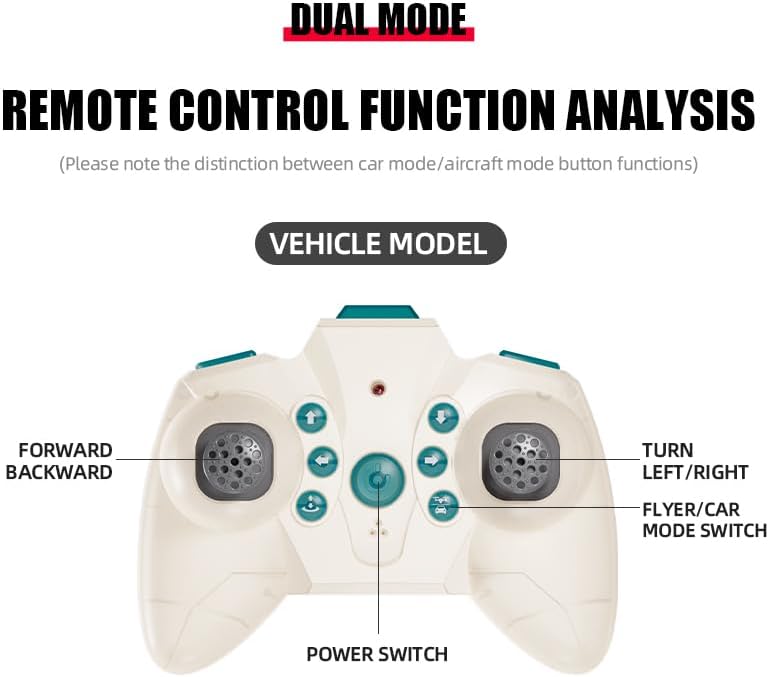
The remote control features dual modes for car and flight operation. Familiarize yourself with the controls:
- இடது ஜாய்ஸ்டிக் (த்ரோட்டில்): Controls forward/backward movement in car mode, and ascent/descent in flight mode.
- Right Joystick (Steering/Direction): Controls left/right turns in car mode, and directional flight (forward, backward, left, right) in flight mode.
- பயன்முறை சுவிட்ச் பொத்தான்: Toggles between Flight Mode and Car Mode.
- ஒரு-சாவி டேக் ஆஃப்/லேண்டிங் பட்டன்: Initiates automatic take-off or landing in flight mode.
- Speed Shift Button: Adjusts the speed setting (low/high).
- ஹெட்லெஸ் மோட் பட்டன்: Activates headless mode for simplified flight control.
- லைட் ஸ்விட்ச் பட்டன்: Toggles the LED lights.
5.2 Switching Between Flight Mode and Car Mode
- After pairing, the drone car is typically in Flight Mode.
- மாறுவதற்கு கார் பயன்முறை: Ensure the drone car has landed and propellers have stopped spinning. Press the Mode Switch button on the remote control. The lights on the drone car will turn red to indicate Car Mode.
- மாறுவதற்கு விமான முறை: Press the Mode Switch button again. The lights on the drone car will turn blue to indicate Flight Mode.

5.3 Flight Operations
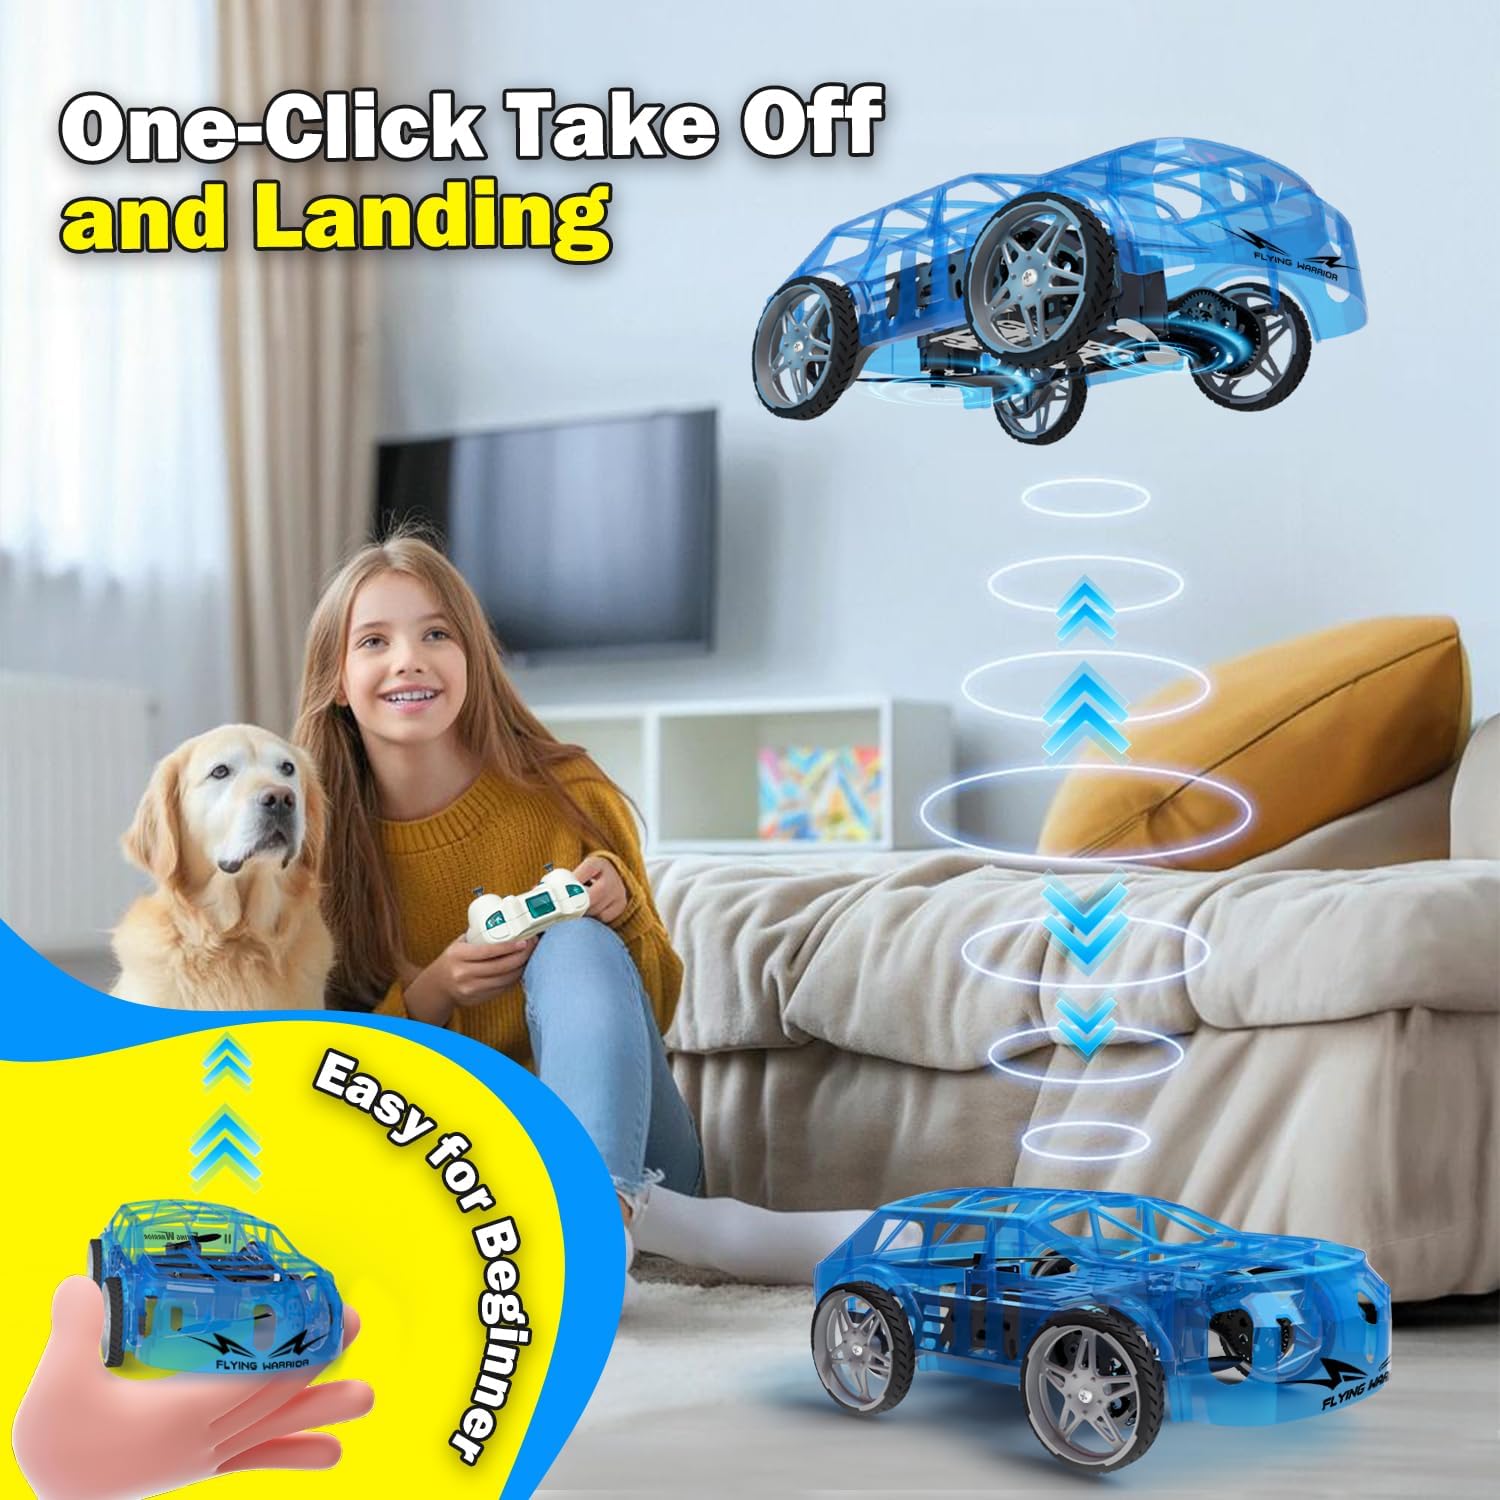
- One-Key Take Off: With the drone car in Flight Mode, press the One-Key Take Off/Landing button. The drone will automatically ascend to a stable hovering altitude.
- Altitude Control: மேலே செல்ல இடது ஜாய்ஸ்டிக்கை மேலேயும், கீழே இறங்குவதற்கும் அழுத்தவும்.
- Directional Flight: Push the right joystick forward to fly forward, backward to fly backward, left to fly left, and right to fly right.
- சுழற்சி: Push the left joystick left or right to rotate the drone car.
- வேக சரிசெய்தல்: Press the Speed Shift button to toggle between low and high-speed modes.
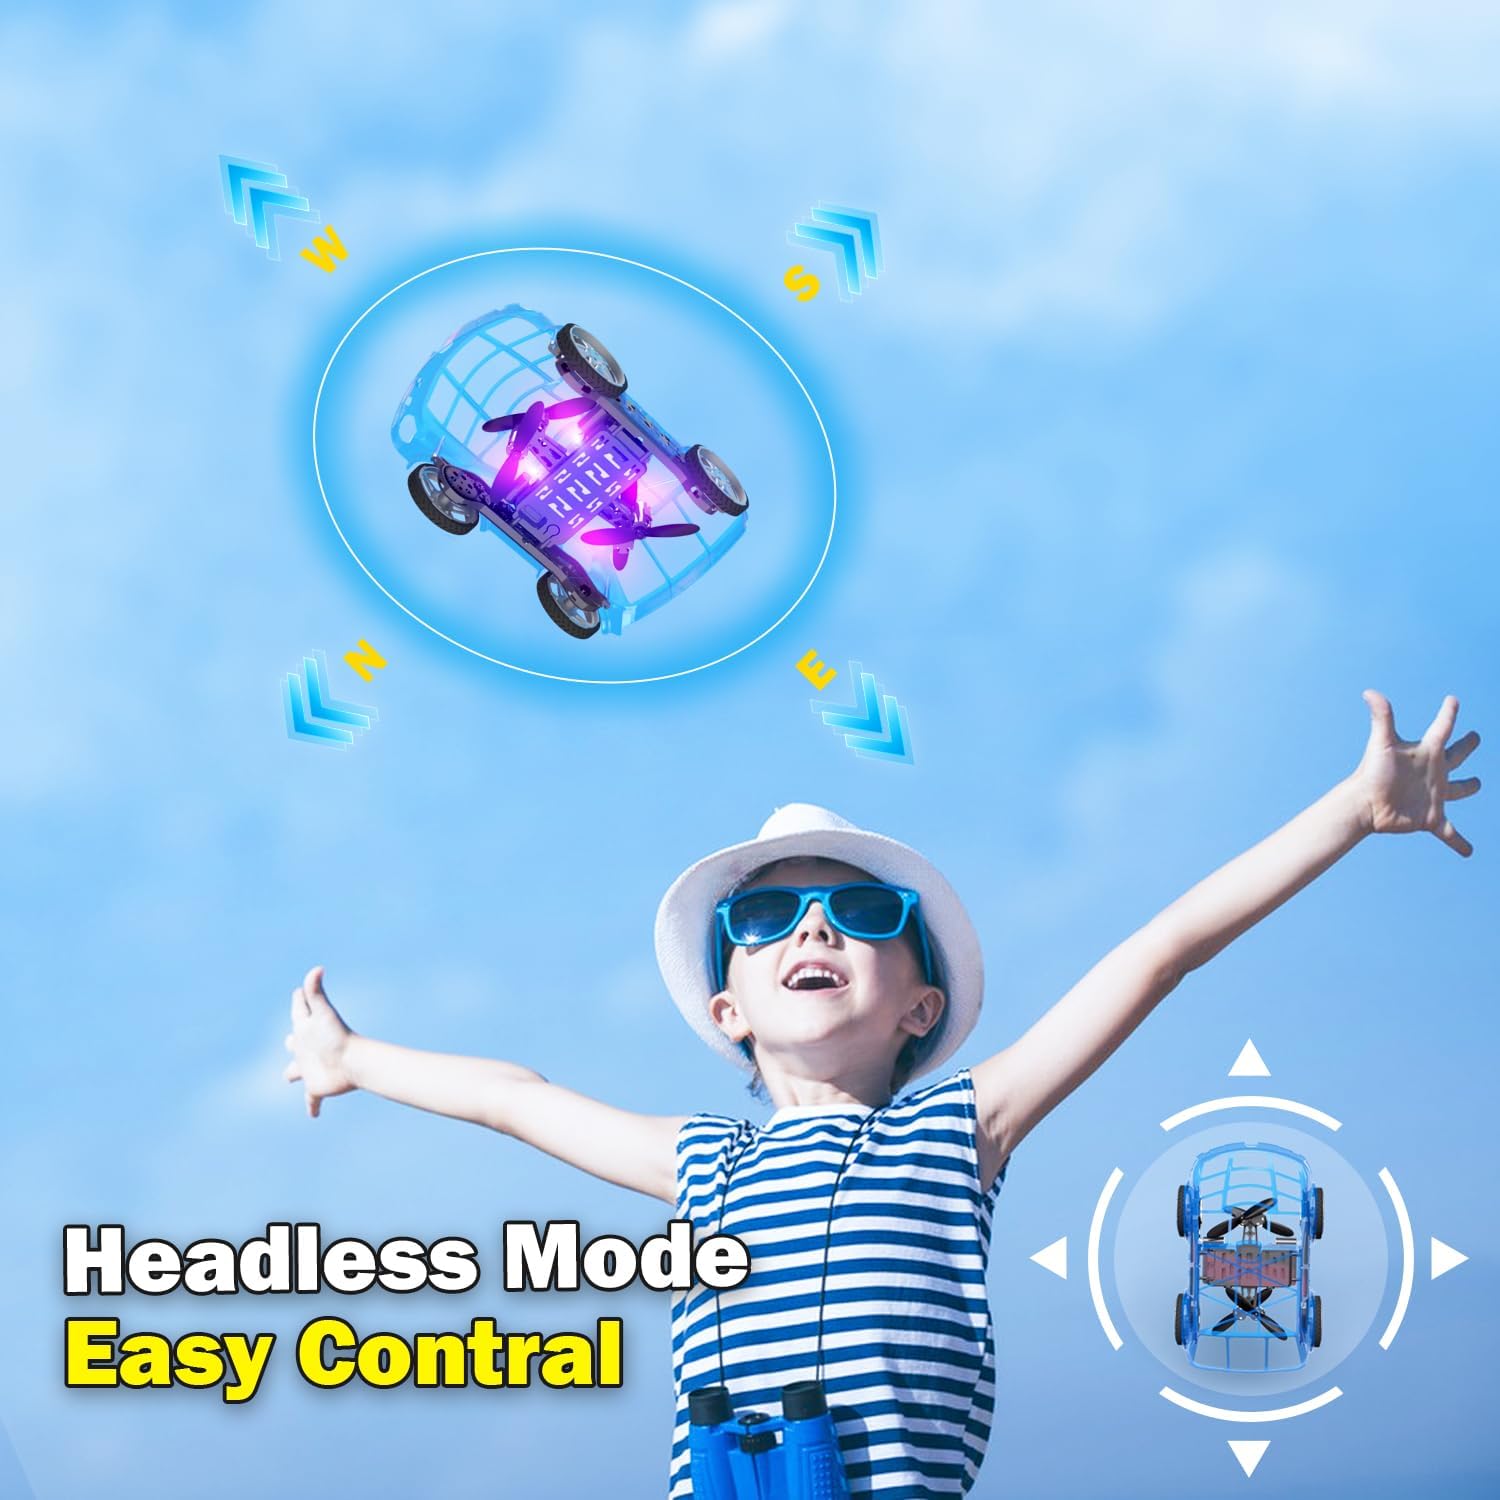
- தலையில்லாத பயன்முறை: Press the Headless Mode button to activate. In this mode, the drone's orientation is relative to the pilot, regardless of the drone's front direction. Press again to exit.
- ஒரு முக்கிய தரையிறக்கம்: Press the One-Key Take Off/Landing button again to initiate an automatic landing. The drone will slowly descend and land.

5.4 Car Operations
- முன்னோக்கி/பின்னோக்கி: Push the left joystick up to drive forward and down to drive backward.
- திருப்புதல்: Push the right joystick left to turn left and right to turn right.
- வேக சரிசெய்தல்: Press the Speed Shift button to toggle between low and high-speed modes.
6. பராமரிப்பு
- சுத்தம்: Use a soft, dry cloth to clean the drone car. Do not use water or chemical cleaners.
- உந்துவிசை மாற்று: If a propeller is damaged, carefully remove it and replace it with a spare propeller, ensuring correct orientation.
- பேட்டரி பராமரிப்பு:
- பயன்பாட்டில் இல்லாத போது பேட்டரிகளை குளிர்ந்த, உலர்ந்த இடத்தில் சேமிக்கவும்.
- Do not store fully charged or completely depleted batteries for extended periods.
- Charge batteries at least once every three months to maintain their health.
7. சரிசெய்தல்
| பிரச்சனை | சாத்தியமான காரணம் | தீர்வு |
|---|---|---|
| Drone car does not respond to remote control. | Not paired; low battery in drone or remote; drone not powered on. | Ensure drone and remote are powered on. Re-pair the remote control (Section 4.3). Charge drone battery. Replace remote control batteries. |
| Drone car cannot take off or flies unstably. | Low drone battery; damaged propellers; incorrect calibration; operating in windy conditions. | Charge drone battery. Check and replace damaged propellers. Perform "Outer eight calibration" (refer to video demonstration). Operate in calm conditions. |
| Short flight time (e.g., 3-5 minutes). | Normal battery capacity for mini drones; battery not fully charged. | Ensure battery is fully charged before use. Utilize the second included battery for extended play. |
| Drone car drifts during flight. | Needs fine-tuning/trimming; environmental factors (e.g., slight breeze). | Use the direction fine-tuning buttons on the remote control to correct drift. Ensure operation in a calm environment. |
8. விவரக்குறிப்புகள்
- பிராண்ட்: Yasola
- மாதிரி பெயர்: 828
- தயாரிப்பு பரிமாணங்கள்: 9.56"லி x 5.11"அங்குலம் x 3.54"அங்குலம்
- பொருளின் எடை: 9.4 அவுன்ஸ் (0.59 பவுண்டுகள்)
- பொருள்: பிளாஸ்டிக்
- நிறம்: நீலம்
- இணைப்பு தொழில்நுட்பம்: Remote control 2.4G
- பேட்டரி திறன்: 600 மில்லிamp மணிநேரம் (லித்தியம் அயன்)
- வயது வரம்பு (விளக்கம்): Kid (recommended for ages 8-12)
- சிறப்பு அம்சங்கள்: Drone car, UFO, flying and running RC drone, flying car, One-Key Take Off/Landing, LED Lights, 2 Mode Control, Headless Mode, High-Low Speed Shift.
9. உத்தரவாதம் மற்றும் ஆதரவு
For warranty information, technical support, or any inquiries regarding your Yasola RC Drone Car Model 828, please refer to the contact information provided on the product packaging or visit the official Yasola webதளம்.