
அறிமுகம்
Thank you for choosing the Klinsmann KRV306 Robotic Vacuum and Mop. This 2-in-1 intelligent cleaning robot is designed to provide efficient and convenient floor cleaning for your home. Please read this manual carefully before use to ensure proper operation, maintenance, and to maximize the lifespan of your device.
பாதுகாப்பு வழிமுறைகள்
To reduce the risk of injury or damage, read and follow all safety precautions when setting up, using, and maintaining your robot. Keep this manual in a safe place for future reference.
- 8 வயது மற்றும் அதற்கு மேற்பட்ட குழந்தைகள் மற்றும் குறைந்த உடல், உணர்ச்சி அல்லது மன திறன்கள் அல்லது அனுபவம் மற்றும் அறிவு இல்லாமை உள்ளவர்கள், பாதுகாப்பான முறையில் சாதனத்தைப் பயன்படுத்துவது குறித்து மேற்பார்வை அல்லது அறிவுறுத்தல் வழங்கப்பட்டிருந்தால் மற்றும் அதில் உள்ள ஆபத்துகளைப் புரிந்துகொண்டால், இந்த கருவியைப் பயன்படுத்தலாம். .
- குழந்தைகள் கருவியுடன் விளையாடாமல் இருப்பதை உறுதி செய்ய கண்காணிக்க வேண்டும்.
- மேற்பார்வையின்றி குழந்தைகளால் சுத்தம் மற்றும் பயனர் பராமரிப்பு செய்யக்கூடாது.
- உற்பத்தியாளரால் வழங்கப்பட்ட அசல் பவர் அடாப்டரை மட்டுமே பயன்படுத்தவும்.
- திறந்த தீப்பிழம்புகள் அல்லது உடையக்கூடிய பொருட்கள் உள்ள பகுதிகளில் ரோபோவை இயக்க வேண்டாம்.
- சிக்கலைத் தடுக்க, செயல்படுவதற்கு முன்பு அனைத்து கேபிள்களும் சிறிய பொருட்களும் தரையிலிருந்து அகற்றப்படுவதை உறுதிசெய்யவும்.
- ரோபோவையோ அல்லது அதன் சார்ஜிங் பேஸையோ தண்ணீரில் மூழ்கடிக்காதீர்கள்.
- பெரிய குப்பைகள், திரவங்கள் அல்லது எரியும் பொருட்களை எடுக்க ரோபோவைப் பயன்படுத்த வேண்டாம்.
தொகுப்பு உள்ளடக்கங்கள்
தொகுப்பில் அனைத்து கூறுகளும் இருப்பதை உறுதிசெய்யவும்:
- Klinsmann KRV306 Robotic Vacuum and Mop
- சார்ஜிங் அடாப்டர்
- பக்கவாட்டு தூரிகைகள் (2 ஜோடிகள்)
- குப்பை தொட்டி
- துடைக்கும் துணி
- பயனர் கையேடு
அமைவு
- ரோபோவைத் திறக்கவும்: Carefully remove the robot and all accessories from the packaging.
- பக்கவாட்டு தூரிகைகளை நிறுவவும்: Attach the side brushes to the designated slots on the bottom of the robot until they click into place.
- ரோபோவை சார்ஜ் செய்யுங்கள்:
- Connect the charging adapter to a power outlet and to the charging port on the robot.
- Ensure the robot is fully charged before its first use. A full charge takes approximately 3-4 hours. The indicator light will change to signal a full charge.
- சுத்தம் செய்யும் பகுதியை தயார் செய்யவும்: Remove any obstacles, loose cables, or small items from the floor to prevent the robot from getting stuck or damaging items.
இயக்க வழிமுறைகள்
பவர் ஆன்/ஆஃப்
- பவர் ஆன் செய்ய: Press and hold the power button on the robot until the indicator light illuminates.
- பவர் ஆஃப் செய்ய: இண்டிகேட்டர் லைட் அணையும் வரை பவர் பட்டனை அழுத்திப் பிடிக்கவும்.
சுத்தம் முறைகள்
The KRV306 offers three cleaning modes:
- Automatic (Zigzag) Mode: Press the power button once to start cleaning in an automatic zigzag pattern. This mode is suitable for general cleaning of open areas.
- ஸ்பாட் கிளீனிங் பயன்முறை: Place the robot in a specific dirty area and press the spot cleaning button (if available, or cycle through modes). The robot will clean in a spiral pattern to concentrate on that area.
- விளிம்பு சுத்தம் செய்யும் முறை: Activate this mode to have the robot clean along walls and furniture edges.
மாப்பிங் செயல்பாடு
மாப்பிங் செயல்பாட்டைப் பயன்படுத்த:
- Fill the water tank (if separate) or attach the damp mopping cloth to the designated area on the robot.
- சுத்தம் செய்யும் சுழற்சியைத் தொடங்குங்கள். ரோபோ ஒரே நேரத்தில் வெற்றிட சுத்தம் செய்து துடைக்கும்.
- Remove the mopping cloth and empty the water tank after each use.
Navigation and Sensors
The KRV306 is equipped with intelligent navigation features:
- Anti-drop Infrared Sensors: These sensors detect stairs and elevated surfaces, preventing the robot from falling.
- Mechanical Bumper: The bumper allows the robot to gently detect and navigate around obstacles like furniture without causing damage.
- வாசல் ஏறுதல்: The robot can easily slide over thresholds up to 10mm high, ensuring continuous cleaning across different rooms.
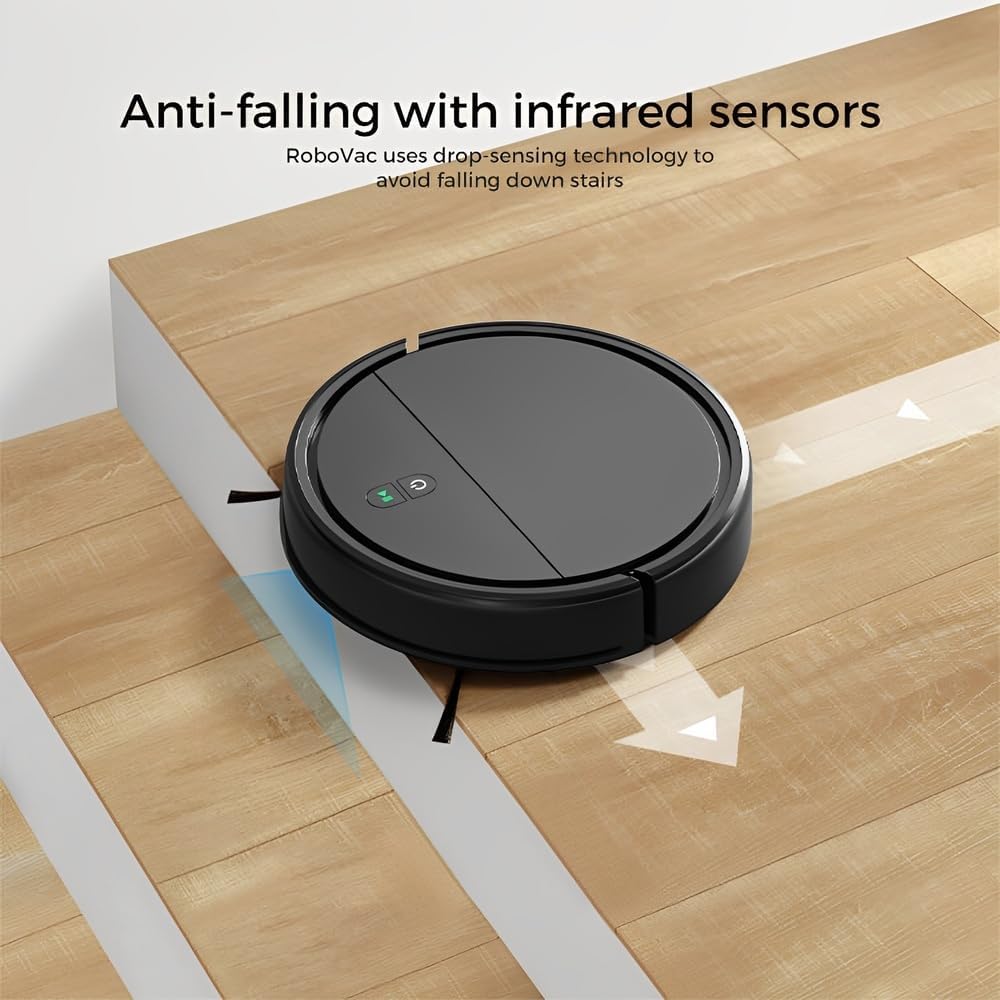
Image: Anti-falling infrared sensors prevent the robot from falling down stairs.

Image: The mechanical bumper allows the robot to navigate around furniture without damage.
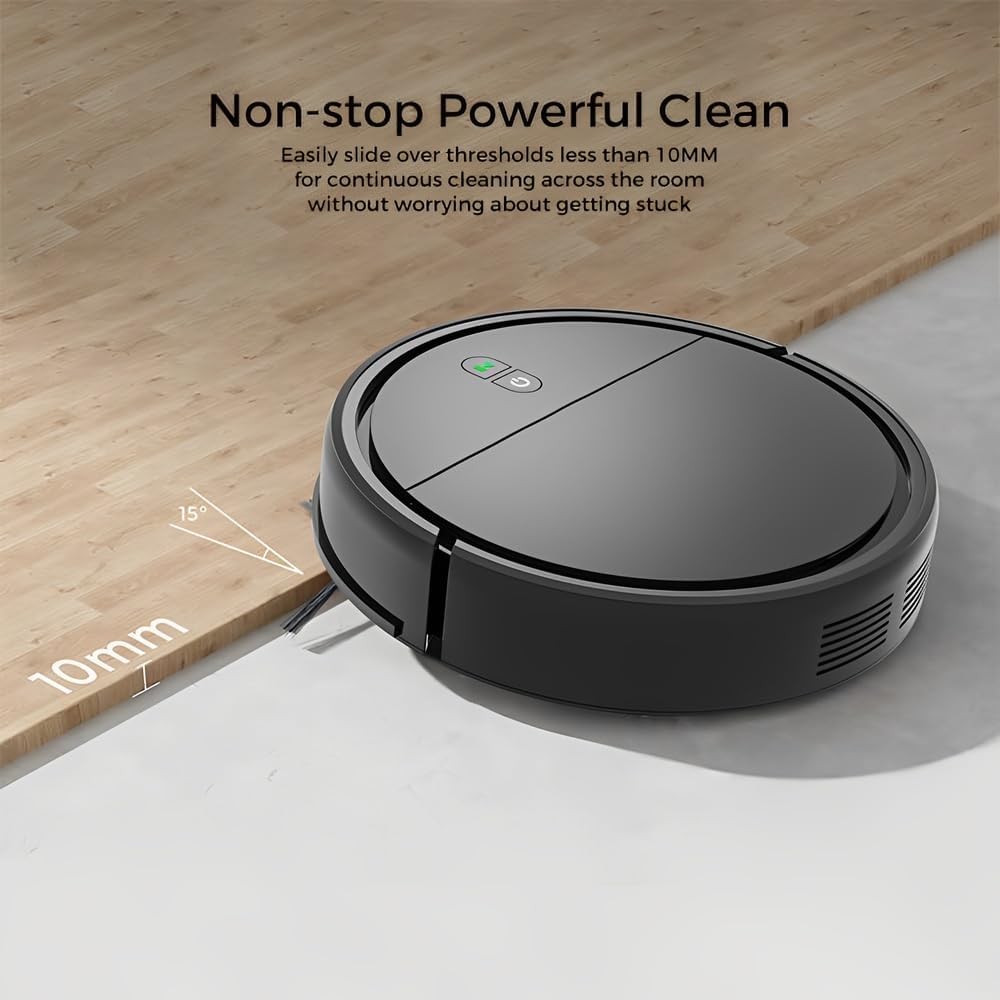
Image: The robot can easily overcome thresholds up to 10mm for continuous cleaning.
பராமரிப்பு
Regular maintenance ensures optimal performance and extends the life of your robot.
குப்பைத் தொட்டியை காலி செய்தல்

Image: The large dustbin collects various types of debris, reducing the frequency of emptying.
- குப்பைத் தொட்டியை விடுவிக்கும் பொத்தானை அழுத்தி குப்பைத் தொட்டியை வெளியே எடுக்கவும்.
- குப்பைத் தொட்டி மூடியைத் திறந்து அதன் உள்ளடக்கங்களை ஒரு குப்பைத் தொட்டியில் காலி செய்யவும்.
- Clean the filter inside the dustbin with the provided cleaning tool or a soft brush. Replace the filter if necessary.
- Rinse the dustbin with water if needed, ensuring it is completely dry before reinserting.
பக்க தூரிகைகளை சுத்தம் செய்தல்
- Regularly check side brushes for tangled hair or debris.
- Carefully remove any tangled material. If brushes are worn, replace them with new ones.
சென்சார்களை சுத்தம் செய்தல்
- Wipe the anti-drop sensors and charging contacts on the bottom of the robot with a clean, dry cloth.
- Ensure the bumper area is free of debris.
Cleaning Mopping Cloth
- Remove the mopping cloth after each use.
- Wash the cloth by hand or machine. Allow it to air dry completely before reattaching.
சரிசெய்தல்
| பிரச்சனை | சாத்தியமான காரணம் | தீர்வு |
|---|---|---|
| ரோபோ இயக்கப்படவில்லை. | பேட்டரி குறைவாக உள்ளது; பவர் பட்டனை சரியாக அழுத்தவில்லை. | Charge the robot; Press and hold the power button for a few seconds. |
| ரோபோ அடிக்கடி சிக்கிக் கொள்கிறது. | Obstacles (cables, rugs, small items); Dirty sensors. | Clear the cleaning area; Clean the anti-drop and bumper sensors. |
| மோசமான சுத்தம் செயல்திறன். | குப்பைத் தொட்டி முழுவதும்; அடைபட்ட வடிகட்டி; தேய்ந்த பக்கவாட்டு தூரிகைகள். | குப்பைத் தொட்டியை காலியாக்கு; வடிகட்டியை சுத்தம் செய்/மாற்று; பக்கவாட்டு தூரிகைகளை சுத்தம் செய்/மாற்று. |
| படிக்கட்டுகளில் இருந்து கீழே விழுகிறது ரோபோ. | Dirty anti-drop sensors; Sensors obstructed. | Clean the anti-drop sensors thoroughly. |
| துடைக்கும் செயல்பாடு பயனற்றது. | Mopping cloth is dry or dirty. | Dampen the mopping cloth; Clean or replace the mopping cloth. |
விவரக்குறிப்புகள்
| மாதிரி | KRV306 |
| பிராண்ட் | வாழ்க்கை |
| செயல்பாடுகள் | Vacuuming, Mopping |
| பேட்டரி வகை | 1500mAh லித்தியம்-அயன் |
| இயக்க நேரம் | 80 நிமிடங்கள் வரை |
| சார்ஜிங் நேரம் | 3-4 மணி நேரம் |
| உறிஞ்சும் சக்தி | 400PA |
| இரைச்சல் நிலை | அதிகபட்சம். 68 டி.பி |
| டஸ்ட்பின் கொள்ளளவு | Optimized (ample capacity) |
| பரிமாணங்கள் (விட்டம் x உயரம்) | 29 செ.மீ x 7.2 செ.மீ |
| எடை | 2.1 கிலோ |
| வாசல் ஏறும் திறன் | 10 மிமீ வரை |
| சிறப்பு அம்சங்கள் | Anti-drop Infrared Sensor, Mechanical Bumper, Low Noise, Compact, Rechargeable |
உத்தரவாத தகவல்
The Klinsmann KRV306 Robotic Vacuum and Mop comes with a 90 நாள் உத்தரவாதம் from the date of purchase, covering manufacturing defects. This warranty does not cover damage caused by misuse, accidents, unauthorized modifications, or normal wear and tear. Please retain your proof of purchase for warranty claims.
வாடிக்கையாளர் ஆதரவு
If you encounter any issues or have questions regarding your Klinsmann KRV306, please refer to the troubleshooting section of this manual. For further assistance, contact the retailer or manufacturer's customer service department with your product model and purchase details.