1. அறிமுகம்
The Senwa Vacuum V100 is an advanced robotic vacuum cleaner designed to provide efficient and effortless cleaning for your home. With powerful suction and intelligent navigation, it effectively cleans various surfaces, from hard floors to carpets, ensuring a spotless environment. Its compact design and user-friendly features make daily cleaning simple and convenient. The V100's effective filtration system captures dust and fine particles, contributing to improved air quality in your living space. This manual provides essential information for the safe and optimal use, maintenance, and troubleshooting of your Senwa Vacuum V100.
முக்கிய அம்சங்கள்:
- Powerful and Efficient Suction: Optimized motor ensures deep cleaning on floors, carpets, and difficult corners, removing dust and dirt in a single pass.
- Lightweight and Maneuverable Design: Easy to transport and use in any space, ideal for quick, effortless cleaning or frequent use.
- Multi-Surface Versatility: Works perfectly on different types of surfaces, adapting to the needs of homes or offices.
- Effective Filtration System: Captures fine particles and helps maintain a cleaner environment, ideal for improving hygiene.
- Easy Maintenance and Durability: Accessible components for quick cleaning and long lifespan, designed for continuous and reliable use.
2. பாதுகாப்பு தகவல்
Please read all safety instructions carefully before using your Senwa Vacuum V100. Keep this manual for future reference.
- 8 வயது மற்றும் அதற்கு மேற்பட்ட குழந்தைகள் மற்றும் குறைந்த உடல், உணர்ச்சி அல்லது மன திறன்கள் அல்லது அனுபவம் மற்றும் அறிவு இல்லாமை உள்ளவர்கள், பாதுகாப்பான முறையில் சாதனத்தைப் பயன்படுத்துவது குறித்து மேற்பார்வை அல்லது அறிவுறுத்தல் வழங்கப்பட்டிருந்தால் மற்றும் அதில் உள்ள ஆபத்துகளைப் புரிந்துகொண்டால், இந்த கருவியைப் பயன்படுத்தலாம். .
- குழந்தைகள் கருவியுடன் விளையாடாமல் இருப்பதை உறுதி செய்ய கண்காணிக்க வேண்டும்.
- மேற்பார்வையின்றி குழந்தைகளால் சுத்தம் மற்றும் பயனர் பராமரிப்பு செய்யக்கூடாது.
- Do not use the vacuum cleaner in wet environments or on wet surfaces.
- Do not allow the vacuum cleaner to pick up large objects, liquids, burning or smoking objects (e.g., hot ashes, cigarettes).
- Use only the original charging adapter and charging dock provided by the manufacturer.
- சார்ஜிங் டாக் தடைகள் இல்லாமல், சமமான மேற்பரப்பில் சுவருக்கு எதிராக வைக்கப்பட்டுள்ளதா என்பதை உறுதிப்படுத்தவும்.
- சுத்தம் செய்வதற்கு முன், தரையிலிருந்து ஏதேனும் தளர்வான கேபிள்கள், சிறிய பொருட்கள் அல்லது உடையக்கூடிய பொருட்களை அகற்றி, சிக்குவதையோ அல்லது சேதமடைவதையோ தவிர்க்கவும்.
- Do not operate the vacuum cleaner if it is damaged. Contact customer support for assistance.
- Turn off the vacuum cleaner and unplug it from the charging dock before performing any maintenance or cleaning.
3. தொகுப்பு உள்ளடக்கங்கள்
Carefully unpack your Senwa Vacuum V100 and check that all items are present and in good condition. If any items are missing or damaged, please contact customer support.
- Senwa Vacuum V100 Robot Vacuum Cleaner (Main Unit)
- சார்ஜிங் டாக்
- பவர் அடாப்டர்
- பக்கவாட்டு தூரிகைகள் (2 ஜோடிகள்)
- பிரதான தூரிகை (முன்பே நிறுவப்பட்டது)
- குப்பைத் தொட்டி (முன் நிறுவப்பட்டது)
- உயர்-செயல்திறன் வடிகட்டி (முன்பே நிறுவப்பட்டது)
- சுத்தம் செய்யும் கருவி
- பயனர் கையேடு
4. தயாரிப்பு முடிந்துவிட்டதுview
Familiarize yourself with the components of your Senwa Vacuum V100.
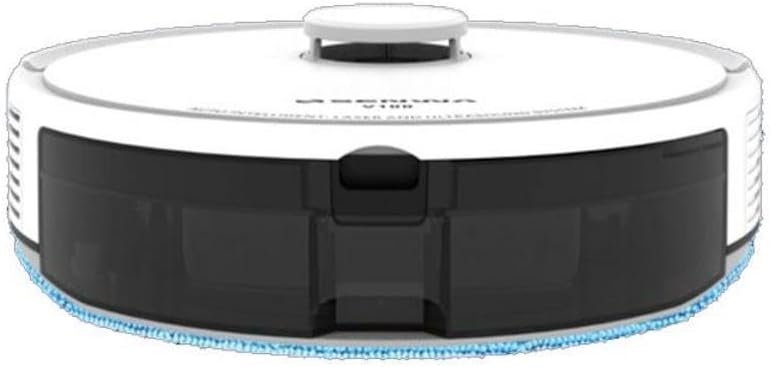
Figure 4.1: Top-Front View of Senwa Vacuum V100
This image shows the top and front of the robot vacuum, highlighting the main body, control button, and dustbin access panel.

படம் 4.2: பக்கம் View of Senwa Vacuum V100
இந்தப் படம் ஒரு பக்கவாட்டு நிபுணரைக் காட்டுகிறது.file of the robot vacuum, showing a driving wheel, a side brush, and a ventilation grille.

படம் 4.3: பக்கம் View of Senwa Vacuum V100 with Dustbin Area
This image illustrates another side view, focusing on the area where the dustbin is typically accessed or removed.
முக்கிய கூறுகள்:
- மேல் மூடி: உள் உறுப்புகளைப் பாதுகாக்கிறது.
- கட்டுப்பாட்டு பொத்தான்: Initiates or pauses cleaning, returns to charging dock.
- குப்பைத் தொட்டி: அழுக்கு மற்றும் குப்பைகளை சேகரிக்கிறது.
- பக்கவாட்டு தூரிகைகள்: Sweep debris from edges and corners into the vacuum's path.
- முக்கிய தூரிகை: தரையிலிருந்து அழுக்குகளை அசைத்து தூக்குகிறது.
- ஓட்டுநர் சக்கரங்கள்: Allow the robot to move across various surfaces.
- சார்ஜிங் தொடர்புகள்: Connect with the charging dock for power.
- சென்சார்கள்: Detect obstacles, cliffs, and walls for navigation.
- சார்ஜிங் டாக்: Provides power to recharge the robot.
5 அமைவு
5.1 பிரித்தெடுத்தல் மற்றும் தயாரிப்பு
- Remove the robot vacuum and all accessories from the packaging.
- Remove any protective films or stickers from the robot and charging dock.
- Attach the side brushes by pressing them onto the square posts on the bottom of the robot until they click into place.
5.2 சார்ஜிங் டாக்கை வைப்பது
- சார்ஜிங் டாக்கை ஒரு கடினமான, சமதளமான மேற்பரப்பில் ஒரு சுவருக்கு எதிராக வைக்கவும்.
- கப்பல்துறையின் இருபுறமும் குறைந்தது 0.5 மீட்டர் (1.6 அடி) இடைவெளியும், அதன் முன் 1.5 மீட்டர் (4.9 அடி) இடைவெளியும் இருப்பதை உறுதிசெய்து கொள்ளுங்கள்.
- பவர் அடாப்டரை சார்ஜிங் டாக்குடன் இணைத்து, அதை ஒரு சுவர் அவுட்லெட்டில் செருகவும். டாக்கில் உள்ள பவர் இண்டிகேட்டர் ஒளிர்வதை உறுதிசெய்யவும்.
5.3 ஆரம்ப சார்ஜிங்
- Place the robot vacuum onto the charging dock, ensuring the charging contacts on the robot align with those on the dock.
- The robot will begin charging. Allow it to fully charge before its first use (approximately 4-6 hours). The indicator light on the robot will change to indicate a full charge.
6. இயக்க வழிமுறைகள்
6.1 சுத்தம் செய்யும் சுழற்சியைத் தொடங்குதல்
- Ensure the robot is fully charged and clear any large obstacles from the cleaning area.
- Press the main control button on the top of the robot once to start an automatic cleaning cycle.
- The robot will automatically navigate and clean your floors.
6.2 சுத்தம் செய்வதை இடைநிறுத்துதல்/மீண்டும் தொடங்குதல்
- To pause cleaning, press the main control button once during operation.
- To resume cleaning, press the main control button again.
6.3 Returning to Charging Dock
- To send the robot back to its charging dock, press and hold the main control button for a few seconds until the robot indicates it is returning.
- The robot will automatically return to the charging dock when its battery is low or when a cleaning cycle is complete.
6.4 Cleaning Modes (if applicable)
Your Senwa Vacuum V100 may feature different cleaning modes for various needs:
- தானாக சுத்தம் செய்தல்: The robot intelligently plans a cleaning path for comprehensive coverage.
- ஸ்பாட் சுத்தம்: ஒரு குறிப்பிட்ட அழுக்குப் பகுதியில் சுத்தம் செய்வதை குவிக்கிறது.
- விளிம்பு சுத்தம்: சுவர்கள் மற்றும் தளபாடங்கள் விளிம்புகளில் சுத்தம் செய்கிறது.
Refer to the specific instructions for your model on how to activate these modes, typically via a mobile app or remote control (if included).
7. பராமரிப்பு
Regular maintenance ensures optimal performance and extends the lifespan of your Senwa Vacuum V100.
7.1 குப்பைத் தொட்டியை காலி செய்தல்
Empty the dustbin after each cleaning cycle or when it is full.
- குப்பைத் தொட்டியை விடுவிக்கும் பொத்தானை அழுத்தி குப்பைத் தொட்டியை வெளியே எடுக்கவும்.
- குப்பைத் தொட்டியின் மூடியைத் திறந்து அதன் உள்ளடக்கங்களை ஒரு குப்பைத் தொட்டியில் காலி செய்யவும்.
7.2 வடிகட்டியை சுத்தம் செய்தல்
Clean the filter weekly or as needed. Replace every 3-6 months.
- குப்பைத் தொட்டியிலிருந்து வடிகட்டியை அகற்றவும்.
- தூசியை அகற்ற வடிகட்டியை மெதுவாகத் தட்டவும். அதிக திறன் கொண்ட வடிகட்டியை தண்ணீரில் கழுவ வேண்டாம்.
- Rinse the primary filter (if applicable) with water and let it air dry completely before reinserting.
7.3 பிரதான தூரிகையை சுத்தம் செய்தல்
Clean the main brush weekly.
- பிரதான தூரிகை அட்டையை அகற்றி, பிரதான தூரிகையை வெளியே தூக்குங்கள்.
- தூரிகையைச் சுற்றி சிக்கியுள்ள முடி மற்றும் குப்பைகளை அகற்ற சுத்தம் செய்யும் கருவியைப் பயன்படுத்தவும்.
- பிரதான தூரிகை மற்றும் அட்டையை மீண்டும் நிறுவவும்.
7.4 பக்கவாட்டு தூரிகைகளை சுத்தம் செய்தல்
Check side brushes regularly for wear and tear. Replace if damaged.
- அவற்றின் தூரிகைகளிலிருந்து பக்கவாட்டு தூரிகைகளை இழுக்கவும்.
- ஏதேனும் முடி அல்லது குப்பைகளை அகற்றவும்.
- Reattach the brushes, ensuring they click into place.
7.5 சென்சார்களை சுத்தம் செய்தல் மற்றும் தொடர்புகளை சார்ஜ் செய்தல்
Wipe sensors and charging contacts monthly with a dry cloth.
- Gently wipe the cliff sensors (located on the bottom of the robot) and wall sensors (on the front bumper).
- Clean the charging contacts on both the robot and the charging dock.
8. சரிசெய்தல்
If you encounter issues with your Senwa Vacuum V100, refer to the following common problems and solutions.
| பிரச்சனை | சாத்தியமான காரணம் | தீர்வு |
|---|---|---|
| ரோபோ ஆன் ஆகாது அல்லது சார்ஜ் ஆகாது. | பேட்டரி முழுவதுமாக தீர்ந்துவிட்டது; சார்ஜிங் தொடர்புகள் அழுக்காக உள்ளன; பவர் அடாப்டர் இணைக்கப்படவில்லை. | Ensure the charging dock is powered. Clean charging contacts on both robot and dock. Place robot directly on dock. |
| ரோபோ அடிக்கடி சிக்கிக் கொள்கிறது. | Too many obstacles; cliff sensors are dirty. | Clear loose cables, rugs, and small objects. Clean cliff sensors. |
| மோசமான உறிஞ்சும் செயல்திறன். | குப்பைத் தொட்டி நிரம்பியுள்ளது; வடிகட்டி அடைக்கப்பட்டுள்ளது; பிரதான தூரிகை சிக்கலாக உள்ளது. | குப்பைத் தொட்டியை காலியாக்குங்கள். வடிகட்டியை சுத்தம் செய்யவும் அல்லது மாற்றவும். பிரதான தூரிகையை சுத்தம் செய்யவும். |
| செயல்பாட்டின் போது அசாதாரண சத்தம். | Main brush or side brushes are tangled; foreign object inside. | Clean main brush and side brushes. Check for and remove any foreign objects. |
| ரோபோ சார்ஜிங் டாக்கிற்கு திரும்பவில்லை. | Charging dock is blocked or out of range; charging contacts are dirty. | Ensure charging dock has clear space. Clean charging contacts. Manually place robot on dock. |
If the problem persists after trying these solutions, please contact Senwa customer support.
9. விவரக்குறிப்புகள்
| அம்சம் | விவரம் |
|---|---|
| பிராண்ட் | Senwa |
| மாதிரி | V100 |
| படிவம் காரணி | ரோபோடிக் |
| நிறம் | வெள்ளை |
| ASIN | B0GTY5J56M |
| சக்தி ஆதாரம் | ரிச்சார்ஜபிள் பேட்டரி |
| சார்ஜிங் நேரம் | தோராயமாக 4-6 மணி நேரம் |
| வடிகட்டுதல் அமைப்பு | உயர் செயல்திறன் வடிகட்டி |
| சுத்தம் முறைகள் | Auto, Spot, Edge (may vary by specific model features) |
10. உத்தரவாதம் மற்றும் ஆதரவு
The Senwa Vacuum V100 comes with a standard manufacturer's warranty. Please refer to the warranty card included in your package for specific terms and conditions, including the warranty period and coverage details.
For technical support, service, or any questions regarding your product, please contact Senwa customer service through the contact information provided on your warranty card or the official Senwa website. When contacting support, please have your product model (V100) and ASIN (B0GTY5J56M) ready.