1. அறிமுகம்
This manual provides comprehensive instructions for the setup, operation, and maintenance of your Native Instruments TRAKTOR KONTROL Z1 DJ Mixing Interface. The TRAKTOR KONTROL Z1 is designed to offer a portable and professional 2-channel DJ mixer, controller, and soundcard solution for use with Native Instruments' TRAKTOR DJ and TRAKTOR PRO 3 software.
It features a streamlined workflow, allowing for precise monitoring and mixing of tracks. Dedicated controls provide tactile command over volume, EQ, filters, and effects for two channels. The integrated audio interface ensures high-quality, club-ready sound output.
2. தொகுப்பு உள்ளடக்கங்கள்
Upon unboxing your TRAKTOR KONTROL Z1, please verify that all the following items are included:
- TRAKTOR KONTROL Z1 Unit
- AC Adapter with various plug adapters
- USB Cable (for computer connections)
- USB to 30-pin Apple Cable (for iOS device connections)
- Product Documentation (including software and hardware serial numbers, instructions)
Note: For newer Apple devices with Lightning ports, a separate Apple 30-pin to Lightning adapter may be required, as it is not included in the standard package.
3. தயாரிப்பு முடிந்துவிட்டதுview
The TRAKTOR KONTROL Z1 is a compact yet powerful DJ controller. Below are key components and their functions:

படம் 3.1: மேல் view of the TRAKTOR KONTROL Z1, showing the main controls including gain, EQ, filter/FX knobs, channel faders, and the crossfader.

படம் 3.2: கோணல் view of the TRAKTOR KONTROL Z1, highlighting its compact design and the layout of its controls.

படம் 3.3: பின்புறம் view of the TRAKTOR KONTROL Z1, displaying the power input (15V), USB port, and main audio outputs (RCA).
3.1 கட்டுப்பாட்டு தளவமைப்பு
- Gain Knobs: Adjust the input level for each channel.
- EQ Knobs (High, Mid, Low): Control the equalization for high, mid, and low frequencies on each channel.
- Filter/FX Knobs: Apply filter effects or control other assigned effects.
- சேனல் மங்கைகள்: Adjust the volume level of individual channels.
- கிராஸ்ஃபேடர்: Blend between Channel A and Channel B.
- கியூ பிரிவு: Includes Cue Mix and Cue Vol knobs for headphone monitoring.
- ஹெட்ஃபோன் வெளியீடு: ஹெட்ஃபோன்களை இணைக்க 3.5 மிமீ ஜாக்.
- முக்கிய வெளியீடு: RCA stereo outputs for connecting to a sound system.
- USB போர்ட்: For connecting to a computer or iOS device.
- ஆற்றல் உள்ளீடு: For connecting the included AC adapter.
4 அமைவு
Follow these steps to set up your TRAKTOR KONTROL Z1:
- மென்பொருள் நிறுவல்:
- For computer use, install TRAKTOR PRO 3 (or compatible version) from the Native Instruments website using the provided serial number.
- For iOS device use, download the TRAKTOR DJ app from the Apple App Store.
- மின் இணைப்பு:
- Connect the included AC adapter to the 15V power input on the rear of the TRAKTOR KONTROL Z1.
- ஏசி அடாப்டரை பவர் அவுட்லெட்டில் செருகவும்.
- சாதன இணைப்பு:
- கணினிக்கு: Use the provided USB cable to connect the TRAKTOR KONTROL Z1's USB port to an available USB port on your computer.
- To iOS Device: Use the provided USB to 30-pin Apple cable to connect the TRAKTOR KONTROL Z1 to your iOS device. If your device has a Lightning port, use an official Apple 30-pin to Lightning adapter (sold separately).
- ஆடியோ அவுட்புட் இணைப்பு:
- Connect the Main Output (RCA) of the TRAKTOR KONTROL Z1 to your amplifier, powered speakers, or sound system.
- Connect your headphones to the 3.5mm headphone output on the front of the unit.
- மென்பொருள் வெளியீடு:
- Launch the TRAKTOR software (TRAKTOR PRO 3 or TRAKTOR DJ) on your connected device.
- The software should automatically detect the TRAKTOR KONTROL Z1. Verify that the audio settings in the software are configured to use the Z1 as the audio interface.
5. Operating the TRAKTOR KONTROL Z1
The TRAKTOR KONTROL Z1 provides hands-on control over your TRAKTOR software. Here are basic operating instructions:
5.1. Basic Mixing
- Load Tracks: In your TRAKTOR software, load tracks into Deck A and Deck B.
- ஆதாயத்தை சரிசெய்யவும்: Use the Gain knobs for Deck A and Deck B to set appropriate input levels, ensuring the level meters do not peak into the red.
- Monitor Tracks:
- Press the Cue button for the desired channel (A or B) to send its audio to your headphones.
- பயன்படுத்தவும் Cue Vol knob to adjust headphone volume and the கியூ மிக்ஸ் knob to blend between the master output and the cued channel.
- Mix Channels:
- Use the Channel Faders to control the volume of each deck.
- Use the Crossfader to blend smoothly between Deck A and Deck B.
- Apply EQ and Effects:
- Adjust the High, Mid, and Low EQ knobs for each channel to shape the sound.
- Engage the Filter/FX button and turn the corresponding knob to apply filter effects or other assigned effects within the TRAKTOR software.
5.2. Integration with TRAKTOR Ecosystem
The TRAKTOR KONTROL Z1 is designed to integrate seamlessly with other Native Instruments TRAKTOR controllers for an expanded setup:
- TRAKTOR KONTROL X1: Can be added to control effects, loops, and transport functions (play, sync).
- TRAKTOR KONTROL F1: Provides creative control over Remix Decks for advanced performance.
6. பராமரிப்பு
Proper care and maintenance will ensure the longevity and optimal performance of your TRAKTOR KONTROL Z1.
6.1. சுத்தம் செய்தல்
- Always disconnect the power and USB cables before cleaning.
- Use a soft, dry, lint-free cloth to wipe down the unit.
- பிடிவாதமான குறிகளுக்கு, சிறிது dampen the cloth with water. Avoid using harsh chemicals, solvents, or abrasive cleaners, as these can damage the finish and internal components.
- Do not spray cleaning liquids directly onto the unit.
- Pay special attention to the top plate, which can be prone to smudging and surface scratches. Avoid wiping with a dry cloth, as this may cause scratches.
6.2. சேமிப்பு மற்றும் கையாளுதல்
- நேரடி சூரிய ஒளி மற்றும் தீவிர வெப்பநிலையிலிருந்து விலகி, குளிர்ந்த, உலர்ந்த இடத்தில் யூனிட்டை சேமிக்கவும்.
- Avoid exposing the unit to excessive dust, moisture, or vibrations.
- When transporting, use a protective case or bag to prevent damage. The Z1 is compatible with the TRAKTOR Gig Bag.
- அலகு மேல் கனமான பொருட்களை வைக்க வேண்டாம்.
7. சரிசெய்தல்
If you encounter issues with your TRAKTOR KONTROL Z1, refer to the following common problems and solutions:
| பிரச்சனை | சாத்தியமான காரணம் | தீர்வு |
|---|---|---|
| No Power/Unit Not Turning On | பவர் அடாப்டர் இணைக்கப்படவில்லை அல்லது பழுதடைந்துள்ளது; பவர் அவுட்லெட்டில் சிக்கல். | Ensure AC adapter is securely connected to the unit and a working power outlet. Test the outlet with another device. |
| ஒலி வெளியீடு இல்லை | Incorrect audio settings in TRAKTOR software; cables not connected properly; volume levels too low. |
|
| Unit Not Recognized by Software | USB cable issue; driver not installed (for PC); software not updated; iOS adapter issue. |
|
| கட்டுப்பாடுகள் பதிலளிக்கவில்லை | Software not connected to controller; MIDI mapping issue. |
|
For further assistance, please refer to the Native Instruments support webதளம் அல்லது அவர்களின் வாடிக்கையாளர் சேவையை தொடர்பு கொள்ளவும்.
8. விவரக்குறிப்புகள்
Technical specifications for the TRAKTOR KONTROL Z1 (Model: 22180):
| அம்சம் | விவரம் |
|---|---|
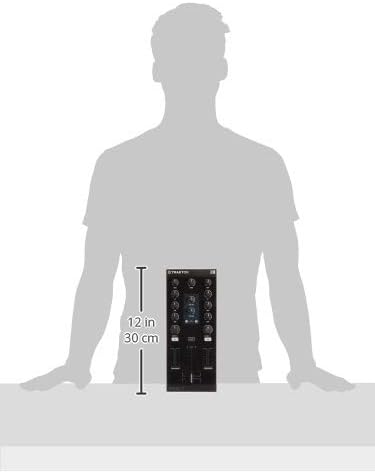
| தயாரிப்பு பரிமாணங்கள் | 11.54 x 4.72 x 2.01 அங்குலம் (29.3 x 12 x 5.1 செமீ) |
| பொருளின் எடை | 0.352 அவுன்ஸ் (தோராயமாக 0.01 கிலோ) |
| சேனல்களின் எண்ணிக்கை | 2 |
| Built-in Soundcard | 24-bit audio interface |
| இணைப்பு தொழில்நுட்பம் | USB (External Line Return) |
| சக்தி ஆதாரம் | Corded Electric (15V DC, 1.2A) |
| இயக்க முறைமை இணக்கத்தன்மை | Windows (and macOS/iOS via TRAKTOR software) |
| மாதிரி எண் | 22180 |
| முதல் கிடைக்கும் தேதி | ஜூலை 8, 2013 |
படம் 8.1: TRAKTOR KONTROL Z1 dimensions for reference.


