1. அறிமுகம்
The DataLocker AlphaCam W is a high-definition video conferencing camera designed for clear and reliable communication. It provides crisp images with vivid color detail and a smooth video frame rate, making it ideal for video conferences and web-based education. This manual provides essential instructions for setting up, operating, and maintaining your AlphaCam W.
2. தொகுப்பு உள்ளடக்கங்கள்
- DataLocker AlphaCam W Video Conferencing Camera
- USB Cable (integrated or separate, for connection)
- பயனர் கையேடு (இந்த ஆவணம்)
3 அமைவு
The AlphaCam W is designed for easy setup without the need for additional software or drivers. Simply connect it to your computer via USB.
3.1 கேமராவை இணைக்கிறது
- கேமராவைத் திறக்கவும்: Carefully remove the AlphaCam W from its packaging.
- கேமராவை வைக்கவும்: The AlphaCam W features a versatile clip that allows it to be securely mounted on top of your monitor or laptop screen. Alternatively, it can be placed on a flat desktop surface.
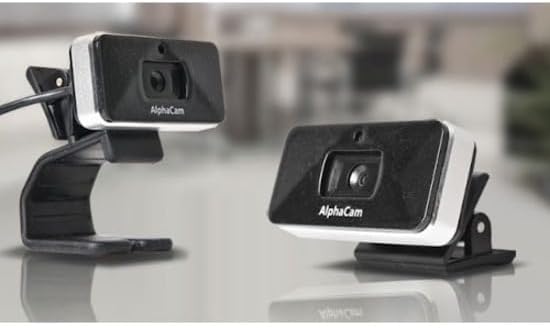
Image: The AlphaCam W can be clipped onto a monitor or placed on a flat surface.
- கணினியுடன் இணைக்கவும்: Plug the USB cable from the AlphaCam W into an available USB 2.0 port on your computer.
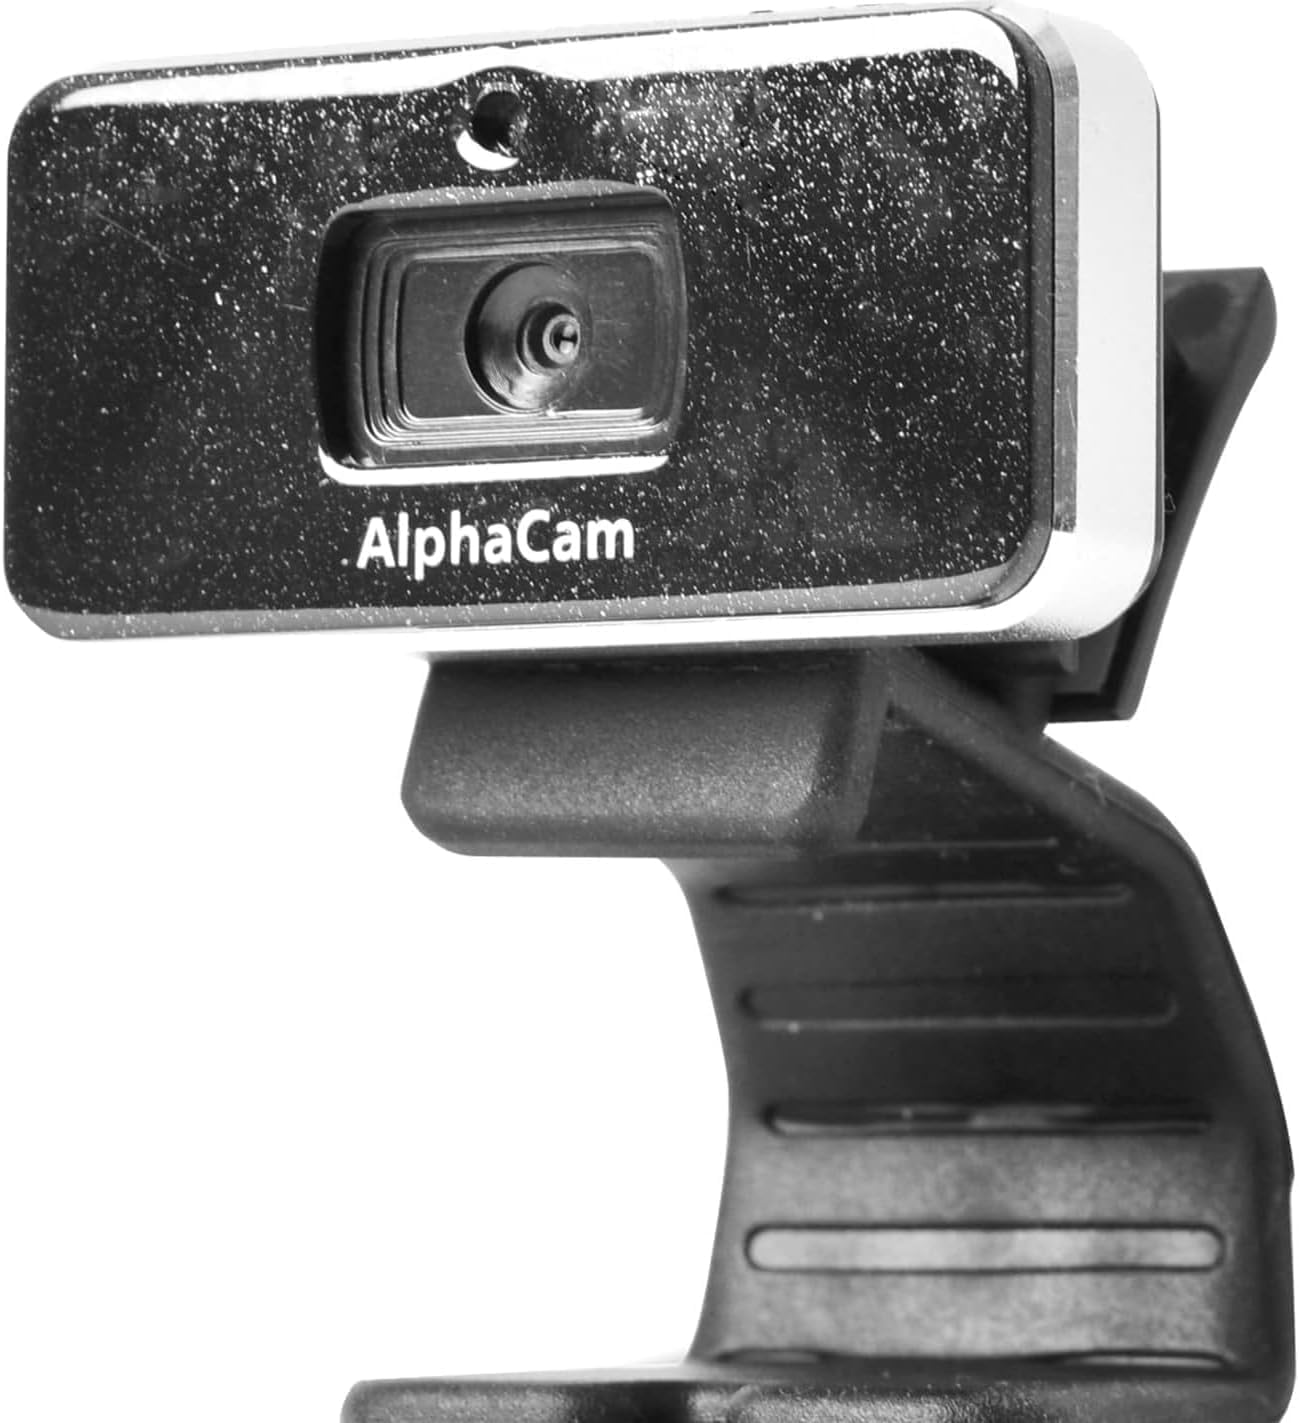
படம்: முன்பக்கம் view of the DataLocker AlphaCam W camera.
- தானியங்கி அங்கீகாரம்: Your computer should automatically detect and install the necessary drivers for the camera. This process typically takes a few moments.
4. இயக்க வழிமுறைகள்
Once connected, the AlphaCam W is ready for use with your preferred video conferencing or streaming applications.
4.1 பயன்பாடுகளுடன் பயன்படுத்துதல்
- கேமராவைத் தேர்ந்தெடுக்கவும்: Open your video conferencing software (e.g., Zoom, Microsoft Teams, Google Meet, Skype). Navigate to the video settings or preferences within the application.
- Choose AlphaCam W: From the list of available cameras, select "DataLocker AlphaCam W" (or similar name) as your video input device.
- Start Video: Activate your video feed within the application. The AlphaCam W will begin transmitting high-definition video at up to 1280 x 720 resolution and 30 frames per second.
4.2 முக்கியமான பரிசீலனைகள்
- Microphone-Free Design: The AlphaCam W does not include an integrated microphone. This design choice helps prevent potential data leaks and eliminates conflicts with existing computer or headset microphones. You will need to use a separate microphone for audio input during calls.
- விளக்கு: For optimal video quality, ensure adequate lighting in your environment. Avoid strong backlighting that can silhouette your image.
5. பராமரிப்பு
To ensure the longevity and optimal performance of your AlphaCam W, follow these simple maintenance guidelines:
- லென்ஸை சுத்தம் செய்தல்: கேமரா லென்ஸை மென்மையான, பஞ்சு இல்லாத துணியால் மெதுவாகத் துடைக்கவும். பிடிவாதமான கறைகளுக்கு, சிறிது dampen the cloth with water or a lens cleaning solution. Avoid abrasive materials or harsh chemicals.
- உடலை சுத்தம் செய்தல்: கேமரா உடலை சுத்தம் செய்ய மென்மையான, உலர்ந்த துணியைப் பயன்படுத்தவும்.
- சேமிப்பு: When not in use, store the camera in a clean, dry place away from extreme temperatures and direct sunlight.
- சொட்டு மருந்துகளைத் தவிர்க்கவும்: கீழே விழுதல் அல்லது தாக்கங்களிலிருந்து சேதத்தைத் தடுக்க கேமராவை கவனமாகக் கையாளவும்.
6. சரிசெய்தல்
If you encounter issues with your AlphaCam W, refer to the following troubleshooting tips:
6.1 No Image or Camera Not Detected
- யூ.எஸ்.பி இணைப்பைச் சரிபார்க்கவும்: Ensure the USB cable is securely plugged into both the camera and your computer. Try a different USB port.
- கணினியை மறுதொடக்கம்: சில நேரங்களில் ஒரு எளிய மறுதொடக்கம் கண்டறிதல் சிக்கல்களை தீர்க்கும்.
- Check Device Manager (Windows) / System Information (macOS): Verify that the camera is listed under imaging devices or USB devices. If there's an error, try updating or reinstalling drivers (though typically not required for this plug-and-play device).
- வேறு கணினியை முயற்சிக்கவும்: If possible, test the camera on another computer to determine if the issue is with the camera or your original computer.
6.2 மோசமான படத் தரம்
- சுத்தமான லென்ஸ்: கேமரா லென்ஸ் சுத்தமாகவும், தூசி அல்லது கறைகள் இல்லாமல் இருப்பதையும் உறுதிப்படுத்திக் கொள்ளுங்கள்.
- லைட்டிங் நிலைமைகள்: Improve the lighting in your environment. Ensure light sources are in front of you, not behind.
- பயன்பாட்டு அமைப்புகள்: Check the video settings within your conferencing application. Ensure the resolution is set to the highest available (e.g., 720p).
- இணைய இணைப்பு: A poor internet connection can sometimes degrade video quality during live streams.
6.3 Camera Freezes or Disconnects
- USB Port Power: Ensure the USB port is providing sufficient power. Try connecting directly to a port on your computer rather than a USB hub.
- கேபிள் ஒருமைப்பாடு: யூ.எஸ்.பி கேபிளில் ஏதேனும் சேதம் ஏற்பட்டுள்ளதா என்று பார்க்கவும்.
- மென்பொருள் முரண்பாடுகள்: Close any other applications that might be using the camera or consuming significant system resources.
7. விவரக்குறிப்புகள்
| அம்சம் | விவரம் |
|---|---|
| மாதிரி எண் | WCAM1000-G |
| வீடியோ தீர்மானம் | Up to 1280 x 720 (HD) |
| பிரேம் வீதம் | 30 fps வரை |
| இணைப்பு | USB 2.0 |
| ஒலிவாங்கி | Not included (Microphone-Free design) |
| நிறம் | கருப்பு |
| பரிமாணங்கள் (LxWxH) | 4 x 2.75 x 5.62 அங்குலம் |
| பொருளின் எடை | 0.35 அவுன்ஸ் |
| வன்பொருள் இயங்குதளம் | PC |
| புகைப்பட சென்சார் தொழில்நுட்பம் | CMOS |
8. உத்தரவாதம் மற்றும் ஆதரவு
For warranty information or technical support, please refer to the official DataLocker website or contact DataLocker customer service directly. Keep your purchase receipt as proof of purchase for warranty claims.
DataLocker Official Webதளம்: www.datalocker.com


