1. அறிமுகம்
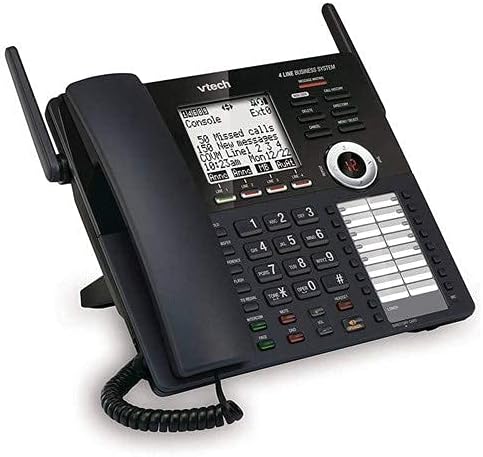
This manual provides detailed instructions for the VTech AM18447 4-Line Corded Base Phone System, including the AM18447 main console and up to three AM18247 corded desksets. This system is designed to manage calls across 1 to 4 telephone lines simultaneously, offering advanced features for efficient communication. Please read this manual thoroughly to ensure proper installation, operation, and maintenance of your phone system.

Image 1: The VTech AM18447 4-Line Corded Base Phone System, showing the main console and three additional corded desksets.
2 அமைவு
2.1 கணினியைத் திறக்கிறது
பெட்டியிலிருந்து அனைத்து பொருட்களையும் கவனமாகப் பிரித்தெடுக்கவும். பின்வரும் கூறுகள் இருப்பதை உறுதிசெய்யவும்:
- VTech AM18447 Main Console (Base Unit)
- Up to three VTech AM18247 Corded Desksets
- Power Adapters for each unit
- தொலைபேசி இணைப்பு கம்பிகள்
- Corded Handsets and Coiled Cords
2.2 Connecting the Main Console (AM18447)
- Connect one end of the coiled handset cord to the handset jack on the main console and the other end to the handset.
- Plug one end of the telephone line cord into the LINE 1 jack on the back of the main console and the other end into a telephone wall jack. Repeat for LINE 2, LINE 3, and LINE 4 if you have multiple lines.
- Connect the power adapter to the POWER jack on the main console and plug the other end into an electrical outlet.
- If using DSL service, ensure you use a DSL filter (not included) for each telephone line to prevent interference.
2.3 Connecting Additional Corded Desksets (AM18247)
Each AM18247 deskset connects to the main console wirelessly. Follow these steps for each deskset:
- Connect one end of the coiled handset cord to the handset jack on the deskset and the other end to the handset.
- Connect the power adapter to the POWER jack on the deskset and plug the other end into an electrical outlet.
- The deskset will automatically register with the main console upon power-up. If registration fails, refer to the troubleshooting section.
படம் 2: ஒரு விரிவான view of the VTech AM18447 main console, highlighting the display, keypad, and line indicators.
2.4 Battery Installation for Power Failure Operation
The main console requires 4 AAA batteries (not included) for power failure operation, allowing basic functionality during a power outage. Locate the battery compartment on the underside of the main console, insert the batteries according to the polarity markings, and replace the cover.
3. இயக்க வழிமுறைகள்
3.1 அடிப்படை அழைப்பு செயல்பாடுகள்
- அழைப்பைச் செய்தல்: கைபேசியை உயர்த்தவும் அல்லது அழுத்தவும் பேச்சாளர் button. Select an available line (LINE 1-4) if not automatically selected. Dial the number.
- அழைப்புக்கு பதிலளித்தல்: கைபேசியை உயர்த்தவும் அல்லது அழுத்தவும் பேச்சாளர் தொலைபேசி ஒலிக்கும்போது பொத்தான்.
- அழைப்பை முடித்தல்: கைபேசியை மீண்டும் தொட்டிலில் வைக்கவும் அல்லது அழுத்தவும் பேச்சாளர் மீண்டும் பொத்தான்.
- பிடி: அழைப்பின் போது, அழுத்தவும் பிடி button to place the call on hold. Press the flashing line button to retrieve the call.
- மீண்டும்: அழுத்தவும் ரெடியல் button to redial the last 10 numbers called.
3.2 சபாநாயகர்
The system features a full-duplex speakerphone, allowing both parties to speak and be heard simultaneously. To use, press the பேச்சாளர் button during a call or to initiate a call without lifting the handset.
3.3 டிஜிட்டல் ஆன்சரிங் சிஸ்டம்
The integrated digital answering system records up to 180 minutes of messages, announcements, and memos.
- வெளிச்செல்லும் அறிவிப்பைப் பதிவு செய்தல்: Access the answering system menu and follow voice prompts to record your personalized message.
- செய்தியின் பின்னணி: அழுத்தவும் விளையாடு/நிறுத்து பொத்தானை. பயன்படுத்தவும் தவிர்க்கவும் to advance, மீண்டும் செய்யவும் to replay, and நீக்கு to remove messages. Variable speed playback is available through menu options.
- Memo Recording: Record personal memos for later playback.
- தொலைநிலை அணுகல்: Access your messages from an outside line by dialing your phone number and entering your remote access code.
- Private Mailbox: Configure private mailboxes for individual users.
3.4 அழைப்பாளர் ஐடி / அழைப்பு காத்திருப்பு
The system stores up to 50 names and numbers in the Caller ID history.
- Viewing Caller ID: Use the navigation buttons to scroll through the Caller ID log.
- அழைப்பில் காத்திருக்கவும்: When on a call, a tone indicates an incoming call. Press the ஃப்ளாஷ் அழைப்புகளுக்கு இடையில் மாறுவதற்கான பொத்தான்.
3.5 தொலைபேசி புத்தக அடைவு
Store up to 100 names and numbers in the phonebook directory.
- ஒரு உள்ளீட்டைச் சேர்த்தல்: Access the phonebook menu, select 'Add New Entry', and enter the name and number.
- வேக டயல்: Assign frequently called numbers to speed dial locations (up to 32).
3.6 Intercom, Call Transfer, and Conferencing
- இண்டர்காம்: அழுத்தவும் இன்டர்காம் button and select the desired station to initiate an internal call.
- அழைப்பு பரிமாற்றம்: During an external call, press இடமாற்றம், select the internal station, and then hang up to complete the transfer.
- 4-வழி மாநாடு: Connect up to four parties (internal and external) on a single call. Refer to the menu for specific steps.
3.7 கணினி அமைப்புகள்
Access the setup menu to customize various settings.
- மொழி: Select English, Spanish, or French for the display menu.
- Ringers: Choose from 10 polyphonic ringers, assignable per line.
- தானியங்கி உதவியாளர்: Enable or disable the auto attendant feature for each line.
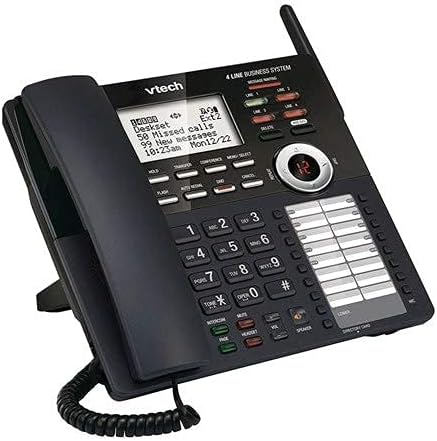
படம் 3: ஒரு கோணம் view of the VTech AM18447 main console, providing a clear perspective of its ergonomic design and button layout.
4. பராமரிப்பு
To ensure the longevity and optimal performance of your VTech phone system, follow these maintenance guidelines:
- சுத்தம்: Wipe the phone surfaces with a soft, slightly damp துணி. கடுமையான இரசாயனங்கள் அல்லது சிராய்ப்பு கிளீனர்களைப் பயன்படுத்த வேண்டாம்.
- இடம்: Place the phone system in a dry area, away from direct sunlight, heat sources, and excessive moisture.
- சக்தி: Ensure all power adapters are securely plugged into working electrical outlets.
5. சரிசெய்தல்
If you encounter issues with your VTech phone system, try the following solutions:
- டயல் டோன் இல்லை:
- Check all telephone line cord connections.
- பவர் அடாப்டர் பாதுகாப்பாக இணைக்கப்பட்டுள்ளதை உறுதிசெய்யவும்.
- Test the telephone line with another phone.
- அலகுக்கு மின்சாரம் இல்லை:
- Verify the power adapter is correctly connected to the unit and a working electrical outlet.
- Check the electrical outlet with another device.
- பதிலளிக்கும் அமைப்பு பதிவு செய்யவில்லை:
- பதிலளிக்கும் அமைப்பு இயக்கப்பட்டிருப்பதை உறுதிசெய்யவும்.
- நினைவகம் நிரம்பியுள்ளதா எனச் சரிபார்க்கவும்; பழைய செய்திகளை நீக்கவும்.
- அழைப்பாளர் ஐடி காட்டப்படவில்லை:
- Ensure you have subscribed to Caller ID service from your telephone provider.
- Verify the phone line connection.
- Deskset Not Registering:
- Ensure the deskset is powered on.
- Refer to the main console's menu for manual registration options if automatic registration fails.
6. விவரக்குறிப்புகள்
| அம்சம் | விவரம் |
|---|---|
| தயாரிப்பு பரிமாணங்கள் | 9 x 5.7 x 8.8 அங்குலம் |
| பொருளின் எடை | 2 பவுண்டுகள் |
| பேட்டரிகள் தேவை | 4 AAA batteries (for power failure operation) |
| உற்பத்தியாளர் | Vtech |
| பிராண்ட் | வி.டெக் |
| நிறம் | கருப்பு |
| தொலைபேசி வகை | corded |
| பொருள் | பிளாஸ்டிக் |
| சக்தி ஆதாரம் | கம்பியூட்டப்பட்ட மின்சாரம் |
| டயலர் வகை | ஒற்றை விசைப்பலகை |
| பதிலளிக்கும் முறைமை வகை | டிஜிட்டல் |
7. உத்தரவாதம் மற்றும் ஆதரவு
VTech products are manufactured with high-quality components and are designed for reliable performance. For specific warranty information, please refer to the warranty card included with your product packaging or visit the official VTech webதளம்.
For technical support, troubleshooting assistance, or to inquire about replacement parts, please contact VTech Customer Service. Contact details can typically be found on the VTech webதளத்தில் அல்லது உங்கள் தயாரிப்பின் பேக்கேஜிங்கில்.


