1. அறிமுகம்
This manual provides comprehensive instructions for the setup, operation, and maintenance of your Tibuta 15.6 Inch WiFi Digital Photo Frame. Please read this manual thoroughly before using the device to ensure proper functionality and to maximize your user experience.

Image 1.1: Tibuta 15.6 Inch WiFi Digital Photo Frame in use, showing its touchscreen capabilities and companion app integration.
2. பாதுகாப்பு தகவல்
சாதனத்திற்கு சேதம் அல்லது தனிப்பட்ட காயம் ஏற்படாமல் தடுக்க பின்வரும் பாதுகாப்பு முன்னெச்சரிக்கை நடவடிக்கைகளைக் கவனியுங்கள்:
- சாதனத்தை தண்ணீர் அல்லது அதிக ஈரப்பதத்திற்கு வெளிப்படுத்த வேண்டாம்.
- Avoid placing the device near heat sources or in direct sunlight for extended periods.
- வழங்கப்பட்ட பவர் அடாப்டரை மட்டும் பயன்படுத்தவும்.
- சாதனத்தை நீங்களே பிரிக்கவோ அல்லது சரிசெய்யவோ முயற்சிக்காதீர்கள். உதவிக்கு வாடிக்கையாளர் ஆதரவைத் தொடர்பு கொள்ளவும்.
- குழந்தைகள் மற்றும் செல்லப்பிராணிகளிடமிருந்து சாதனத்தை ஒதுக்கி வைக்கவும்.
3. தொகுப்பு உள்ளடக்கங்கள்
தொகுப்பில் அனைத்து பொருட்களும் உள்ளதா என சரிபார்க்கவும்:
- Tibuta 15.6 Inch WiFi Digital Photo Frame
- பவர் அடாப்டர்
- பயனர் கையேடு (இந்த ஆவணம்)
- நிற்க
4. தயாரிப்பு முடிந்துவிட்டதுview
உங்கள் டிஜிட்டல் புகைப்பட சட்டத்தின் கூறுகளுடன் உங்களைப் பழக்கப்படுத்திக்கொள்ளுங்கள்.
4.1 முன்னணி View

படம் 4.1: முன் view and key features of the Tibuta 15.6 Inch Digital Photo Frame.
- 15.6 Inch HD Touch Screen: High-definition display with 1280x800 resolution and IPS technology for wide viewing கோணங்கள்.
- தொடுதிரை இடைமுகம்: Allows for direct interaction with the frame's menus and settings.
4.2 பின்புறம் View மற்றும் துறைமுகங்கள்

படம் 4.2: பின்புறம் view of the Tibuta Digital Photo Frame with labeled ports and features.
- மின்விசை மாற்றும் குமிழ்: சாதனத்தை ஆன் அல்லது ஆஃப் செய்கிறது.
- சுவர் பொருத்தப்பட்டது: Mounting points for wall installation.
- Ampஆயுட்காலம்: ஆடியோ பிளேபேக்கிற்கான ஒருங்கிணைந்த ஸ்பீக்கர்கள்.
- மைக்ரோ எஸ்டி கார்டு ஸ்லாட்: Supports Micro SD cards up to 128GB for expanded storage.
- ஹெட்ஃபோன் ஜாக்: வெளிப்புற ஆடியோ சாதனங்களை இணைப்பதற்கு.
- Type-A USB Port: USB டிரைவ்கள் அல்லது பிற புறச்சாதனங்களை இணைப்பதற்கு.
- மினி USB போர்ட்: For data transfer (if applicable).
- DC பவர் போர்ட்: பவர் அடாப்டருடன் இணைக்கிறது.
- நிற்க: Attachable stand for desktop placement.
5 அமைவு
5.1 ஆரம்ப பவர் ஆன்
- Attach the stand to the back of the photo frame for stable placement on a flat surface.
- Connect the power adapter to the DC Power Port on the back of the frame.
- பவர் அடாப்டரை ஒரு சுவர் கடையில் செருகவும்.
- Press the Power Switch to turn on the device.
- Follow the on-screen prompts to select your language, time zone, and connect to a Wi-Fi network.
5.2 Wi-Fi உடன் இணைக்கிறது
- From the main menu, navigate to "Settings" and then "Wi-Fi".
- பட்டியலிலிருந்து உங்களுக்கு விருப்பமான வைஃபை நெட்வொர்க்கைத் தேர்ந்தெடுக்கவும்.
- திரையில் உள்ள விசைப்பலகையைப் பயன்படுத்தி வைஃபை கடவுச்சொல்லை உள்ளிடவும்.
- Tap "Connect". Once connected, a Wi-Fi icon will appear on the screen.
5.3 துணை செயலியை நிறுவுதல்
To share photos and videos remotely, download the dedicated companion app.

Image 5.1: Download the Uhale App from Google Play or the App Store.
- On your smartphone or tablet, open the Google Play Store (Android சாதனங்களுக்கு) அல்லது ஆப்பிள் ஆப் ஸ்டோர் (iOS சாதனங்களுக்கு).
- தேடுங்கள் "Uhale App" (or the specified app name in your frame's instructions).
- பயன்பாட்டைப் பதிவிறக்கி நிறுவவும்.
- Follow the in-app instructions to pair your device with the digital photo frame. This typically involves entering a unique code displayed on your photo frame.
6. இயக்க வழிமுறைகள்
6.1 Sharing Photos and Videos via App
Once the frame is connected to Wi-Fi and paired with the app:
- உங்கள் ஸ்மார்ட்போனில் துணை பயன்பாட்டைத் திறக்கவும்.
- Select the photos or videos you wish to share.
- Tap the "Send" or "Share" button within the app.
- The selected media will be transferred to your digital photo frame and displayed.
The frame supports various display modes, including timing, zooming, and cropping, which can often be adjusted via the app or directly on the frame's settings.
6.2 Using External Storage (Micro SD Card)
The frame has 16GB of built-in storage and supports Micro SD cards up to 128GB.
- Insert a Micro SD card into the designated slot on the back of the frame.
- The frame will automatically detect the card.
- Navigate to the "Gallery" or "Files" section on the frame to access content from the Micro SD card.
- நீங்கள் நகலெடுக்கலாம் files from the Micro SD card to the internal storage or play them directly.
6.3 Automatic Rotation (Gravity Sensing)
The frame features gravity sensing for automatic rotation, adjusting the display orientation based on how the frame is positioned (landscape or portrait).
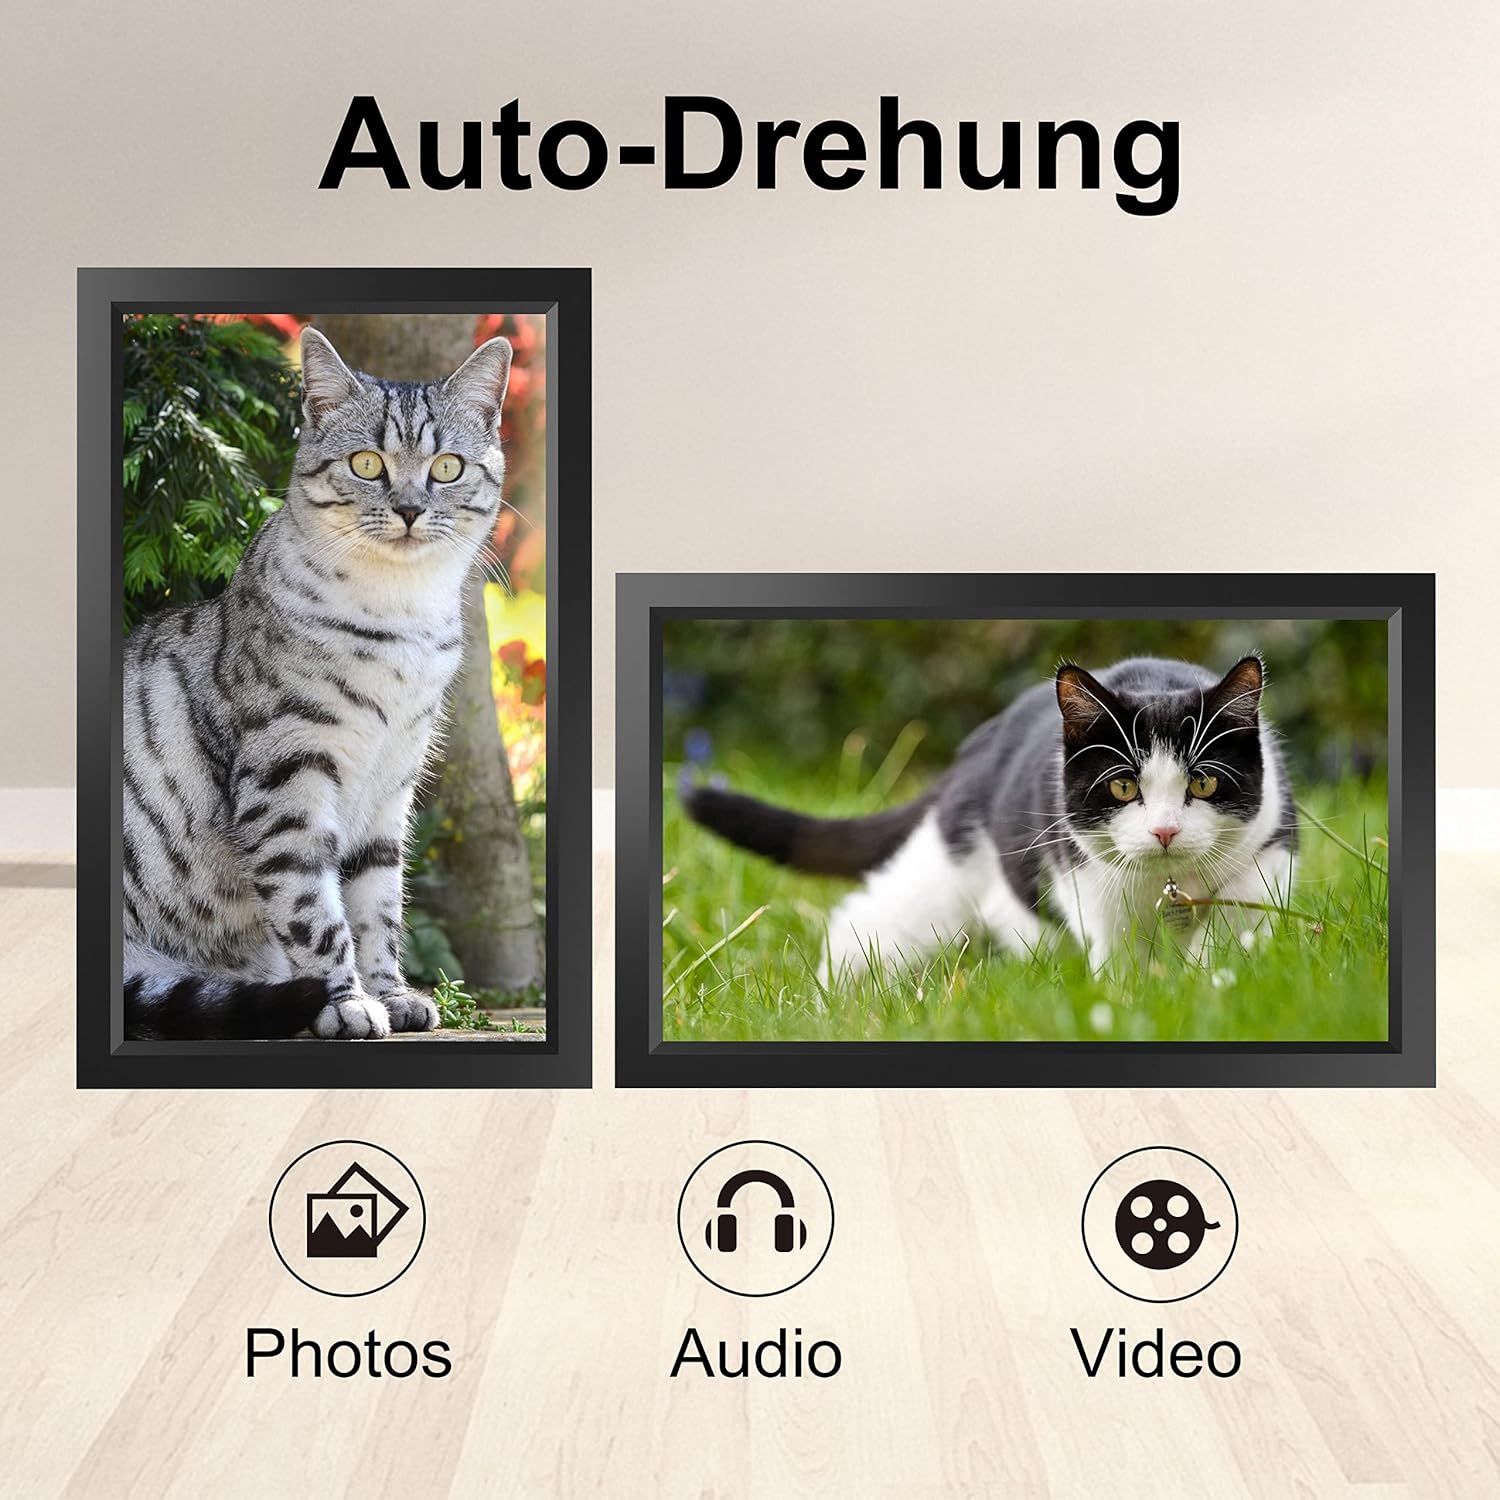
Image 6.1: Automatic display rotation based on frame orientation.
Ensure the gravity sensing feature is enabled in the frame's settings if you wish to utilize this functionality.
6.4 காட்சி அமைப்புகள்
உங்கள் தனிப்பயனாக்கு viewing experience through the frame's settings menu:
- ஸ்லைடுஷோ இடைவெளி: Adjust how long each photo is displayed.
- Transition Effects: Choose different effects between photos.
- பிரகாசம்: திரையின் பிரகாசத்தை சரிசெய்யவும்.
- Sleep Mode/Timer: Set schedules for the frame to turn on/off automatically.
- Zoom/Crop: Options to adjust how photos fit the screen.
7. பராமரிப்பு
7.1 திரையை சுத்தம் செய்தல்
To clean the touchscreen, gently wipe it with a soft, lint-free cloth. For stubborn smudges, slightly dampதுணியை தண்ணீர் அல்லது திரை சுத்தம் செய்யும் கரைசலில் நனைக்கவும். கடுமையான இரசாயனங்கள் அல்லது சிராய்ப்புப் பொருட்களைப் பயன்படுத்துவதைத் தவிர்க்கவும்.
7.2 பொது பராமரிப்பு
- Keep the frame in a dry environment.
- Protect it from dust by occasionally wiping the frame's body with a soft cloth.
- சாதனத்தை கைவிடுவதையோ அல்லது வலுவான தாக்கங்களுக்கு உட்படுத்துவதையோ தவிர்க்கவும்.
8. சரிசெய்தல்
| பிரச்சனை | சாத்தியமான காரணம் | தீர்வு |
|---|---|---|
| சட்டகம் இயக்கப்படவில்லை. | பவர் அடாப்டர் இணைக்கப்படவில்லை அல்லது பழுதடைந்துள்ளது. | Ensure the power adapter is securely connected to both the frame and a working power outlet. Try a different outlet. |
| Wi-Fi உடன் இணைக்க முடியவில்லை. | தவறான கடவுச்சொல், வரம்பிற்கு வெளியே அல்லது நெட்வொர்க் சிக்கல். | Verify the Wi-Fi password. Move the frame closer to the router. Restart your router. |
| Photos/videos not appearing. | App not paired, incorrect file format, or storage issue. | Ensure the app is correctly paired. Check if the media files are in a supported format. Verify sufficient storage space on the frame or SD card. |
| தொடுதிரை செயல்படவில்லை. | தற்காலிக மென்பொருள் கோளாறு. | Restart the frame by holding the power button or unplugging and replugging the power adapter. |
| Automatic rotation not working. | Feature disabled or sensor issue. | Check the frame's settings to ensure gravity sensing/auto-rotation is enabled. |
9. விவரக்குறிப்புகள்
| அம்சம் | விவரம் |
|---|---|
| மாதிரி எண் | TID15.6 |
| திரை அளவு | 15.6 அங்குலம் |
| காட்சி வகை | ஐபிஎஸ் தொடுதிரை |
| தீர்மானம் | 1280x800 |
| உள் சேமிப்பு | 16GB (approx. 20,000 photos) |
| வெளிப்புற சேமிப்பு | மைக்ரோ எஸ்டி கார்டு 128 ஜிபி வரை |
| இணைப்பு | Wi-Fi |
| சிறப்பு அம்சங்கள் | Gravity Sensing Automatic Rotation, Touchscreen |
| பரிமாணங்கள் (L x W x H) | 39.12 x 24.64 x 2.51 செ.மீ |
| எடை | 1.48 கிலோ |
| சக்தி ஆதாரம் | Battery Powered (includes 1 Lithium Ion battery) |
குறிப்பு: விவரக்குறிப்புகள் முன் அறிவிப்பு இல்லாமல் மாற்றத்திற்கு உட்பட்டவை.
10. உத்தரவாதம் மற்றும் ஆதரவு
10.1 தயாரிப்பு உத்தரவாதம்
The Tibuta Digital Photo Frame comes with a one-year product warranty. This warranty covers manufacturing defects and operational issues arising from normal use. If any issues arise during this period, please contact our after-sales support team for assistance.
10.2 வாடிக்கையாளர் ஆதரவு
For technical support, warranty claims, or any other inquiries, please refer to the contact information provided on the Tibuta official website or your purchase documentation. When contacting support, please have your model number (TID15.6) and purchase date available.


