1. அறிமுகம்
The xTool S1 Riser Base is an accessory designed to expand the engraving capabilities of your xTool S1 machine. It allows for the processing of thicker materials and facilitates the use of the xTool RA2 Pro rotary attachment for cylindrical objects. This manual provides essential information for the proper setup, operation, and maintenance of the riser base.

Figure 1: xTool S1 Riser Base
2 அமைவு
2.1 அன்பாக்சிங் மற்றும் கூறுகள்
Carefully unpack the xTool S1 Riser Base and verify all components are present.
- xTool S1 Riser Base unit
- அறிவுறுத்தல் கையேடு (இந்த ஆவணம்)
- Any included fasteners or tools
2.2 Installation onto xTool S1 Machine
- Ensure the xTool S1 machine is powered off and disconnected from the power source.
- Remove the base plate from the xTool S1 machine if it is currently installed.
- Position the xTool S1 Riser Base on a stable, level surface.
- Carefully place the xTool S1 machine onto the Riser Base, aligning the mounting points.
- Secure the xTool S1 machine to the Riser Base using the provided fasteners, if applicable.

Figure 2: Installation of the Riser Base
3. இயக்க வழிமுறைகள்
3.1 Engraving Thick Objects
The Riser Base increases the working height of the xTool S1, allowing engraving of materials up to 5.3 inches (133.5 mm) thick.
- Place the thick object directly onto the base plate of the Riser Base.
- Adjust the laser module height as necessary to achieve proper focus on the material surface.
- Ensure the object is stable and does not obstruct the laser path or movement.
- Proceed with engraving operations as per the xTool S1 machine's standard operating procedures.

Figure 3: Engraving a thick object with the Riser Base

படம் 4: எ.காample of a thick workpiece (up to 133.5mm)
3.2 Using with xTool RA2 Pro Rotary Attachment
The xTool S1 Riser Base is required for operating the xTool RA2 Pro rotary attachment with the xTool S1 machine. This combination enables engraving on cylindrical and irregular objects such as tumblers, wine glasses, baseball bats, and rings.
- Install the RA2 Pro onto the Riser Base according to the RA2 Pro's instruction manual.
- Place the cylindrical object securely in the RA2 Pro attachment.
- Adjust the RA2 Pro and laser module for optimal focus and alignment.
- Ensure the object rotates freely without obstruction.
- Initiate engraving through the xTool software, selecting the appropriate rotary settings.
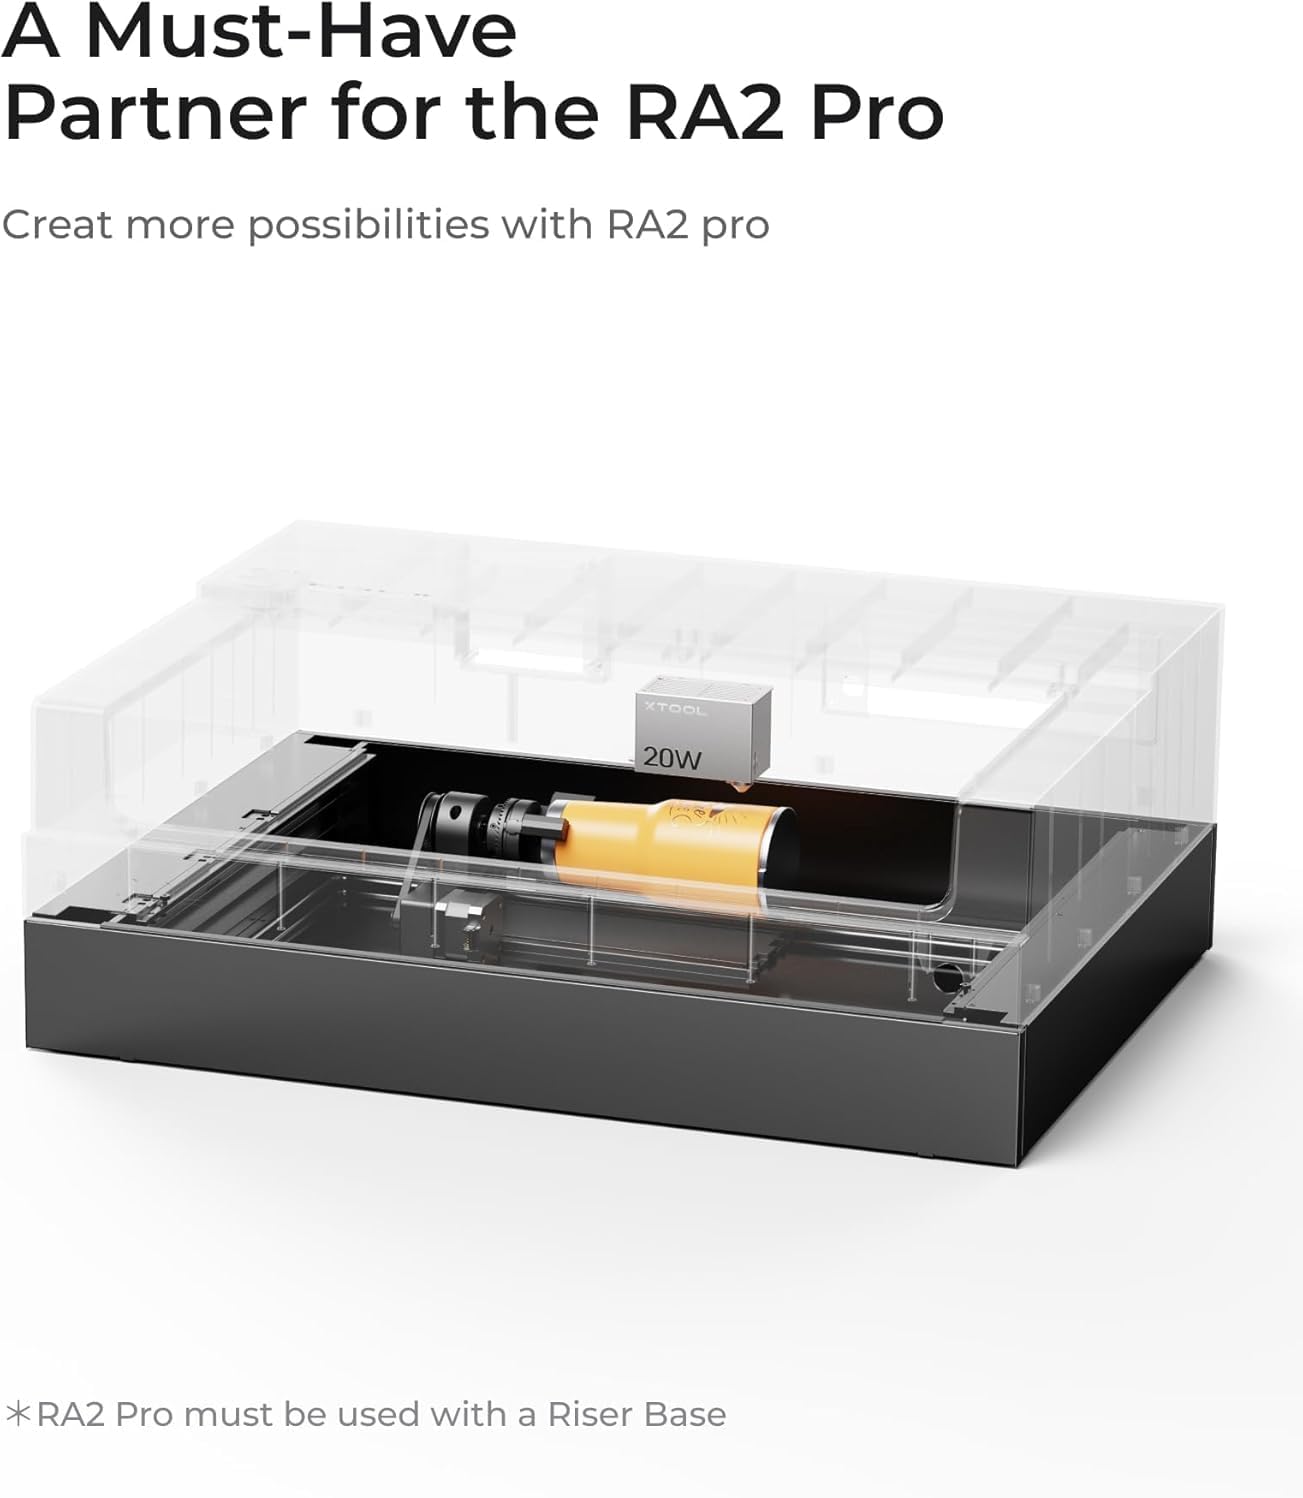
Figure 5: RA2 Pro setup with Riser Base

Figure 6: Rotary Engraving Diameter with RA2 Pro

படம் 7: எ.காamples of rotary engraved items
3.3 Adjustable Base Plate Height
The Riser Base features a base plate with four adjustable height gears. This allows for quick adaptation to various material heights. To adjust, gently pull and push the base plate to the desired gear position.
4. பராமரிப்பு
- சுத்தம்: Regularly clean the Riser Base to remove dust, debris, and engraving residue. Use a soft, dry cloth. Avoid abrasive cleaners or solvents.
- ஆய்வு: Periodically inspect the Riser Base for any signs of wear, damage, or loose connections. Ensure all components are securely in place.
- சேமிப்பு: When not in use for extended periods, store the Riser Base in a clean, dry environment.
5. சரிசெய்தல்
| பிரச்சனை | சாத்தியமான காரணம் | தீர்வு |
|---|---|---|
| Smoke Leakage | Improper sealing or gaps around the Riser Base. | Ensure the Riser Base is correctly installed and flush with the xTool S1 machine. Check for any gaps and seal them if necessary. |
| Unstable Engraving Surface | Riser Base not placed on a level surface or loose connections. | Verify the Riser Base and xTool S1 machine are on a stable, level workbench. Tighten any loose fasteners. |
| RA2 Pro Not Functioning Correctly | Incorrect installation or software settings. | Refer to the RA2 Pro instruction manual for proper installation and calibration. Ensure correct settings are applied in the xTool software. |
6. விவரக்குறிப்புகள்
| அம்சம் | விவரம் |
|---|---|
| தயாரிப்பு பெயர் | xTool S1 Riser Base |
| தயாரிப்பு பரிமாணங்கள் | 11 x 7.4 x 32.5 அங்குலம் (279.4 x 188 x 825.5 மிமீ) |
| தயாரிப்பு அளவு (தோராயமாக.) | 4.2" x 22" x 30" (106 x 561 x 765 மிமீ) |
| Package Size (Approx.) | 32.7" x 10.8" x 7.6" (831 x 276 x 195 மிமீ) |
| தயாரிப்பு எடை | 12.79 பவுண்ட் (5.8 கிலோ) |
| தொகுப்புடன் எடை | 16.75 பவுண்ட் (7.6 கிலோ) |
| Max. Workpiece Height (with Riser Base) | 5.3 அங்குலம் (133.5 மிமீ) |
| பொருள் | தாள் உலோகம் |
| இணக்கத்தன்மை | xTool S1 Laser Engraver, xTool RA2 Pro Rotary Attachment |

படம் 8: விரிவான தயாரிப்பு விவரக்குறிப்புகள்
7. உத்தரவாதம் மற்றும் ஆதரவு
For warranty information and technical support, please refer to the official xTool website or contact xTool customer service directly.
- ஆன்லைன் ஆதரவு: பார்வையிடவும் xTool Support Page அடிக்கடி கேட்கப்படும் கேள்விகள், வழிகாட்டிகள் மற்றும் தொடர்பு விருப்பங்களுக்கு.
- தொடர்பு: For direct assistance, refer to the contact information provided with your original xTool S1 machine documentation or on the xTool webதளம்.


